Are you and your family unknowingly living with toxic fumes in your home? Volatile Organic Compounds or VOCs are gases that can become trapped in your home. They became a household concern when a story broke back in 2014. A report linked Chinese-made laminate flooring to toxic levels of formaldehyde in hundreds of homes in the U.S.
The result of this report was that consumers became aware of products that are endangering our health and environment. Flooring companies and regulatory agencies were forced to set new standards. You should know that the problem still exists.
In this article, you’ll discover the answers to:
Know what to look for to make a safe choice about new flooring in your home.
A volatile organic compound or VOC is a chemical that has high vapor pressure at room temperature. The molecules sublimate or evaporate into the air. A good example is rubbing alcohol. When you pour it on your hand, it immediately starts to evaporate, transforming into gas and mixes with the air you breathe.
Many household chemicals have VOCs, from cleaning products to paint and solvents. Sometimes we call them fumes. That “new car smell” or the scent of a freshly painted room occur due to “outgassing” of the VOCs in the paint, adhesives or plastic.
It’s vital to understand VOCs because many of these compounds can be dangerous to human health.
The EPA studied Volatile Organic Compounds’ Impact on Indoor Air Quality. As we have mentioned, the sources are from almost every product we use. Here is their list:
Household products, including:
Other products, including:
In this article, we're concerned only with the chemicals related to flooring and finishes. The good news is that there are many oil-based and water-based floor finishes that have low amounts of VOCs. As we’ll see in a moment, the adhesives in engineered flooring can cause unhealthy levels of VOCs, especially formaldehyde.
Did you know that Volatile Organic Compounds indoors can be as much as ten times higher than outdoors due to low air circulation? For example, while painting or stripping indoors, levels can be 1,000 times higher than outdoors. They can linger for several hours after. It’s important to follow instructions and use proper ventilation.
Breathing the fumes in high quantities or for long periods can cause severe health problems.
Health effects from breathing in VOCs may include:
Tests show that some VOCs can cause cancer in animals and may cause cancer in humans.
Long-term exposure or high concentrations of VOCs can cause symptoms like:
The ability of organic chemicals to cause health effects varies greatly from those that are highly toxic to those with no known health effect.
There is evidence that concentrations of some specific VOCs may be related to the occurrence of respiratory symptoms, headaches, and fatigue. Some reports refer to these symptoms as “Sick Building Syndrome.” The actual causes of these possible effects are unknown. However, many come directly from flooring materials and the adhesives used in the process.
These are four of the most common toxic VOCs found in homes today.
It’s one thing to know that you are about to create a VOC hazard by painting or stripping. You have some control. However, what happens when you are unaware of them because they are already part of the products in the home before you moved in? You and your family may unknowingly live in a space filled with hazardous VOCs and don’t even know it.
It happened to thousands of homeowners who had cheaply made flooring from China.
Lumber Liquidators is a national flooring company that buys from flooring manufacturers and sells directly to the consumer. From January to May 2015, they sold laminate flooring made in Chin The flooring was said to be "low voc vinyl flooring", but unfortunately, the adhesives contained toxic levels of formaldehyde, and homeowners across the country were becoming ill from the off-gassing.
CBS “60 Minutes” broadcasted a stunning report about the conditions on March 2015. It created a consumer backlash and a federal investigation. The outcome was that Lumber Liquidators Holdings Inc. must pay a $33 million criminal penalty for misleading American consumers about the safety of their products.
The only upside is that both consumers and manufacturers are now aware of the problems of exposure to VOCs.
You can view the original 60 Minutes broadcast here.
Formaldehyde is one of the most well-studied and understood chemical compounds in commerce. It is known for it's anti-bacterial and preservative properties. Despite it's bad reputation in many news sources, you might be surprised to know that it is a naturally occurring compound in your body and is used in many products from automotive products and personal care items, to health care products and even some vaccines!
Formaldehyde is an building block in the glue that is used to bind wood vaneers (thin layers of wood) or wood particles together when producing "manufactured wood products" like plywood, MDF (medium density fibreboard) or particleboard. It is essential and very difficult to substitute in this process. It is also very economical.
Formaldehyde can also be found in some flooring finishes or glues used to install laminate or engineered flooring as it is a key ingredient used to make a great binding agent. Some foam underlayment even contains formaldehyde to help make foam soft.
The U.S. Environmental Protection Agency (EPA) has established "acceptable limits" for formaldehyde emissions. These limits are compliant with the CARB's (California Air Resource Board) Airborne Toxic Control Measure and have been in effect since 2017.
Underwriters Laboratories (UL) has a booklet about formaldehyde you can download called, “FORMALDEHYDE IN COMPOSITE WOOD PRODUCTS: Meeting the New U.S. EPA Regulations.” It will give you plenty of information on formaldehyde off-gassing from composite wood products.
Your home has many sources for volatile compounds. Following are the best ways you can reduce your exposure to them.
You can buy formaldehyde digital testers that measure “total volatile organic compound" or "TVOC" concentrations along with other unhealthy contaminates.
They are inexpensive, hand-held devices that make it easy to check any room or space. For additional information about exposure levels, download:
California Title 17 ATCM to Reduce Formaldehyde Emissions from Composite Wood Products.
Do you plan on refinishing the floor in your home? You should know that by law, varnishes should contain less than 450 grams of VOCs per liter and lacquers only 350 grams per liter. Look for products with the lowest VOC content. Although oil-based finishes can off-gas for years, it’s most severe during the first few days after application.
A safer, greener alternative is water-based products. They contain around 250 to as little as 50 grams of VOCs per liter. Choose linseed, Tung, and other natural oils. Water-based finishes and natural oils still off-gas like oil-based finishes, but it occurs much more rapidly, due to the faster drying time.
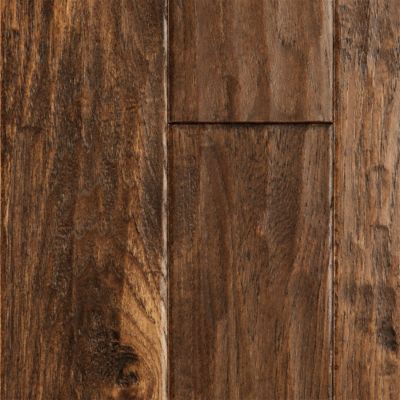
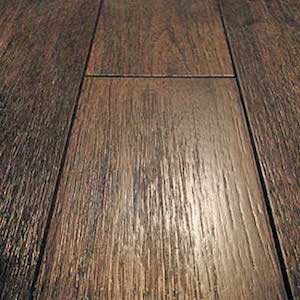
The amount of volatile compounds emitted from flooring products depends upon the processes and chemicals used in the manufacturing process. The cause of poor indoor air quality can be inadequate ventilation and excessive emissions of volatile organic compounds from adhesives and finishes.
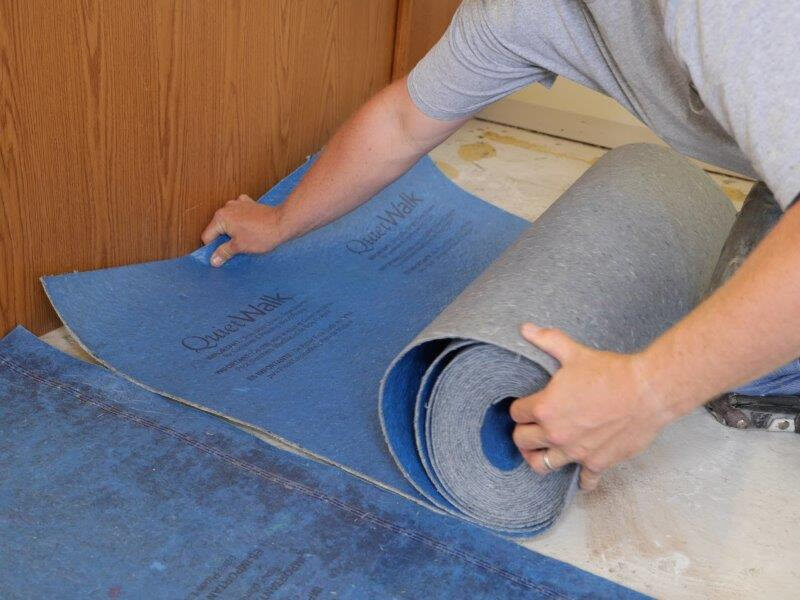
One area of concern is the sub-floor. If you use an adhesive, look for low VOC type adhesives to glue down the sub-floor. Liquid Nails is one brand that offers a VOC-compliant adhesive.
Regarding your new flooring, consider these materials:
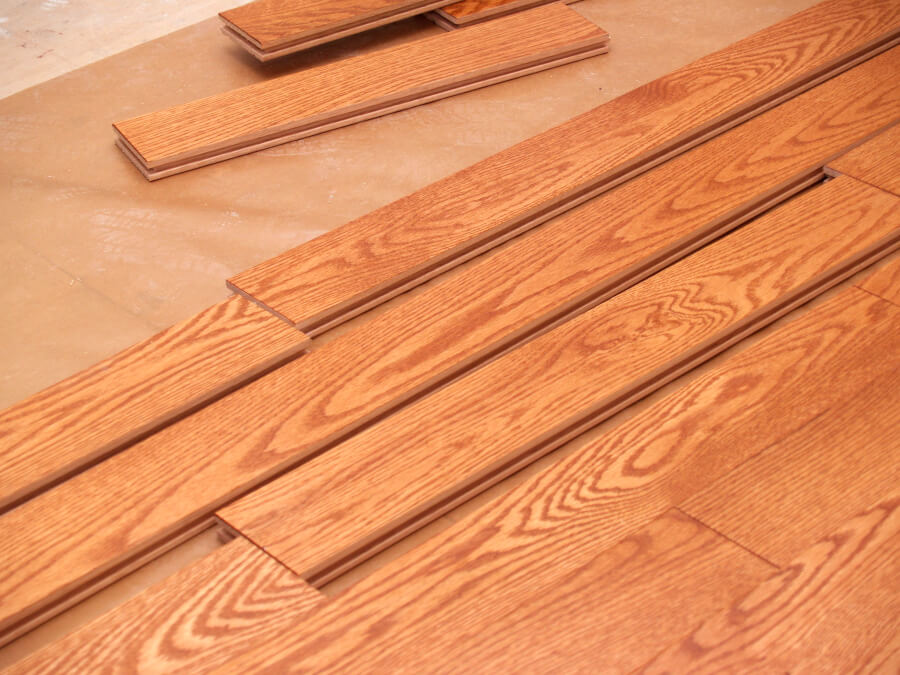
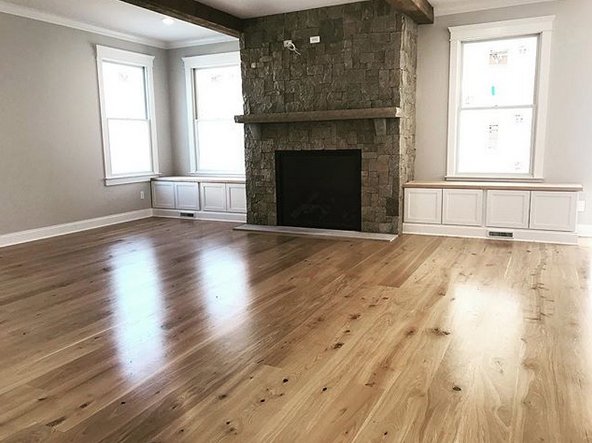
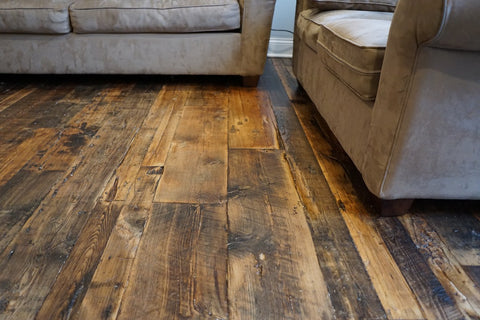
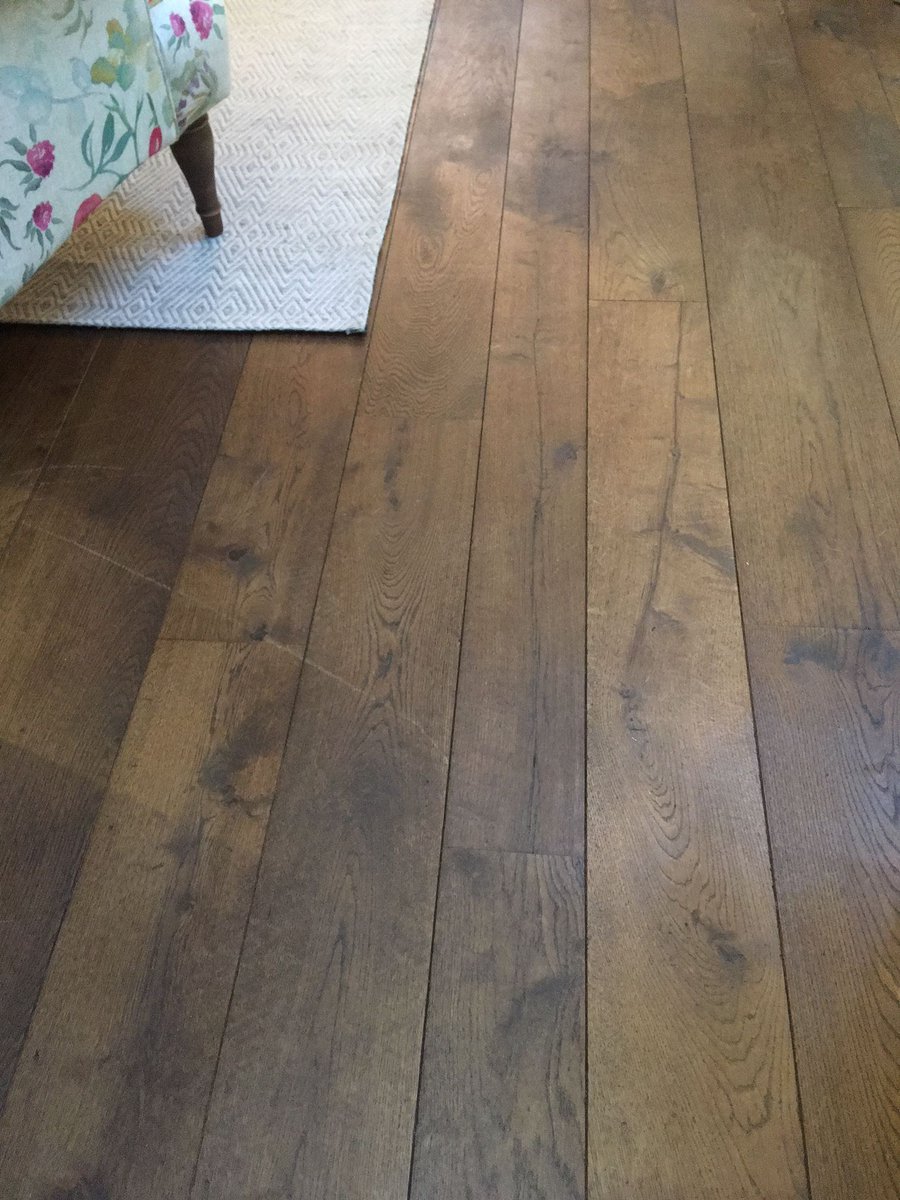
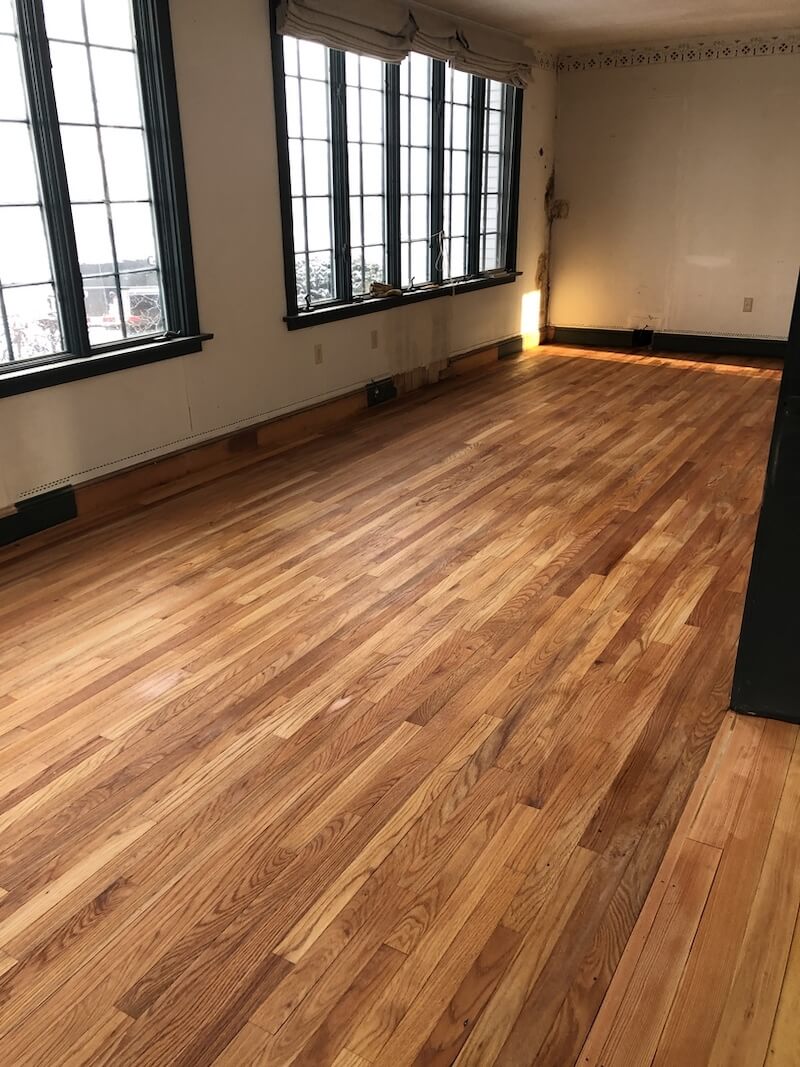
Solid hardwood floors give off almost no VOCs in their natural state. It’s all about the finish and how it’s applied. Finishing a floor in the home will create large quantities of VOCs while the stain and finish cure.
The best bet for low or no VOCs is pre-finished solid hardwood floors such as Easiklip. Pre-finishing means the coatings have had time to cure, usually under heat and UV light. The VOCs have ample time to escape in the warehouse before installing in your home.
Again, it depends on the manufacturer or if you finish the floor in the home. Most bamboo, but not all, have some urea-formaldehyde. Finishes on bamboo floors may contain high levels of it. Check with the dealer and manufacturer for documentation and proof of the claims they make about formaldehyde. Look for water-based finishes.
An easy way to tell is by smelling a sample before you buy.
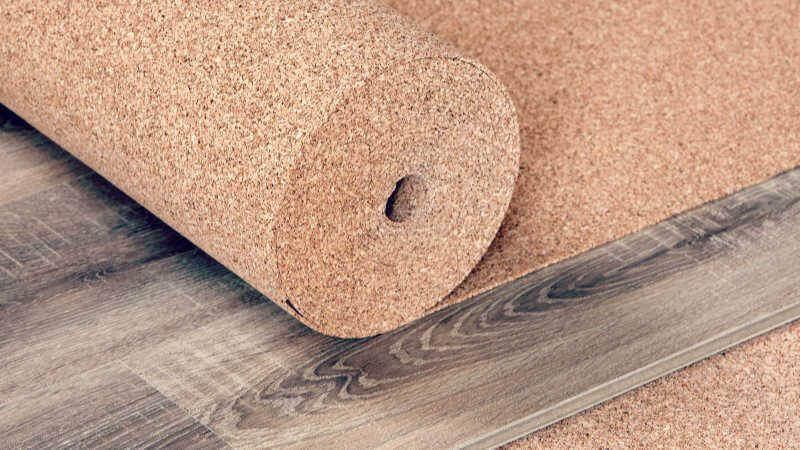
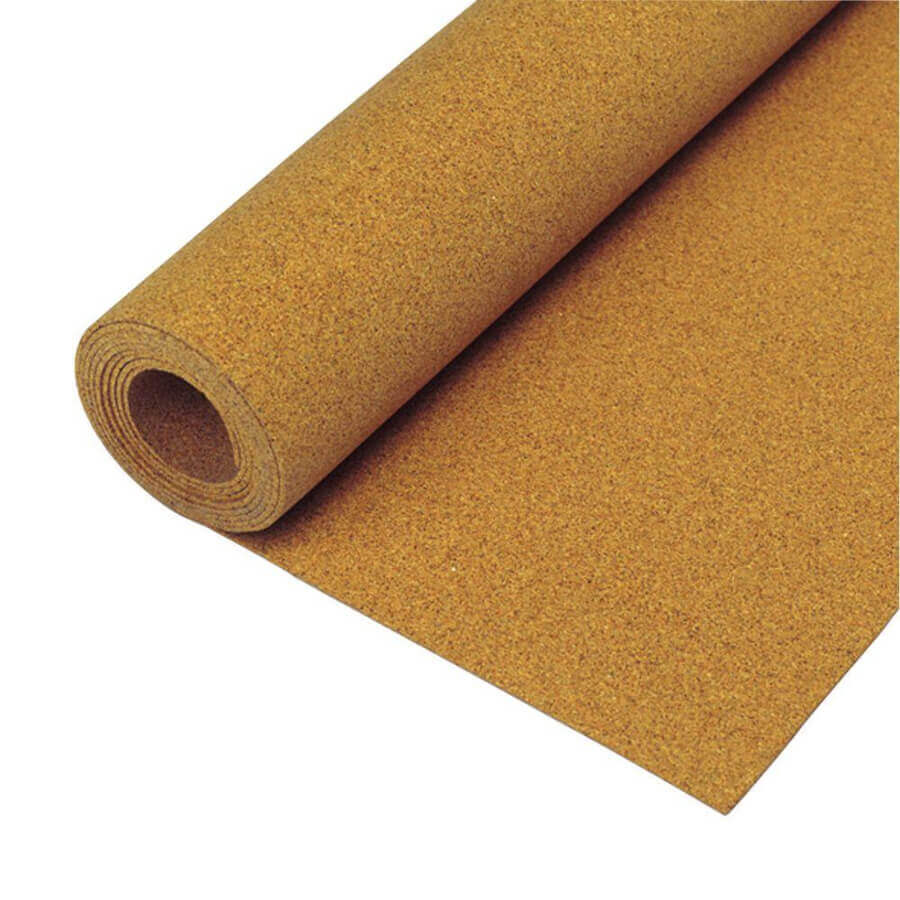
The binding agents in cork flooring use urea melamine and phenol-formaldehyde. However, most of these compounds off-gas during processing. The more significant source can come from the adhesives used to install the flooring. Buy an adhesive with a low VOC rating or that meets E1 standards.
If you plan to finish the floors after installation, use water-based polyurethane.
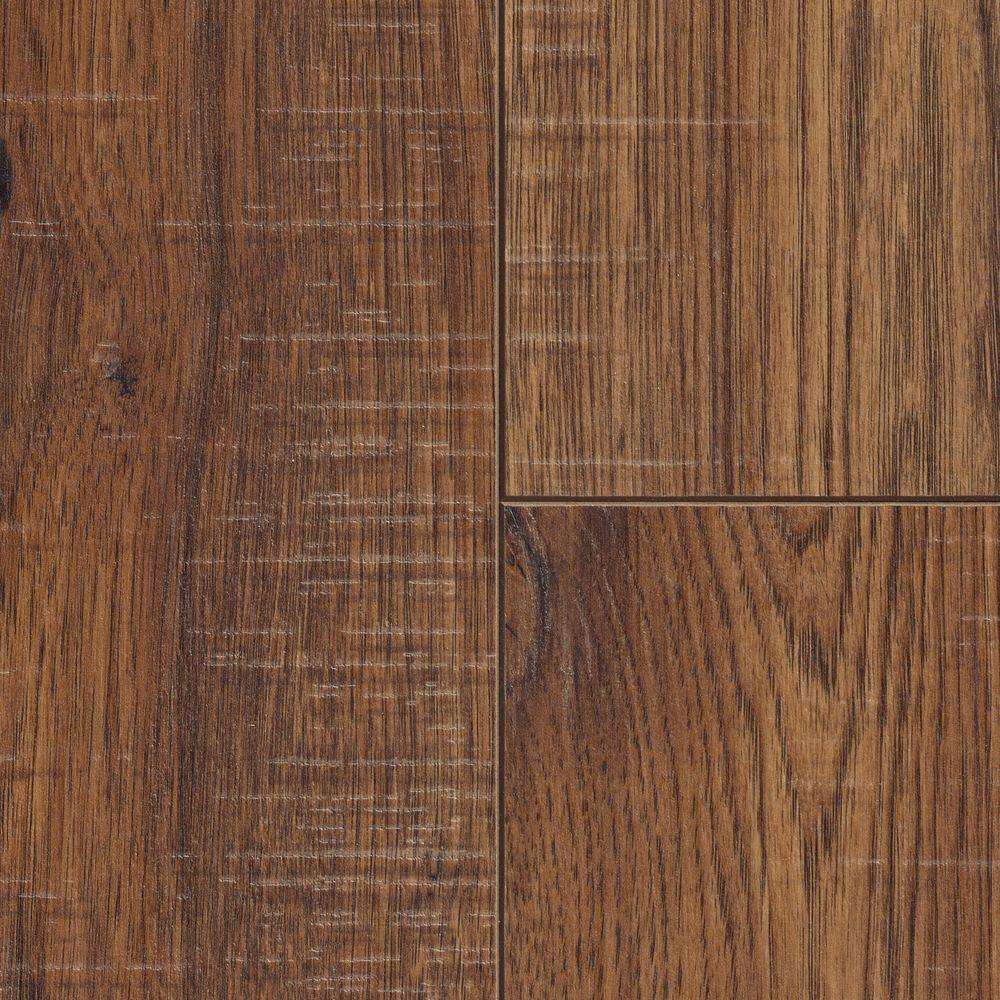
Laminate floors typically have more VOCs than other floorings due to the adhesives in the process. They are the worst option for a healthy home.
Engineered wood uses much of the same processes as laminates. They can also outgas for months. However, there are options with low or no VOCs. You’ll need to do your homework to find the brands that don’t use formaldehyde and that produce low levels of volatile compounds.
Linoleum is a combination of linseed oil, binders, sawdust, limestone, and dry pigments applied to a natural jute backing. These floors tend to outgas when new, but it’s harmless linseed oil that dissipates quickly.
Although vinyl and linoleum look similar, they are very different. Vinyl is a petroleum-based product made from polyvinyl chloride (PVC). It can outgas chemical compounds for years. Some of the VOCs are believed to cause illness and even increase cancer risk.
It's one of the cheapest options, but for good reason. Do your research and check out this study on toxic chemicals being widespread in vinyl flooring.
Low VOC vinyl flooring may be hard to find. So there are healthier flooring choices than vinyl for your family.
Since most carpeting is synthetic, they can be a source for VOCs. Look for brands that promote low-VOCs. Added features like flame retardants, mothproofing, and stain repellents add to the chemical mix and increase outgassing.
Look for natural fibers like wool and opt-out of the extras mentioned above. Also, use natural padding materials and water-based glue.
There isn't really such a thing as Zero VOC wood flooring, since natural wood itself actually contains trace amounts of formaldehyde and other VOCs. In fact, your own body even produces its own formaldehyde at times, which is converted into one of the building blocks for DNA!
So in reality, no solid wood flooring is actually zero VOC. However, companies that use stains and finishes on their solid wood flooring (not laminate, engineered) that do not contain any VOCs can call their product VOC free flooring. This is because the levels of formaldehyde and other VOCs emitted by the natural wood are so low they are considered only to be 'trace' amounts and are not harmful to humans.
At Easiklip Floors, we use Klumpp coatings for all our solid wood flooring. These coatings are VOC free and eco friendly. We also had our flooring tested for emissions by Eurofins, an international laboratory that tests for environmental effects in consumer goods by European standards.
Our flooring scored an A+. The total VOCs detected after 28 days were only 15 micrograms per m3, which is considered virtually VOC free. To put this in context, to score an A+, a product must emit less than 1000 micrograms per m3, which is considered totally safe. So if 1000 is considered safe and unharmful, our score of 15 should definitely put your mind at ease!
For your best non-toxic flooring option, check out our selection of beautiful, solid hardwood.
]]>
What is an Underlayment and Why Bother with It?
What Kinds of Underlayments Are There?
How to Install Hardwood Floor Underlayments
Don’t Install a Hardwood (or Any) Floor Without an Underlayment
There are two kinds of people in the DIY hardwood flooring world, those that know what flooring underlayment is and those that don’t. If you are about to begin the search for the perfect hardwood floor and don’t know anything about flooring underlayment, you’ve come into the right article. Here is everything you need to know about the what, where, how and why of using a flooring underlayment.
You are about to make a significant investment of time and money in selecting and installing hardwood floor. Taking some time to choose and install the right flooring underlayment will help protect your investment.
First, let’s define what it is. When you install your floor, it will rest on the subfloor which is usually cement or a type of plywood or particle board. Underlayment is a thin sheet of material that sits between the new wood floors and subfloor.
It is a thin sheet of material that serves four purposes:
Let’s look at the reasons you need a flooring underlayment before installing your gorgeous wood floors.
If you are installing new wood floors on the second or third floor of your home, soundproofing helps deaden the sound of footfall coming from the ceiling. Without proper underlayment, it will sound like Santa, and his reindeer live above you.
If you are installing in a rental or multi-family property, most likely your building codes will require soundproofing. Check with your building department for their requirements. It just makes good sense that you want to have sound absorption wood floors everywhere. They create better privacy and a comfortable living environment for everyone.
Before to attempt to soundproof your wood floor, you need to understand the two types of noise we encounter in rooms. They are airborne and impact.
The sources of airborne or ambient noise are TVs, stereos, voices, and phones. The sounds pass through the air and then transmit through the walls, ceilings, and floors. The best way to reduce airborne noise is to install sound absorption materials into cavities of the walls, floors, and ceilings.
Impact noise, as the name suggests, is when one object strikes another. Dropping a bowling ball, kids running with shoes and dragging furniture across the floor are examples of impact noise. The sound transmits directly into the solid surfaces and structures of the walls, floor, and ceiling.
Impact noise is usually louder or has more vibration energy and harder to control. The best solution is to separate the hard surfaces of the floor and sub-floor with an underlayment. The underlayment will reduce the transfer of sound energy.
Pro Tip: If you plan to install in a rental property, be sure to check with codes BEFORE you install. Some building departments don’t bother to inspect until after the installation. If you don’t follow their regulations, they can make you tear it up and do it right.
Most single-family homes are on a slab at ground level or have a basement. The trade name for these floors is “on-grade” or “below-grade” and are usually made of concrete. When installing hardwood over concrete, it is mandatory to provide a moisture barrier over the concrete before installing the wood. Concrete is very porous and wicks moisture up through it like a sponge. Installing a hardwood floor in a basement or over a concrete slab without a moisture protection will destroy the floor, probably within a year.
We’ll talk about the proper flooring underlayment shortly, but it must be impervious to moisture to protect the wood.
Most sub-floors have slight imperfections and aren’t smooth like a pool table. Using the proper materials can even out minor imperfections, joints in boards and dents to make the hardwood floor lay flatter.
Of course, you’ll need to repair larger holes first and level the sub-floor. Flooring underlayment is relatively thin so they won’t hide a lot of unevenness.
Many of today’s modern hardwood floors and engineered wood floors are floating. That means no glue or nails are attaching the boards to the sub floating floors. As the room temperature and humidity changes with the seasons, the wood shrinks and expands as it reacts to the climate. An underlayment is essential for floating floors because it facilitates this movement by reducing the friction between the floor and sub-floor. It also acts as a cushion, providing a bit of a softer feel when you walk.
Now that you know why they are critical for professional flooring installation let’s look at the options.
Most of these products come in rolls due to the large areas they must cover. Here are the best materials for the job.
This product looks like the same black paper as roofing paper, but they are not the same. Roofing paper has an asphalt coating which will emit petroleum fumes if used indoors. Use only 15 lb. black felt paper made for wood flooring.
This product is one of the best choices if you plan to nail the floor to the subfloor.
When we talk about foam, we mean flexible polyethylene foam. Some foam pads have a moisture barrier attached save time and money. They have an extra layer of plastic on one side to act as a moisture protection.
Foam offers a few advantages for wood floors. It cushions the wood, adding flexibility and some insulation. It also helps to reduce noise and reduces friction during the natural expansion and contraction of the floor.
Foam underlayment comes in sheets or rolls and easy to install.
Felt underlayment has excellent soundproofing qualities. It’s thicker than most types helping to minimize subfloor imperfections and improving insulation value. Check to see that it has a waterproof barrier on one side for use over concrete. Most felt products have been treated to provide anti-microbial properties.
Rubber is another option that works well as both a waterproof barrier and to reduce footfall noise. The noise reduction of 2 mm of rubber is about the same as 6mm of cork, and you can use it for hardwood, stone or tile. Other than the seams, you don’t need an adhesive to secure it to the subfloor.
Cork is trending upward as an underlayment material especially for “green” homes. One significant benefit is that it is a renewable resource and a natural product. It has superior sound reduction properties over synthetic materials. It is firm yet spongy, perfect for filling in sub-floor imperfections, especially concrete.
Cork is a natural insulator which will help you regulate the floor’s temperature. Cork destined for flooring has anti-microbial properties, and it’s great for repelling termites and insects. Although cork is water resistant, it’s not waterproof. You’ll need to use a plastic sheet as a moisture protection, typically 6mil thick.
Most hardwood floor applications need only a 1/8” (3mm) thick cork. However, if you need more soundproofing or add height, use the ¼” (6mm) cork. It comes in both rolls and sheets. A roll covers 200 square feet and is easy on the budget. Installation methods include floating, staples or glue.
The primary deciding factors for which underlayment is right for your floor will depend on the sub-floor and your local building codes.
The easiest products to install are ones that come in a roll. Whether foam, paper or cork, the techniques are the same. Here is a video showing you how to lay down a foam-type flooring underlayment with a self-adhesive strip.
Pro Tip – Run your seams perpendicular to the floor on top for best results.
Step 1 – Unroll the material to the other side of the room and cut extra to go up the wall 3 to 4 inches (7–10 cm).
Step 2 – Align the first edge to a wall where you want it then tack one end to the wall.
Step 3 – Begin removing the backing to the self-adhesive strip and attach the first sheet to the sub-floor. If there is no self-adhesive strip use a wood flooring tape made for that purpose. Use a tack hammer or stapler to attach the sheet to the floor as you work your way down the edge.
Step 4 – Repeat the process with the next sheet being careful to keep the edges aligned. By stapling the floor as you work your way to the other end, it keeps the foam from moving or buckling.
Step 5 – Tape the top of each seam together to strengthen and seal them.
Once you install the wood flooring, you can trim the excess material. Shoe molding will cover the gap. This short video shows how to install foam underlayment for a hardwood floor.
Installing rubber underlayment on concrete is a bit different than a sub wood flooring because obviously, you can’t tack it in. Some products use double-sided carpet tape to attach the pieces. Other products require applying adhesive over the surface of the concrete, a little at a time as you roll it out.
Pro Tip – For shorter runs or intricate cutouts, pre-measure and cut before gluing.
Step 1 – Always sweep or vacuum the floor before starting any wood flooring project.
Step 2 – Roll out and cut a length of the underlayment. Double check for straightness.
Step 3 – (For Tape Application) Draw a chalk line down the edge and apply double-sided carpet tape under the side, leaving half of the width exposed to attach the adjoining piece.
Step 3 – (For Adhesive Application) Use an approved liquid adhesive and spread it over the concrete using a trowel. Spread out just enough to roll out small sections until the first piece is down.
Step – 4 Repeat steps 2 and 3 until the floor is covered.
To give you a better idea of this process, watch this video on how to install rubber underlayment. Although it’s for a garage floor, the process is the same anywhere in your home.
To see how to install rubber underlayment on concrete sub-floor using adhesive, here is an excellent video showing that technique.
There are three ways to attach underlayments depending on the sub-floor:
While floating is the easiest, it may not be the best. Lightweight foams can shift or buckle as you work to install the floor. It’s best that they attach to the sub-floor for a smooth, professional looking floor.
An underlay adds a few benefits worth noting.
An underlayment improves the durability of any hardwood floor and helps it last longer. With the right type installed, the next step to creating your dream home is to install your new hardwood floors.
Remember that concrete is not a water barrier. It can wick up moisture from the ground and is also prone to condensation build-up. Both of these can make quick work of destroying your hardwood floors.
So bear in mind that in your basement or over a slab, you cannot nail, staple or screw your hardwood flooring to the subfloor, because doing so will puncture your underlayment, effectively rendering the moisture barrier useless.
For this reason, you music install a floating hardwood floor in these situations. A floating floor attaches only to itself and not the subfloor. It functions as a giant wooden mat that can expand and contract as a unit, when needed. It floats over top of the subfloor and underlayment allowing the preservation of the underlayment's vapor barrier.
For the best looking floating solid hardwood floors that are a snap to install, look no further than right here at Easiklip.
]]>Have you ever walked into a freshly remodelled home? The first thing you notice is the floor. It’s the focal point of every room. Your eyes glance on the floor then move to the walls, furniture, and fixtures.
In this article, we’ll look at the preferred wood floors features that will help you make the right decision, look amazing and hold your home’s value.
]]>Have you ever walked into a freshly remodelled home? The first thing you notice is the floor. It’s the focal point of every room. Your eyes glance on the floor then move to the walls, furniture, and fixtures.
Hardwood floors are known for their timeless charm and are an integral part of any home. Whether you’re refinishing or installing brand-new hardwood floors, choose wisely. An out-of-date hardwood floor style can affect your home’s value and make it harder to sell.
Unlike clothing fashion that changes with every season, flooring styles have a long cycle, that can last for generations. As an example, have you seen the hexagonal white and black bathroom tiles found in homes of the 1910’s and 20’s? They are still being used today.
In this article, we’ll look at the preferred wood floors features that will help you make the right decision, look amazing and hold your home’s value.
There are five areas to consider:
Homeowners look for long-lasting, beautiful wood floors that are easy to maintain.
Whether you are a traditionalist or a trendsetter, choose engineered wood features that are currently in demand, that suits your taste and budget.
The latest color preferences go in opposite directions, very dark or very light and natural. One floor color choice that homeowners shy away from are the reddish tones that were favorite a decade or two ago. It’s hard to match paint and furnishings unless you like strong and striking colors.
“We built our house back in 2006 and installed Brazilian Cherry floors. 10 years later, I really hate the red in the floors and prefer a neutral brown, and the Brazilian cherry floors are no longer popular.” – A homeowner on a flooring forum
Like a sexy black dress, dark and solid hardwood flooring looks elegant especially against contrasting white walls, furniture, and a light accent rug.
Modern, minimalist homes with an abundance of light are using more dark hardwood floor stain colors like ebony, espresso or even black.
While trendy, black can be difficult to maintain as it shows every scratch and speck of dust. It’s best to reserve this color for low traffic areas (no kids or pets).
On the lighter end, homeowners choose one of three floor color directions, natural wood, light grey or white-washed, bleached wood.
When it comes to natural wood, white oak flooring is an excellent choice. Unlike red oak, nut or fruit woods, white oak does not vary in color throughout the board. With only a few coats of protection from polyurethane, the light, honey-colored white oak wood brightens any room. The neutral color gives unlimited decorating options, fits any décor, and creates a warm, comfortable home.
The lighter shade helps hide dirt and dust, making it a favorite choice in busy homes. However, not everyone appreciates the yellow tones of natural wood. If that’s you, grey and white are two options that have become a rising trend.
Grey floors add a light elegance to a home. Grey stains mask any yellow tones found in natural wood, allowing for more decorating options. The floor color choice has been trending up since the beginning of the decade.
“I noticed the trend and demand for grey hardwood floors around 2010 or 2011. First, I really only saw this in pre-finished (or factory-made wood), and it wasn’t until 2012 or so when I started to get lots of local customers to ask us to refinish their existing floors and turn them gray.” - Debbie Gartner, TheFlooringGirl.com
To achieve a “beachy” look and surfer’s paradise feel, go with a whitewashed floor. It’s one trend in floor color that has spread from beachfront properties to homes in any location. Bleached wood lends itself to casual interior design and finished basement to add a light and airy feel. It’s also an excellent choice for both modern and farmhouse kitchens.
Whitewashed wood floors typically simulate the appearance of natural wear like that of a seaside boardwalk. The wood grains show through providing a comfortable yet upscale contemporary feel.
Wood in all its natural beauty comes with a variety of color options, even from the same tree. One trend is to take advantage of this by mixing dark and light boards throughout the room.
This can be a challenge for decorating because there is an inconsistent color. However, it will give a unique and artistic look due to the many natural characteristics of the wood.
Lighter floors are usually more forgiving than dark hardwood floors when it comes to maintenance. Choose a hardwood floor color that fits your taste and lifestyle.
“Currently the most popular & stylish sheen is a satin finish. Satin finish has some sheen but doesn't look too glossy. It gives the room both a classic and contemporary feel.” Larchmont Patch News
Floor finishes come in various sheens from high-gloss on one side of the spectrum to matte on the other. The determining factor is something called “Luster Level.” It’s the amount of light reflected off the floor’s surface at a 60⁰ angle. The more reflection, the higher the luster level.
When you look at a new bowling alley or a gymnasium floor, they shine like glass. That is a high-gloss polyurethane finish. And, just like glass, it looks great when it’s clean, but quickly shows every scratch and footprint.
Semi-gloss, while still offering a nice shine, is less reflective than high-gloss. Glossy finishes mean high maintenance due to more cleaning and polishing to keep up their appearance. Also, in areas with lots of light, the glare can be annoying. High-gloss has a 70% luster rating while semi-gloss runs about 55%.
Lower sheen finishes offer a different look and less maintenance. Satin provides a soft, warm glow. The luster level is about 40% or half that of high-gloss. It still makes a clean look for the entire floor without highlighting dust and scratches. It’s a forgiving finish that makes it the most popular choice for new floors.
Matte finishes have the lowest luster at 25%. While matte offers minimal reflection, it displays fewer scratches than the high-gloss floors. It is about showing off the grain and highlighting the woods natural appearance.
Whichever type of hardwood floor finishes you choose the idea is to protect the wood and tie the floor together making a more uniform surface that is easy to keep clean.
Matte, Satin, Semi Gloss and Gloss
A smooth finish may not be trendy, but it will never go out of style. Whether sanded, stained, or finished, most homeowners like their hardwood floors smooth. It is easy to clean and feels good under bare feet. Smooth floors have been the most popular surface for centuries, and always a safe choice.
For some decor, textures provide a new modern flooring look and feel. Here is an overview of the wood floor textures currently in the market.
Like a favorite pair of ten-year-old jeans, distressed, or antiqued flooring, give any space a comfortable, warm and cozy feeling. Distressed floors require less maintenance, and are suitable for families with lots of traffic from pets and kids.
Distressed wood is the perfect choice if you’re looking for a lot of character, and an authentic rustic wood flooring looks and feel. The manufacturer will add features such as aging, sculpting and other techniques to make the board look aged and worn.
You’ll see decorators matching the distressed wood in homes with brick walls, stacked stone, and old farmhouse-style kitchens.
Before there were power tools, all tools were human powered. Craftsman would hand scrape floors to smooth out rough edges and high spots. The vintage look is the latest trend for homes desiring a rustic wood flooring.
The highly textured surface hides a myriad of scratches and dents. It’s the texture of choice for homeowners who have large breed dogs but still want the warmth of hardwood floors. You’ll find hand scraped solid hardwood flooring in high-end homes and commercial buildings.
Manufacturers use machines to simulate hand scraping, but most hardwood floor installers can do the process on site, as shown in this video. They wet the wood and use a metal scraper to scrape out wood shavings in the direction of the grain. The effect is like small ripples in a pond, making each board unique.
Wire brushing is a technique that simulates the natural wear of the floor. The result is that you get a vintage looking floor that’s easy to maintain. Unlike sanding, the wire brush process enhances the wood grain rather than smoothing it. The bristles pull out the softer wood leaving, the harder, smother growth ring.
It’s not as textured or wavy like hand scraped solid hardwood flooring, but it does leave a noticeable texture that helps camouflage wear and dirt. It’s an excellent choice for wood floors in kitchens.
Because it’s labor-intensive, most manufacturers use machines at the factory to pre-finish the boards. To get a good explanation of the process watch this video about wire brushed floors.
Reclaimed wood flooring, as the name implies, comes from salvaging lumber from older buildings. While adding charm and character to your floor, homeowners will also benefit from the patina of the old wood. Once it’s sanded smooth, it will still have nail holes, knots, and gouges from years of wear.
It’s eco-friendly flooring because it is an alternative to newly sourced wood. Reclaimed wood flooring is not uniform and will install like a jigsaw puzzle. The variations can add to the appeal and uniqueness of the floor.
Sources can be flooring removed from a previous job to recycled pallet wood. It depends on your budget and time. However, installing it can take double the time as a prefinished new hardwood floor. Here is an example of installing a reclaimed redwood floor from 1848.
Back when settlers had unlimited lumber, and the trees were huge, they cut wide plank for floors to save time. Today, we no longer have the same unlimited resources, but we still have the same taste in the wide width of the planks. The 2 ¼ to 3 ½ inch wide boards in homes from the 40’s to the 80’s are considered outdated.
In the last decade, homeowners prefer planks that are 5 inches or wider, it looks more elegant and upscale. Wide plank flooring can make your room feel less busy and more open due to fewer visible joints on the floor.
The type of wood has always been important. Oak, especially white oak, is one of the most common wood species used for floors in North America. It’s beautiful, sustainable, and durable.
Other popular wood species include maple, hickory, cherry, ash, mahogany, and walnut. However, these species can be quite pricey.
Once a design trend of the 30’s through the 80’s, parquet floors have quickly become a distant memory. These floors are crisscrossed patterns of wood strips that resembled tiles. The common flooring issues with these types of floors are loose blocks, scratches, and gaps. You can still see them in old European Palaces, older homes, apartments, and commercial buildings.
However, chevrons and herringbone patterns using larger boards can elevate the look of the room. The difference between the two are the ends. In a herringbone style, the ends overlap at a 90⁰ angle. To make chevron patterns, the ends are cut and fitted together to make a point.
Home designers usually reserve these patterns for formal living and dining areas.
Another smaller trend is mixed width hardwood flooring. It resembles older farmhouses when builders had to use what they could find. Floors with varying widths provide extra detail and break up the regimented lines of a room. It makes an interesting contrast to the modern design.
Diagonal flooring is an option that adds another dimension to a hall or room. Instead of laying the floor parallel to a long wall, diagonal flooring installs at 45⁰. It costs more in labor and material but makes any space look ultra-modern and sophisticated. Diagonal floors will always look good in any era.
You can’t go wrong with a clean design using straight lines and no pattern. It will always stay in style, saving time and money.
Flooring trends evolve over time. If you’re considering laying a new engineered wood floor, follow the consumer’s demand. Chances are you’ll find better inventory at a reasonable price for the choices you want. Your home floor will look beautiful and will hold its value.
“Houses with hardwood flooring are easier to sell, sell for more money, and sell faster.” - National Wood Flooring Association
Here is a summary plus a few things to keep in mind when deciding on your flooring and color options.
What’s in:
What’s out:
If you are choosing a new floor, select something durable and likely to stay in style the lifetime of your home. A solid hardwood floor made from white oak that is 5 inches wide will last a lifetime and look good in any room.
At Easiklip, we specialize in this type of hardwood floor. And, it’s the easiest to install for DIYers or contractors. Learn more and order a free sample pack at Easiklip.com.
As a final note, since solid hardwood floors require light cleaning frequently, we thought we'd share a great resource guide on vacuuming hardwood floors. It contains:
If you find this article informative or know somebody who can benefit from it, please share.
]]>The reasons that hardwood flooring is so alluring is aplenty and apt for almost every room in your home. There's no hardwood flooring type that is inviting as real hardwood is in a kitchen. No flooring can match the elegance of real hardwood flooring in a dining room. Real hardwood flooring also provides coziness and a relaxing vibe when installed in a bedroom or the living room. But is real hardwood flooring perfect for every room in the house?
As inviting and luxurious as it is, solid hardwood flooring does have two major enemies – water and humidity. It sure would be nice to have a comforting dark hardwood flooring installed in a bathroom or as a prime addition to a finished basement but unfortunately those are two areas where moisture and humidity are mainstays.
One of the biggest benefits of Easiklip Flooring is that it is the real thing; solid hardwood flooring – not laminate or a compound made from smaller pieces of wood. Since basements are at such a risk of flooding and because water is so devastating to natural hardwood, you're usually better off going with tile in a basement. Generally speaking, there are many different flooring options for your basement. That being said, if your geographic area is safe from flooding risks, laying a 2mm damp-proof flooring membrane (underlayment) for your Easiklip hardwood floor to lay on, will protect it from any moisture seeping up from the concrete underneath making Easiklip solid hardwood floors a viable solution in your basement. Of course, feel free to contact us for an individual consultation for your specific home layout.
Aside from actual water, another very damaging component to solid hardwood flooring planks is humidity. When hardwood flooring is exposed to humidity, it has a tendency to absorb it and thus swell. Hardwood flooring will then shrink when its moisture content returns to it's acclimated state. That's a lot of buckling back and forth, especially in a bathroom where humidity might change 4-5 times a day as a family showers.
Of course you aren't relegated to tile in any room where there's a drop of water. If your home happens to have a washroom/make-up room, Easiklip hardwood flooring is a perfect option. These areas of a home might feature a toilet and sink, but as long as there isn't a shower or bath, the threat to a real hardwood floor is minimized. In fact, hardwood floors in a washroom create a very laid back atmosphere that is peaceful and relaxing.
Even though some rooms in your home aren't a traditional option for hardwood flooring, never say never until you give us a call. We can evaluate your basement substrate or bathroom ventilation to see if your dream of hardwood flooring in these rooms really can come true.
Easiklip specializes in solid oak flooring for do-it-yourself projects, home renovations, new residential and commercial construction projects throughout Canada, the United States, Europe, and Asia. Our easy-to-install floating wood flooring has been the first choice locally and internationally for more than 15 years.
Buy your hardwood flooring from our online store and we'll ship it right to your door, anywhere in the continental United States and around the world. With all purchases, we include a 30-Day Money Back Guarantee.
On This Page:
Choosing whether to go with a light or dark hardwood flooring color can sometimes be a tough decision. Typically, you love one and hate the other, and really there is no right answer. To make the right choice for you, start by selecting the hardwood color range that speaks to you and fits the space. You can always add other design elements around the floor's color or tone.
We've laid out some design pros and cons for both light and dark hardwood floors to help you choose.
Let's go to the dark side first.
A deep, rich hardwood floor makes a room feel warm, cozy and inviting. There are many options for dark hardwood flooring. You can choose a dark wood species like walnut or stain a lighter wood in a dark shade.
If you're thinking of choosing a dark hardwood floor, you should know the advantages and disadvantages before making your final decision.
Dark hardwood flooring always provides a more sophisticated and elegant look than lighter hardwood flooring. They add an ambiance of an old English castle. If you want to install a darker floor, choose a smaller plank width and a satin finish. This will highlight the beautiful hardwood grain and give you a natural look.
Here are five sound reasons to opt for darker hardwood flooring:
If you have a pet with dark fur, having a dark hardwood floor is a bonus. However, the dark side is not for everyone.
There are some valid reasons to steer clear of darker floors that you must consider. The big question people ask is...
The answer is yes. Dark hardwood flooring will show scratches more. You'll need to have furniture pads under every chair leg or other piece of furniture. It's necessary to add a scratch-resistant finish to the hardwood flooring for added protection.
Dirt and dust show up more readily on dark hardwood floors. It takes more vacuuming to keep the dust at bay, and it's best not to wear shoes inside.
Additionally, dark hardwood flooring can make a room feel much smaller. You will need light-colored walls to offset the hardwood floor's darkness.
Dark-colored hardwood floors absorb light. If there is not an abundance of natural light or plenty of lamps, the hardwood floor will make the room look dark and dreary.
It's best to avoid using darker shades in small rooms with little light, or else the space will seem smaller than it is.
Whether dark hardwood floors are in or out of style depends on a designer's preference.
According to Forbes, dark cabinets, all-white kitchens, and neutral colors are going away. They didn't mention floors, but since dark floors are neither white nor neutral, they will still be popular in the next decade.
Jess Blumberg, an interior designer for ElleDecor.com, said, "I love a wide plank wood floor, stained dark charcoal, to ground a space and keep it looking rich."
Interior designer for Hyphen and Co, Eliza McNabb, stated, "A dark stain makes wood floors feel elevated. The contrast between a light wall and a dark floor makes the room feel brighter and taller. A rich brown or graphite floor grounds a room and, from a practical standpoint, hides any imperfections on an existing floor."
But not every designer jumps on the dark hardwood floor bandwagon.
Bryan Sebring of Sebring Design notes a different trend for darker floors. "Oak is still the king of kitchen floors. Currently, we see a throwback to lighter colored hardwoods. Dark wood floors are less in demand. Our clients want lighter brown tones close to fruitwood or gray instead of the reddish hues of the 1990s."
Regardless of current fashion trends, it's your home, taste, and budget that should drive your decision. Dark hardwood floors will always have a unique character and timeless appeal. It still provides a vibrant and elegant look.
A dark hardwood floor takes a bit more design consideration when adding furniture, rugs, and wall colors. Paring the wrong colors can make the room feel dark and uninviting. Fortunately, finding the right colors to compliment the floor is not that difficult.
Some preferred design elements that work well with dark stains and wood include:
With the right accent colors, dark hardwood floors in the kitchen and living room make the home look very chic.
If you have brown, red-toned, or mahogany furniture, they may be too dark against a dark-colored floor. Choose light or colorful fabrics. Bright and colorful area rugs break the monotony of large dark areas.
However, you don't have to contrast the furniture every time. Matching the chairs and tables' legs to the hardwood floor makes the room feel elegant and professionally designed.
Choose paint or fabric colors in the blue spectrum. Look for light blue or blue mixed with gray. Another color is green, which is on the gray side. Not bright greens, but understated and pastel, like sage.
Of course, white, either bright or cool white, is always in style.
Natural oak hardwood floors have a bit of yellow in them. Complementary paint colors include white and neutral tones like beige or gray. If the hardwood floors have been bleached white, you can use almost any color that suits your taste, and it will look good.
Perhaps your dream home didn't come with the hardwood floor color that matched your dream. What you wanted was a natural color, but the previous owner stained the hardwood floor coffee brown. Ripping them up and replacing them is not in the budget.
How can you make the best of them, visually? Use light and bright colors from the baseboard to the ceiling to offset the darkness. If possible, go with a satin or matte finish. A high-gloss finish means high maintenance. It will show every scratch and speck.
If you don't like a dark hardwood floor, you can lighten it without having to replace it. However, a perfect outcome will depend on the condition and the wood's natural color. Changing the color requires sanding. It's a messy job best left to experienced pros with the right equipment.
HGTV's Tarek El Moussa recently purchased a new home but didn't like the wood floor color. Rather than installing a new floor for $30,000 or more, he hired a company to sand the existing floor down to the natural wood. After finishing in a neutral color, it cost only $5,000 to transform the old floor into a light hardwood floor.
You cannot sand thin or worn out hardwood floors. For more ideas, read our blog, "How to Restore Hardwood Timber Floors."
After sanding, you can elect to leave the wood natural, bleach it, or add color with a gray or whitewash. Finish with a water-based polyurethane to protect the wood.
It's best to contact a wood flooring expert to help you test your wood stain or color idea. Try it on a small section after sanding. It will help you envision the final look before getting stuck with a color you don't want.
Another option is to bleach the wood. To see the variety of shades achieved from bleaching wood, watch this video, Bleaching the Red out of Brazilian Cherry Wood Floors. Brazilian Cherry is dark red, but the principles apply to any dark wood floor.
If lightening dark floors is too daunting a project, maybe you're better off opting for light hardwood floors right from the start. Easiklip has an affordable line of easy to install, solid hardwood floors for DIYers and professionals.
The most popular and common light hardwood floor is oak, usually red or white oak. Other common light-colored hardwoods are maple, ash, and pine. Pine is a softwood, yet it's a hardwood flooring favorite for its characteristic knots.
Light hardwood floors make a room look chic, more comfortable, and relaxed. As with any color or design choice, there are advantages and disadvantages. Let's start by looking at the positives.
Here are some of the advantages:
Some real estate professionals say that homes with dark hardwood floors sell for more money, but the jury is still out. If you plan to sell, a light-colored hardwood floor is the safest option.
A light hardwood floor is not always the best choice.
The best way to know which hardwood floor is best for your situation is to take home some samples. To get started, order a 4-piece sample pack from Easiklip. Choose four colors from their selection of:
Designers suggest laying them down and checking back during different times of the day to visualize how they might look under various lighting conditions. It's the best way to choose which color hardwood floor is the right one for you.
The truth is that light hardwood floors will never go out of style. However, some shades are more popular than others. One reason is that they are neutral, offering decorators more options when finishing a room.
Blonde, honey-colored, and natural wood are light but tend to have a more yellow color, limiting some design choices.
Another trending color or style is high variation hardwood floors. This type of hardwood floor uses the same tree species, but the wood comes from different parts, so there is a mix of light and dark boards. High variation wood floors offer more design options and create a unique, casual look.
Since the beginning of hardwood floors, light oak hardwood flooring has been the choice of kings and peasants alike. It has long-lasting durability combined with beautiful colors and grains.
White oak is a golden color with a natural finish. Red Oak has both golden and deep red hues depending on the board. European white oak with a natural finish adds texture and warmth to any space.
Oak hardwood flooring is a sustainable hardwood flooring material. It lends itself to every type of finish, from bleaching to charcoal stain. The grain still shows through the darkest colors, giving any room a look of quality and elegance.
Gray hardwood flooring is a trending flooring color. It provides a feeling of freshness, and it's easy to maintain. It's a practical compromise when you can't decide whether to go dark or light.
They are trendy, stylish, and enhance any home furnishings.
Depending on which interior designer you ask, both light and dark hardwood floors will always be in vogue. If you like white kitchen cabinets and countertops, a dark hardwood floor creates an elegant counterpoint. If you have space with little or no natural light, a light hardwood floor brightens the room.
With a hardwood floor, you can always change the color rather than change the floor. Should you opt to replace your floor with solid hardwood, the easiest solution is Easiklip. We have five prefinished colors of solid oak floors from which to choose. You can install them yourself without nails or glue. Go here to see more.
]]>
Click-lock hardwood flooring is a method of attaching two hardwood floorboards together without screws, glue, brads, or staples. It was initially designed for laminate and engineered hardwood floors. The wood boards have unique grooves along the edges that fit together, interlocking the hardwood floor.
Although most engineered and laminate hardwood floors connect in this fashion, they typically use glue or nails in addition to the locking system.
Easiklip hardwood flooring took this concept further and developed a “click-lock” system for solid hardwood flooring and the end result is a floating hardwood floor. The hardwood floor’s weight keeps it in place without attaching it permanently to the subfloor. We’ll cover more about this hardwood flooring later.
Click-lock hardwood flooring has become popular as it is user friendly and easier to work with. Here are some reasons to choose this type of wood flooring over others.
Installing any solid hardwood floor requires a bit of experience and know-how. But a click-lock type hardwood floor is DIY-friendly. The wood floorboards fit together snugly and correctly aligned, which will save you time that otherwise you would be spending on spacing hardwood floor gaps.
As we mentioned above, most snap-together hardwood floors are floating floors. That means no glue or nails and a simpler installation process. Thinner flooring like laminates does require glue because they don’t have the weight or bulk of solid hardwood flooring to keep them from moving.
Another advantage of floating hardwood floors is that they can expand and contract naturally through the various seasons. Permanent thinner/lower quality wood flooring can buckle or warp during high or low humidity conditions because they can’t move.
Hardwood floating floors can save you money both in labor and materials. Whether you pay an installer to do it or lay it yourself, click-lock hardwood floors install much faster. With permanent solid hardwood flooring, you have the extra expense of equipment, fasteners, adhesive, or all three. Additionally, each wood floor plank takes longer to install.
The main reason why people opted for permanent installation was to get solid hardwood. That’s not the case anymore, as Easiklip offers solid hardwood white oak flooring that clips together. It’s both affordable and DIY-friendly.
Another advantage of a hardwood floating floor is that it’s much easier to disassemble for localized repair or if you want to move the entire hardwood floor to a new location. You unclip it and take it with you.
A floating, clip-together solid hardwood floor installs over almost any floor. If you plan to install a hardwood floor over an unlevel or uneven surface, this article will help you level the hardwood floor before installing the new one.
For best results, use an appropriate floor underlayment. Floor underlayment can be a moisture barrier to prevent moisture from wicking up if you install over concrete. It is good soundproofing for installing on higher floors too.
When we mention interlocking, click-lock, or snap-together hardwood flooring, we’re referring to the installation method, not the rubber mats you find at the gym. The three primary materials for home click-lock flooring are vinyl, engineered, and solid hardwood.
Let’s look at the properties of each type of flooring.
Vinyl is a 100% synthetic material. Typically, the core is fiberglass, and the top layer is vinyl imprinted with an image of wood to resemble the look of a wood floor.
The built-in click-lock system makes it easy to install and economical for high-traffic areas. It’s water-proof, making it a good choice for mudrooms, daycare centers, and below-grade such as basements.
Laminate flooring is similar to vinyl, except the core is usually constructed using wood by-products, medium-density fiberboard (MDF), or high-density fiberboard (HDF). Laminate flooring, like vinyl, uses a hard, transparent plastic wear layer that protects the simulated wood design layer.
Engineered hardwood flooring is as close to the look of genuine hardwood as you can get. Its construction consists of a thin veneer of real hardwood mounted on a core. The core is typically plywood, particleboard, or a synthetic compound.
Engineered hardwood flooring is usually less expensive than solid hardwood flooring and easier to install with the click-lock system.
Nothing beats the beauty, value and feel of real hardwood flooring.
To compare all three types of flooring, read “Engineered Hardwood vs. Laminate Flooring: Learn the Differences.”
With so many hardwood flooring options, why choose solid hardwood flooring? There are at least five excellent reasons why you should put solid hardwood flooring under your feet.
The added advantage of a clip-together solid hardwood floor is there is no mess or fumes from adhesives. Installation times are reduced by as much as 30% since there is no glue or nails to slow you down.
Easiklip solid hardwood flooring installs using patented aluminum clips that hold each plank firmly to the next.
It’s an easy 4-step procedure.
Step 1 – Lay down an underlayment of plastic sheets.
Step 2 – Install the flooring underlayment.
Step 3 – Attach clips to the first row of boards and set them in place beginning in the right-hand corner of the room.
Step 4 – Install the next row, ensuring that each wood floorboard “clicks” into the clips.
To see how easy it is and all the installation details, check out the video, “How to Install Solid Hardwood Flooring by Easiklip.”
Easiklip’s solid hardwood flooring system is the quick, easy, and glueless method of installing solid oak hardwood flooring. DIYers and professional installers can install a beautiful hardwood floor in a shorter time.
The entire wood floor can be disassembled and moved to another location at any time. It’s entirely reusable with no damage to the floor or subfloor.
To learn more, visit the Easiklip floating hardwood floor installation page here.
]]>
Have you watched the shows where a couple buys an old house, fixes it up, and sells it for a profit? It’s called flipping. One of the major choices every investor makes is whether to keep the existing flooring or replace it.
Sometimes a shabby old carpet hides a pristine oak floor. Refinishing hardwood floors makes the most sense. Other times, the floor may have water damage or an old parquet floor that new home buyers don’t want.
This post will help you make the right decision whether to replace or refinish your hardwood floors.
When flipping an investment property or upgrading your home, the floor can make or break the design. Here are what to consider when deciding to install a new floor.
Change the Direction - Some designers want to get artistic by changing the floor’s look to diagonal or herringbone. Another reason to change the direction is for Asian buyers who follow feng shui principles. The direction of the floorboards makes an impact on the flow of energy throughout the home.
For very old wooden floors, a replacement offers a better solution to refinishing. However, if the damage is slight or it’s purely cosmetic, then refinishing your floors avoids the trouble and expense of replacing them.
Refinishing hardwood floors instead of replacing them can salvage older or historic floors and reclaimed wood. Once done, the natural beauty will shine through with a unique character you can’t find in new wood floors.
That said, refinishing takes a big commitment in time and keeping the area off-limits to everyone for a week or more. It can take at least a day between each coat of stain and finish to dry. During this time, you must keep kids, pets, and nosey neighbors out of the room until the final coat dries.
Be aware that your home will fill with fumes if you don’t have proper ventilation. You may need to stay elsewhere during the process. If you can live with the temporary inconvenience and smell, refinishing is worth the trouble.
Check out our article on how to refinish a wood floor for more details.
For these reasons, some people prefer to purchase a new hardwood floating floor to lay down on the old floor. It’s faster, replacing takes less time, and you can use the room immediately.
Typically, sanding and refinishing a floor will always cost less than tearing up an old floor and replacing it. Refinishing can take longer than a new installation, as each coat of stain or finish needs time to dry.
There are two cost categories for each, labor and materials.
If you plan to do the labor, your time costs money too. Consider what you make per hour and factor that into your calculation. If you plan to do the project in your “free time,” chances are it will drag on for days. Are you prepared to have a space that’s unlivable for days or even weeks?
Let’s compare the cost of refinishing hardwood floors to the cost of replacing hardwood floors.
Expect to pay an average cost of $2 to $7 per square foot to refinish. The cost varies by location, choice of coatings, and additional repairs necessary before refinishing. Add $2 per square foot if you also plan to stain the floor first.
If you consider replacing a hardwood floor, you must factor in the cost of tearing it up, disposal, the new floor, and labor.
For figuring purposes, use $1.50 to $2.50 per square foot for tear up and disposal. Hardwood flooring starts at $4.00 per square foot and goes up from there.
Try out this website’s cost estimating calculator based on the room’s size.
Before replacing hardwood floors, you can either tear out the old one down to the sub-floor or install a floating floor over it. A subfloor can be concrete, OSB (Oriented Strand Board), or plywood. To install any hardwood floor, it must have a flat and level sub-floor.
Keep three things in mind:
To install a floating floor, watch this video. For other types of floors, ask your local flooring company for advice.
You’ll find various videos online on how to refinish a hardwood floor. The basic steps are as follows:
Check out our blog and videos about refinishing wood floors.
Are you still hung up on whether to refinish or replace? Let’s break it down.
Pros:
Cons:
A big advantage of replacing with a prefinished floor, you can use it immediately.
Pros:
Cons:
Some floors cannot be refinished, such as bamboo, engineered hardwood, or old floors that are too thin from previous refinishing.
Should you refinish or replace your floors? The choice boils down to cost, time, personal preference, and the floor’s condition. Use the advice above to guide you to the best option for you.
One last option. Consider a solid oak floating floor that clips together using patented aluminum clips. You don’t need nail guns or messy adhesives. It installs over wood or concrete floors for about the same price as refinishing. You can walk on them right away. For more information, check out our FAQs.
]]>Most hardwood floors last for generations. But there comes a time when the floor no longer looks good or is unsafe. Sometimes it’s easier and less expensive to tear it up and start fresh.
But don’t burn or throw the old hardwood floor away. Depending on its condition, you might be able to salvage or sell it and give it a second life. Some local flooring contractors may buy it from you, or you can sell the lot on Craigslist. Don’t expect to get much, maybe $1-$3 per square foot, but it’s better than nothing.
To salvage and remove hardwood flooring, you’ll need some tools and techniques that we are about to share with you.
If you hire a professional to tear up and dispose of the old floor, you’re looking at an approximate range of $1.33 to $2.62 per square foot. There are additional costs to remove old hardwood floors because it takes more time to disassemble them. If the subfloor is damaged, you’ll need to add that cost as well.
You can save money by taking up the floor yourself as a DIY project. You probably already have the tools, or you can rent them. Don’t forget to factor in storage costs or a dumpster for disposal.
If you are salvaging hardwood floors, you’ll need to spend more time carefully removing them. Before you start tearing things up, you need a few tools.
Removal Tools |
Personal Protective Gear |
Circular Saw Pry Bar Mallet Hammer Chisel Nail Claw Curved Vice Grips Large Magnet |
Safety Glasses High-Quality Dust Mask Gloves with Padded Palm Construction Kneepads Long Pants Work Boots Tarps and tape Shop Vacuum |
A few pointers about the tools:
Once you have all the tools to do the job, you need to de-clutter the room.
Typically the prep and cleanup take the most time. Once you get started tearing up the floors, it goes quickly.
Most hardwood floors are attached to the subfloor, usually plywood. Typically, the boards were glued and nailed to prevent squeaking. Removing your hardwood floor without damage is tricky but vital to maintaining the subfloor’s integrity.
Set the circular saw to the same depth as the hardwood. That way, you won’t cut into the subfloor.
If you plan to dispose of the wood…
If you plan to salvage the wood…
Extract any remaining nails and staples from the floor and the boards using vice grips, nail claw, or a hammer. Curved vise-grips work wonders for removing short nails or broken staples. If you can’t pull them out for some reason, nail them flush to the surface.
A large magnet works well for picking up stray nails and staples. Sweep up or use a shop vac to clean up the remaining debris. Keep a trash bin handy lined with a heavy-duty trash bag.
If you don’t plan to salvage the wood, rent a roll-off dumpster to save time and have a place to dump everything.
Follow these four tips from flooring professionals for a safer, smoother job.
Get the best goggles, padded work gloves, knee pads, and respirators. You’ll be working on your hands and knees in very dusty conditions. There will be plenty of splinters and nails waiting to get you, so don’t skimp on the quality of your PPE (Personal Protective Equipment).
When covering doorways and lamps, opt for fabric sheets or tarps rather than plastic. Plastic creates plenty of static electricity and will attract tons of dust, making cleanup harder.
Once the hardwood is gone, check the integrity of the subfloor. Make sure that it’s even and that it’s structurally sound. Neglecting any repairs now will mean a squeaky or uneven floor later on.
Be sure to double-check to see that no remaining nails or staples are sticking up.
Removing and replacing hardwood floors creates clouds of dust, and it gets everywhere. The dust from some flooring adhesives can be toxic, so wear your PPE and seal off the room as much as possible before you work. Use a shop vac as you go and clean the filter often.
To remove 700 sq. ft. of hardwood flooring takes about 10 to 12 hours. It’s a straightforward job, even for a first-time DIYer. That’s the labor cost you won’t pay to a contractor, and it is a good workout.
The easiest floor to uninstall is a floating floor. It is not attached to the subfloor. Instead, the boards lock together, and the weight holds them in place.
When replacing wood floors, consider Easiklip. It’s the easiest, solid hardwood floor to install. Any DIYer can install it because it snaps together using aluminum clips without glue, staples, or nails. If you ever need to repair or move the entire floor, you simply unclip it. To learn more, visit Easiklip.com.
]]>A hardwood floor is one of the only design elements that enhance any style of home. Wood graces the floor of the 948-year-old Tower of London and almost every elegant castle and mansion in the world. It can also soften the harsh appearance of the latest architectural creations made with cement and steel.
A wood floor is timeless and beautiful. When it comes to hardwood floors, you must choose between prefinished or unfinished. The selection depends on your budget, schedule, and tolerance for messiness.
We’ll show you the difference between these two to help you make this important decision.
When finishing a hardwood floor, there are two elements, the stain and the protective layer. However, a natural finish uses only a clear topcoat, typically polyurethane with aluminum oxide, to protect from scratches and enhance the wood’s natural color and grain. Both the stain and the topcoat contain chemical solvents. These chemicals contain volatile organic compounds (VOCs), which dissipate as they dry. It’s the smell you notice when opening a can of paint or mineral spirits.
The advantage of purchasing prefinished hardwood flooring is that all the staining, polyurethane, and fumes occur at the factory. When the boards arrive at your job site, the panels are dry and ready to install. Both types of flooring need to acclimate to the site, usually 3 to 7 days. After that period, installation for prefinished will be much faster.
When talking about unfinished hardwood flooring, we must consider two alternatives. The first is brand new boards that come straight from the factory. The new hardwood planks must be cut to size and then installed. Then they must be sanded after installation and finished on site.
The second is a preexisting wood floor that may be decades old. It must be sanded down to new wood in preparation for finishing. Either way, the wood floor is ready to stain and finish.
Both options offer benefits, but the choice comes down to the final look you want to achieve, the amount of time available for installation, and the cost. Let’s look at the advantages of each option below.
The greatest advantage of prefinished hardwood flooring is the factory did all the work. Here is what that means for you:
Prefinished hardwood flooring is not always the perfect solution. Here’s why…
Prefinished hardwood planks have a beveled edge to prevent damage. The finished floor will have seams along each row of boards. It’s not that noticeable, but if you want perfectly tight seams, you’ll need to go with an unfinished hardwood floor.
Unfinished hardwood flooring is a blank canvas for your room’s design. Between the species, board widths, and stain colors, your design options are almost unlimited. Consider these benefits of unfinished wood:
You’ll have more control and options over the final look with unfinished wood flooring. It’s a matter of how much time you are willing to sacrifice to get that look.
Most homeowners and contractors choose prefinished solid oak flooring. Oak has been the standard for wood floors for centuries. Prefinished oak floors are a relatively recent innovation that makes installing a new floor quicker than sanding and finishing it on site.
One oak floor manufacturer makes installing a wood floor as easy as possible. Easiklip floors use aluminum clips instead of messy glue, troublesome staples, or nails. They have five prefinished models that match almost any décor. DIYers can install a 10’ x 12’ floor within hours and use the room right away. To learn more, visit Easiklip Floors here.
]]>
Are you remodeling a home as your forever home, flipping it, or as a rental? The choice of flooring makes an impact no matter what you plan to do with the property. A hardwood floor always adds value, is durable, and looks stylish. But you don’t need to go with the expense of solid hardwood to gain those benefits.
Engineered hardwood flooring offers the beauty of hardwood at a lower cost per square foot. The higher quality brands of engineered hardwood flooring can be sanded and refinished like solid hardwood.
If you are considering engineered hardwood flooring, this article is for you.
Are you aware that engineered hardwood flooring is 100% natural wood? Don’t confuse engineered with laminate flooring. Laminates are cheap reproductions. They use materials like resin or vinyl and imprint it with a photo and grain pattern that imitates the appearance of wood.
Engineered wood floors have a thin wood surface laminated to a more rigid core, usually plywood. The top layer is known as the “wear layer.” It comes in various thicknesses, with a thicker layer lasting longer, but it costs more. The advantage of a thicker layer is it withstands sanding and refinishing like a solid hardwood floor.
The base or core of engineered wood flooring provides its strength and stability. Plywood is the most common material for cores, but some use HDF (High-Density Fiberboard) as an alternative. The more layers in the core, the stronger it is. The higher quality boards have nine layers, making them more resistant to temperature and moisture changes than solid wood.
When shopping for engineered hardwood flooring, you will see the thickness is usually between 3/8 to 3/4 inch thick, whereas solid hardwood planks are 1/2 to 3/4 inch thick. The wear layer can range from 1 mm up to 6mm or about 1/4 inch.
Multi-ply is the most common type of engineered wood flooring. The multi-layer design makes it more resistant to issues like expansion and cupping, and the strong plywood cores allow greater stability in wider planks up to 13.5 inches (350mm). The total thickness of multi-ply boards can run from 1/2 to 3/4 in. (13mm to 20mm).
Multi-ply is the best choice when installing under-floor heating or in rooms with many temperatures and humidity variations.
3-ply engineered wood is three separate layers of wood that run in opposite directions through the layers. They are not as resilient as multi-ply but are usually 20% cheaper. A board with a 3-ply core is only reliable at widths of up to 7 3/4 in. (200mm). These engineered wood boards also range from 1/2 to 3/4 in. (13mm to 20mm). Three-ply engineered wood flooring is economical when installing over an existing flat floor for a rental or flip situation.
Engineered wood floors with HDF cores are less common but gaining popularity because of their superior quality. The high-density fiberboard core uses recycled hardwood. The HDR core is more rigid, stable and provides better support and moisture resistance than solid hardwood. Its Janka hardness rating is around 1700. The HDF core in engineered wood flooring solves the dimensional stability issues of traditional solid hardwood flooring.
Choosing a flooring material is not easy, and it’s a significant investment. To help you consider the various factors, here is a handy guide to help you find the best flooring for your purpose.
Engineered Hardwood |
Hardwood Flooring |
|
Cost |
$3 to $14 per square foot |
$8 to $15 per square foot |
Sanding & Refinishing |
0 to 2 times |
2 to 3 times |
Dimensional Stability |
Very stable. High resistance to warping |
May warp or cup in high humidity or temperature variations |
Plank Thickness |
3/8” to 9/16” |
3/4” |
Plank Width |
3” to 9.5” |
3” to 12” |
Plank Length |
Up to 10 feet |
Up to 10 feet |
Installation Method |
Staples, nails, glue, or floating |
Nails, glue, or floating |
Solid hardwood is available in both pre-finished and unfinished planks should you prefer to finish on site. Read this article for an additional price comparison between hardwood and other types of flooring
Due to engineered wood flooring’s core construction, it is more moisture resistant. It will work in more rooms, such as kitchens, bathrooms, and basements.
Homeowners will find that engineered wood is the best option for several reasons.
Engineered hardwood flooring looks like solid hardwood. Unlike laminate flooring, engineered wood has a top layer of real wood, making it indistinguishable from solid hardwood floors.
Engineered wood flooring offers more options for wood species, plank dimensions, finishes, colors, and styles. It’s easy to match any home or design.
Engineered wood should last for decades. It can withstand everyday wear and tear better than laminate materials, and it’s comparable to solid hardwood. It also holds up well to temperature changes and moisture, so it’s a better choice for high humidity areas such as below grade or a conservatory or sunroom.
Typically, engineered hardwood flooring is easier and faster to install. It gives you the flexibility of stapling, nailing, floating, or gluing it. However, there is one solid hardwood floor that is installed without using glue or nails. You can learn about Easiklip Solid Floating Hardwood Floors here.
Engineered floors come pre-finished, so you don’t have to deal with the chemical smell of polyurethane, and you can walk on it as soon as you install it. That’s not true for unfinished hardwood floors.
Engineered wood floors require the same care as solid hardwood. They just need sweeping, vacuuming, and light damp mopping to keep them in top shape.
When comparing plank to plank, engineered hardwood is typically more affordable. Engineered hardwood flooring costs $3 to $14 per square foot, while solid wood costs $5-$16.
You’ll find that many flooring options are not compatible with underfloor heating. Fortunately, you can use engineered wood with underfloor heating. If this is a feature you want in your home, this makes engineered wood a great option.
As with any flooring material, buy the best quality that you can afford. Here are some tips to make the right choice for your project.
Thin planks usually cost less but will wear out faster. If the top layer is too thin, you won’t have the option to sand and refinish the floors. Instead, you will have to replace the floor when it wears out.
Always ask about the core when shopping for engineered wood floors because it determines the strength of the flooring. Some manufacturers might use a cheaper blockboard to save money, but it lacks stability and reliability. The more layers the core has, the stronger it is.
The species of wood at the wear layer makes a difference, as with any flooring. Some woods are more scratch-resistant, and others might work better in different climates. Consider the color, grain, and Janka hardness before settling on one for your flooring project.
If you need to match the details, furniture, or cabinets, unfinished engineered planks can be a good option. However, finishing a floor in your home is time-consuming and messy. You won’t be able to walk into the room for days.
The plank length can have a significant impact on the appearance of wood floors once installed. Generally, you want to go with a length of at least 18 inches (450mm). A good rule of thumb is to use longer planks for larger rooms.
An engineered wood floor will work well if you have children, pets and you love entertaining. It’s also suitable for rental property because engineered wood floors look upscale, affordable, and durable.
Nothing replaces the natural beauty of a hardwood floor. While engineered wood flooring can be less expensive and easier to install than solid wood, it’s not always the case. Easiklip designed a 3/4 inch solid wood floor made from white oak. It clips together without screws, nails, or glue so that any DIYer can install it. Best of all, it comes in five prefinished colors so homeowners can walk on them immediately. They are comparable in price to engineered wood floors too. You can order a free sample and review pricing here.
]]>
French fashion designer Coco Channel once said, "An interior is the natural projection of the soul." If your soul happens to love a clean, modern, and uncluttered look, then the Japandi style is the right choice for your home.
It is the new buzzword in interior design. Japandi is the mash-up of Japanese and Scandinavian styles into one. In the interior design world, two minimalist designs have stood the test of time. Scandinavian and Japanese designs complement one another in their clean, modern, and minimal ways.
If you haven't yet heard of Japandi, it is an opportunity for a refreshing new start for any room or home. Let's see why it's trending and why so many people gravitate to this simple, relaxed style.
Interior designers borrowed inspiration from elegant Japanese minimalism and rustic Scandinavian designs. Designers call this Japanese and Scandinavian love-child, Japandi. It's an uncluttered look that favors natural wood and earth tones for a relaxing feel. Colors tend to be pale from floors to ceilings, creating rooms that are bright and filled with natural light.
Both styles are minimal, but they each bring a unique accent décor to the room. Where Scandinavian interiors tend to be too neutral, Japanese design adds a warmer color palette. One difference is the furniture. Japanese furniture may be only a short table, pillows, and tatami mats, while Scandinavian accommodates Westerners with full-sized tables and chairs.
This style favors lots of light, straight lines, and living green plants for accents.
"Moving to a smaller home felt cozy, like having a pair of jeans that fit me just right—no wasted living space and no baggy fabric." ― Lisa J. Shultz, Lighter Living: Declutter. Organize. Simplify.
Overstuffed furniture, dark walls, and heavy accent pieces give way to the lighter, more sophisticated look. There are only a set number of square feet in a room. Filling it with typical large couches and other pieces makes the living space smaller and more crowded.
Walk into a Japandi designed space, and here is what you'll notice. It's uncluttered and model-home clean. The area has a sense of openness and a feeling that you have room to breathe. The design preference is light natural wood floors such as naturally finished white oak. Area rugs will complement the wall colors, usually a light earth-tone like cream or lamb's wool.
The walls tend to be white or another pale color that reflects the light from large windows. The ceiling may also be wood in a natural color.
Japandi furniture will be of high-quality craftsmanship, including accent tables and lamps. They will have a low profile and are made with light-colored wood. The upholstery will match the light colors in grey or beige.
It is a décor trend because people like the way it opens up smaller rooms. Japandi creates an oasis of calmness in any home.
Another style quite similar to Japandi favors the clean, straight lines in architecture and furniture. It's called organic modern style.
Finnish designer Hugo Alvar Henrik Aalto receives the credit for this style. He and his wife Aino Aalto would design a building and the furnishings together as one component. Many designers consider Hugo's furniture to be a model of modern Scandinavian design.
Stephanie Thornton Plymale, president of the Heritage School of Interior Design, says, "While organic modern style is a nod to Scandinavian minimalism, it also borrows from mid-century modern and bohemian design. It creates functional spaces that are warm, natural, and effortlessly sophisticated."
Organic modern also uses a subdued color palette in white, gray, or beige shades. The furniture has clean lines, no bulky stuff. Rugs will be natural materials such as sheepskin, cowhide, wool, or sisal.
Both organic modern and Japandi floors will be natural oak or reclaimed wood in a natural shade.
It's hard to tell the difference between Japandi and organic modern. Organic strictly adheres to airy and light color combinations. It uses primarily western-style furniture, whereas Japandi is a blend of Scandinavian and Japanese design. Both use a lot of whites, creams, beiges, pale grays, and wood.
The Scandinavian or "Scandi" look was popular in the 1950s. It originated in the five Nordic countries of Denmark, Finland, Norway, Sweden, and Iceland.
The neutral color palette in modern Scandinavian homes will be primarily grays and whites with black accents. Scandinavian interior designs use natural materials like leather, sheepskin along with knits and crochets. It's also about comfort. The sleek, minimal design of Scandinavian furniture pieces is as comfortable as it is beautiful.
Now that you have an idea about each of these designs, are you ready to go with Japandi? Let's set up your home.
Here are a few design ideas from the Japandi playbook that will guide you to a beautiful finish.
Neutral colors in off-white, grayish or beige tones provide a sense of calm. The neutral base offers a blank canvas to highlight accent pieces or colors.
One technique is to layer different shades of color to add depth, contrast, and interest. The neutral palette will bring out the warmth of wood floors, chairs, ceilings, and moldings.
Both Scandi and Japanese styles rely on wood's unique colors and textures to liven up the room. When selecting tables, chairs, and accent pieces, look to lighter woods. Traditional Scandinavian woods are ash, beech, and pine. Japanese wood furniture primarily comes from the light, fine-grained wood of Japanese cypress or cedar trees.
You can also use dark woods to balance the light colors abundant elsewhere in the room. Mix up the light tones with dark wood accents, such as Japanese accent pieces with shiny, black lacquered finishes.
Light wood floors are part of this style. They reflect the natural light and help darker accent pieces stand out. However, you can choose a darker wood floor. Adding light-colored rugs, drapes, upholstery, and furniture will give a good contrast.
Most Japandi styles that we have seen incorporate white oak floors due to their durability, color, and textures. We recommend choosing a natural or light stain. Another option is a white or grey-washed wood floor. Herringbone patterned floors work well to add another texture to the room.
Textured rugs made from natural fibers, cowhide, or sheepskin add to the cozy warmth of Japandi floors.
One of the signature elements of Japandi furniture design is low profile. That means wing-back chairs or overstuffed leather couches highlighted with hundreds of brass tacks are out of the picture.
Every piece of furniture is classy with a sleek design, smooth wooden legs, or curved shape armrests. Beds should have a smaller frame elevated off the floor. Every piece of furniture should be comfortable, functional and allow light and air to flow freely in the room.
No Japandi space is complete without living plants. Japanese architecture is famous for incorporating Zen gardens to create a relaxing, healing atmosphere outside. Bring some garden plants indoors for a splash of natural color and a breath of fresh oxygen.
House plants add color without adding clutter. Go all out and add some Bonsai trees or get something that's low maintenance from your local nursery.
The Japandi style keeps non-essential items to a minimum. However, the space isn't going to be boring. Like a museum, only display the best of your collections and put everything else away.
The design goal is to have a clean open space. Japandi furniture adds to the room's texture, such as a cane chair, a jute rug, and a hand-finished wooden end table. Each piece is functional yet contributes to the overall design.
If you have difficulty reducing the trinkets and knick-knacks, try using natural wood boxes and baskets to hold them. Another way to reduce clutter is to add a well-crafted wooden folding screen. It can add ambiance while hiding all your excess stuff.
Scandi design is synonymous with the word "Hygge." It's a Danish and Norwegian word that refers to a mood of coziness, comfortable living, wellness, and contentment.
The Japanese express this feeling as "wabi-sabi." It acknowledges three realities that nothing lasts, nothing is finished, and nothing is perfect.
The fusion of these two philosophies is the essence of Japandi design. To bring this sophisticated and relaxing design to your home, try some of these techniques:
The beauty of the Japandi style is that it works for any sized room.
Although Japandi may seem like a trending style, this design has been around for over a century. Comfort and simplicity never go out of style. Start the new look with a natural oak floor. The golden color of natural white oak or grey-washed wood flooring is the essence of a Japandi Interior.
It's OK to use a darker floor as they make an excellent counterpoint to all the neutral colors in the room. Consider mixing light wood chairs with a dark table or vice-versa.
To see which floor looks best in your space, compare five styles of solid oak flooring here.
]]>Have you ever entered a home or apartment that looked like a carnival funhouse? You walk in, and everything is mismatched. Three of the four walls were different vibrant colors, none of the furniture colors matched, and the accent pieces looked like a bomb went off in a paint store.
Is it a comfortable space, or does it leave you feeling edgy and wanting to run away? Too many colors are distracting, overwhelming, and uninviting. It makes the room look cluttered.
Luckily, there is an easy fix for even the most decoratively challenged among us. It’s a simple rule of thumb to use when redecorating any room in your home or office. It’s called the 60-30-10 rule of color, and it’s an excellent foundation for designing with color.
Let’s discover how this simple concept can help you tie a room together, including the floor.
60-30-10 refers to the percentages of a given color used to decorate a living space. To simplify color choices, you’ll use 60% of a dominant or primary color, 30% a secondary color, and 10% accent shade or color. The idea is to show you how to balance color in a room using your favorite colors. You can experiment with the entire color palette but choose colors that mingle and complement one another.
The majority of the room’s color, 60%, will include the walls, larger pieces of furniture like a sofa or bed, and an area rug. One way to visualize is to walk into a room and squint your eyes. What is the predominant color or shade that you recognize? That will be the primary color.
The secondary color, or 30%, will be things like smaller furniture, bedding, drapes, or an accent wall. It should be a contrasting color or shade. Make it a bit bold but don’t take away from the primary color.
The remaining 10% of your color scheme is the fun part. You can put up wall art, paint doors, throw pillows, candles, and all the little goodies to create splashes of color all over the room.
“For a house to be successful, the objects in it must communicate with one another, respond and balance one another.” – Andrée Putman, a French interior & product designer |
When considering matching or harmonizing colors in your home, consider the hardwood floor as part of your color scheme. Floors and walls must complement each other as they are the largest areas in any room. Usually, your wall color should coordinate with the floor. For example, regardless of the shade, if you have a hardwood floor, use a neutral shade of paint to match. It’s part of the 60%.
Think of the primary color as a blank canvas for the rest of your artistic design. Most of the walls, large pieces, and the sofa will most likely be in the same color range.
The secondary color is half as much as the primary. Spread the 30% color theme throughout the room or an accent wall. Make it a color or shade not too far from the primary color.
A natural finished oak hardwood floor can also be a complementary color for either the primary or secondary. Unfinished oak hardwood floors accept stains well. You can bleach them almost white or stain them to add contrast.
Use the principles of color design and let your creative juices flow with the remaining 10% of your color. What’s fun is you can change the color to fit your mood or the change of season. It keeps your room looking fresh without major changes or breaking the bank.
The 60-30-10 rule is a guideline, not a federal law. Have fun and play around, especially with the accent colors. If you need more than three colors to match your personality (or your client’s), add another. In other words, make your color scheme 110% - 60%, 30%, 10% plus another 10%. It’s OK to add a fourth color, as long as it enhances the other three.
Before you start breaking the rules, make sure you understand the colors and how to use them. There are two categories, warm and cool.
Home design magazines and designers are always talking about warm and cool colors. Understanding what they are and how to use them will help you choose the right colors for your home decor project.
Warm Colors
Do you remember the seven primary colors of the spectrum from your high school science class? Shining a white light through a prism turns it into a rainbow. You remembered the color and wavelengths using the name... ROY G BIV. It stood for Red, Orange, Yellow, Green, Blue, Indigo, and Violet.
Warm colors are the “ROY” side of the spectrum and remind you of a warm fireplace or romantic sunset. Use orange, red, yellow, and all the combinations. Some designers consider terra-cotta or brown as warm colors, too, making a large room feel cozier.
Cool Colors
Cool colors are on the G BIV side of the spectrum. Blue, green, and light purple make you think of snow, ice, and cool, deep ocean waters. Use lighter shades of cool colors to make small rooms look larger and more spacious. Typically, bedrooms are a great place for soothing, calming, cool colors.
Now that you’ve been refreshed on the color spectrum, you can devise a custom paint decorating formula just for you. You have 100%, why not go with 50-20-20-10? Or, how about 30-30-20-20? It’s up to you.
Before you go out and load up on paint, download an app and experiment with the colors you envision. Do they match or clash? It’s OK to change the proportions. Just keep everything in balance.
Six of the biggest paint and stain manufacturers have apps where you can visualize exact colors in a sample room or upload a photo of your room. In all, you can find eleven color choosing apps in this article. Try one or two and get just the right colors before you buy paint. The best part is that you’ll have the exact code number for that color and manufacturer.
Another way to visualize accent color and pieces is the IKEA Place virtual reality app. Place different furniture, rugs, and accessories around your room using the mobile app. Instantly visualize how it will look.
If you like your design to be understated but elegant, then a monochromatic color scheme is the right choice for you. Although monochromatic means only one color, you can use different shades for a classy, modern look.
Typically, a monochromatic look will use a neutral color in the whites and beiges. However, pastel colors can also work well for a relaxing atmosphere.
And then there is the latest color creation for interior design... Greige.
If you haven’t heard of “Griege,” you will. It probably started as an accident, but it’s become quite popular. Gray + Beige = Griege. It’s neutral, goes with any other color, and you can safely use it for your primary color.
One hardwood flooring style that goes well with this is a Greywash, 5-inch, solid oak hardwood floor. It’s the perfect blank canvas for adding feature furniture and rugs with any color or pattern.
Greige makes a perfect second or third color option to more colorful paint as well.
Don’t get stuck on the 60-30-10 color rule. Spread your color wings and fly using these tips to help you achieve a sophisticated and professional design look.
It’s a quick way to design a tasteful, modern space using the easy-to-follow 60-30-10 color rule.
We don’t want to minimize the effect the hardwood floor has on your design color scheme. Natural, white oak hardwood floor works well with any warm color scheme. It has golden honey tones, and the prominent grain pattern works well with furniture made with leather, wood, and warm-colored fabrics.
As we mentioned, Easiklip carries a Greywashed white oak that accents all neutral and cool colors. You can check out their options and order a sample pack here. You’ll find a color to match any home design, modern, eclectic, or traditional.
]]>
The power of a beautiful hardwood floor in any home can’t be overstated. Besides its beauty, it affects your feeling, space, lifestyle, and your home’s value. Did you know that it may also attract good vibes into your home? Feng shui is the ancient Chinese practice of arranging and organizing a room, a house, and even an entire office building. The purpose is to channel the natural flow of energy, called Qi (pronounced Chi).
Those familiar with feng shui understand incorporating some of its practical ideas when planning for a wood floor can make a big difference. In feng shui, wood can help you achieve an inviting, calm, serene, and peaceful atmosphere.
Our blog this time invites you to keep an open mind to the ideals of feng shui and how a hardwood floor can improve the flow and positive energy of your space.
Feng and Shui in Chinese mean “wind” and “water.” This combination of science and art originated in China sometime between 2,000 and 6,000 years ago.
The philosophy of feng shui is fundamental in new construction, especially in Asia. It’s a practice of orienting the building and arranging the living spaces to balance the natural world. The goal is to harness positive energy forces and to establish harmony between people and their environment.
True believers feel that following the rules of feng shui makes us happier, peaceful, and more successful in our homes or offices. Who doesn’t want more of that?
The word “Bagua” in Chinese means “eight areas.” A Bagua is the energy map which feng shui practitioners superimpose on a home’s floor plan. It highlights eight types of energy relating to different life circumstances plus a ninth area covering overall health and wellbeing.
These areas are:
Each area has unique characteristics. For example, wealth uses the color purple, the number 5, rectangular and columnar shapes, and its element is wood.
Presumably, a rectangular wood floor is an excellent start to attracting wealth into your home.
There are also 5 elements that influence Bagua areas.
Without getting too deep into feng shui theory, we need to mention the five elements of wood, fire, earth, water, and metal.
These elements stem from the Taoist beliefs that the five elements interconnect in life. They work together to create a harmonious system. The basis of feng shui is to balance these five elements in your home and your living areas.
Feng shui is all about bringing positive energy into the home. Everything affects the room’s energy, including the flooring materials, the color of the room, positioning of the furniture, and other features. Here are some of the essential elements of Feng shui and how to use them.
The type of material and its colors are essential elements for the room and the home. If you love a beautiful hardwood floor, there’s good news. The preferred flooring material for Feng shui is wood. Hardwood, like oak, will bring positive energy to your health and wellbeing.
Softwoods like pine are supposed to create a relaxing environment. Think about how soothing it is to stay in a rustic cabin in the woods made with knotty pine. Pine is the wood used to make saunas. So, there is something good about having wood under your feet or surrounding you.
Another wood floor option is to use exotic wood finished with natural oil. Choose tung oil for a natural wood floor finish. You can read more in this article, “How To Finish Your Wood Floor with Tung Oil.”
The wood planks can direct the flow of Qi energy, like traffic on a highway. Be mindful of the direction of the boards. For example, you wouldn’t want to lay boards across a narrow hallway because they act as a barrier to the flow of Qi. Instead, follow the length of the hall. If you wish to slow down the flow of Qi in the room, lay the planks diagonally.
Color is significant in feng shui. Since floors are considered an Earth element, the colors should be earth tones like brown, tan, green, and gray. These are calming colors that promote harmony and health.
Choose colors for the walls and ceilings that complement the floor color. Feng shui dictates that using deeper or darker shades might dampen the energy of the room. However, adding green, live plants can boost the energy in the room and enhance the wood floor’s beauty.
Feng shui dictates that it’s better to select neutral, earthy, and natural colors. Since the concept of feng shui is to enhance the connection of people with their surroundings, it’s best to leave the hardwood floors as close to their natural color as possible.
Shapes are another essential design aspect of the feng shui process. Shapes and layouts can either strengthen or block the flow of energy. Sometimes, the wrong shapes can create dead zones or stagnant areas inside the home.
Regarding floor patterns, feng shui suggests making the floors less noticeable. The idea is not to make them so obvious that it draws attention and energy down towards the floor. Drawing energy downward relates to being down and out, a negative feeling.
For proper feng shui, avoid highly visual patterns such as herringbone, stripes, or checkerboards. Also, you should avoid starburst and diamond shapes. According to feng shui philosophy, a diamond is a checkerboard inverted to a 45°angle. The points represent “poison arrows” that point toward every door, blocking the energy. For the same reason, avoid starburst patterns.
One shape that does work is the hexagon because it has no sharp arrow points. With a bit of understanding and good design practices, it is possible to have a beautiful floor that adheres to feng shui principles.
A feng shui floor design uses the same material throughout the house. Having different flooring for every room disrupts the flow of Qi and reduces the positive energy. If you insist on having other flooring, try and change only the kitchen and bathrooms.
The way the boards lie will dictate the direction of energy flow. Whether you want to adhere to feng shui or not, laying boards across a hallway’s width doesn’t look good. It makes it look narrower and shorter than it is already.
One possible exception is if the hallway leads directly to a window or door. Laying the boards across the width slows down Qi and prevents it from exiting the home.
We talked about Bagua and the eight zones above. Here are some design tips for each of the zones.
East-Facing Rooms
To boost the energy of feng shui in east rooms, use wood floors and furniture. Avoid using things made of metal. Favorable shapes for east rooms are rectangular, wavy, square, and natural shapes, such as stones.
Southeast Rooms
Decorations for this room should have natural crystals, wood, rugs, and earthenware. Add shapes for southeast rooms like wavy, flowing, square, and rectangular.
South Facing Rooms
For these rooms, use wooden furniture and all-natural fibers like sisal, linen, and jute. Accessories and accent piece shapes for southern rooms are pyramids, triangles, stars, and diamonds.
Southwest Rooms
Include rock crystals, candles, and earthenware., but leave out mirror-like surfaces or wooden furniture. Use triangles, diamonds, stars, and pyramids as part of your decorations.
West Rooms
Go with things made of rock crystal, metal, all earthenware, and glass. The best shapes are round and square.
Northwest Rooms
Look for earthenware (ceramics, clay, pottery, etc.), glass, metal, and natural crystals when furnishing a northwest room. The three shapes are Oval, round, and square.
North Rooms
For the best Qi flow in this room, decorate with shiny surfaces like glass or metal. Feng shui shapes include wavy, round and oval.
Northeast Rooms
Furnishings for these rooms are the same as for Northwest rooms. Use candles, rock crystals, and all earthenware. For shapes, go for pyramids, stars, diamonds, triangles, and squares.
There is no hard rule for flooring, but solid wood ticks all the boxes for a healthier and more organized home. Wood is one of the five essential elements that enhance growth and creativity. Installing wood floors throughout your home adds continuity from room to room.
Although you can use other flooring materials such as tile or stone, wood is more relaxing. Practically speaking, homebuyers prefer wood over other materials. Select a matte finish instead of a high-gloss floor. Paint the ceiling a bright color with plenty of light to help energize the room. The theory is that a high-gloss floor reflects light. People tend to keep their heads down looking at the floor, which reduces their energy.
Feng shui is flexible when it comes to the type of wood for floors. You can’t go wrong with oak because It’s durable, economical, and looks beautiful in any decor. For the best energy, use the same wood and color throughout the home. Having light floors in one room and dark in the next blocks the flow of energy.
Oak with a natural, matte finish offers the balance of light you want in every room. Oak floors are practical too. They hold up to kids, pets, spills, and traffic for generations.
If you plan to install solid oak floors, check out Easiklip’s line of solid oak floors. They offer four light colors, Natural, Rustic White Bleach, Greywash, and Rustic smoke. They match well with light-colored walls to draw positive energy into any room.
]]>If you want to keep hardwood floors flat all year round, what is the most crucial element? Here’s a hint. It’s hidden behind the baseboard along each wall. What is it? It is the expansion gap between the hardwood floor and the wall.
There are many rookie mistakes when installing a hardwood floor, but the biggest one is putting the hardwood floor boards up tight against walls and other vertical surfaces. Why? Because hardwood floor expands and contracts with the seasons depending on the humidity in the room. As it absorbs humidity from both the air and the sub-floor, the hardwood flooring expands and needs to move. What happens next depends on the hardwood floor’s installation.
Let’s take off that baseboard and uncover the importance of a hardwood floor expansion gap, why you need one, and the consequences if you don’t plan for it.
Bear in mind that any hardwood floor, especially a floating hardwood floor, moves all the time based on the room’s humidity. A solid hardwood floor expansion gap allows for this movement. When installing a hardwood floor, it is critical to leave a gap around the room’s perimeter and anywhere the hardwood flooring meets a vertical surface. That includes all doorways, fireplaces, columns, and around any pipework.
As we mentioned, you need to keep space around every vertical object. The gap is critical for a solid hardwood floor to lie flat throughout the various seasons and humidity changes. If the hardwood planks have no space to expand, they can start to lift or crack.
For example, for red oak hardwood flooring, expect it to move 1/16” for every foot across the grain. That means, in a 16 ft wide by 20 ft long room, you’ll need a 1-inch expansion gap, 1/2inch on each side.
The recommended expansion gap for the engineered hardwood floor is 8mm (5/16 in). For hardwood or bamboo flooring, leave a gap between 10 to 15 mm (3/8 to 5/8 in).
To see more details, view this video.
As we’ve mentioned, wood reacts to changing relative humidity (RH) and temperature levels daily. It needs to expand or contract evenly across the entire hardwood floor area. Wooden floor expansion problems happen when the hardwood floor gets obstructed, it can buckle, crown, lift and cause squeaks. Here are five common mistakes that cause these issues.
Hindering the hardwood floor’s movement for any reason means that it will build pressure in the form of one or more raised joints.
Hardwood floors move naturally as the seasons change. Solid Hardwood has hygroscopic properties. Like a sponge, as it absorbs moisture, it expands, and as it dries, it contracts.
Wider boards expand and contract more than narrower ones making the gaps more noticeable in hardwood floors with wide planks. A hardwood floorboard expands and contracts much more across its width than its length.
Image Courtesy of Popular Woodworking |
The chart below shows a numeric value for the dimensional change in a board depending on the species. F/S stands for Flat Sawn, and Q/S is Quarter Sawn.
Image Courtesy of Popular Woodworking |
The higher the number, the greater the movement. There is no tremendous difference between species, so no matter what type of hardwood it is, a 1/2 inch expansion gap around the room should suffice for any solid hardwood floor.
Does Engineered Wood Flooring Expand?
Hardwood Floors Magazine and Purdue University experimented using a sample of solid oak and engineered wood flooring. You can read the details of the experiment in the article, Expansion of Solid and Engineered Rift White Oak Flooring with Increase in Moisture Content.
The experiment included two separate tests using a sample of 4-inch solid rift-cut white oak hardwood flooring and another sample of 4-inch rift-cut engineered hardwood flooring with a 4-mil sawn wear layer and an 11-ply platform. The samples were left outside but covered to react naturally to the temperature and humidity.
The wood expansion and contraction chart below shows the results.
|
The results showed that engineered wood flooring expanded about three times less than solid oak. The oak wood flooring sample expanded in width 0.064 inches or about 1/16 of an inch (about 1.6%) when the humidity changed from 7.4 percent to 14.8 percent moisture content.
However, the engineered wood flooring expanded just 0.02 inches or 0.5%. The cross laminates in the base material accounted for the lower wood flooring expansion and contraction. If you plan to use solid hardwood, it is critical to include expansion gaps and proper humidity control in the rooms for best performance.
The board’s width has a lot to do with movement. An 8-inch wide plain sawn plank of white oak flooring shrinks twice as much as a 4-inch board of the same cut and species.
This promotional video for bamboo wood floors provides good visualization and strategy for using expansion gaps.
For most rooms, add an expansion gap around the perimeter of 10mm to 15mm or 3/8 in. to 1/2 in. Use spacers around the wall cut to the desired width.
Homeowners and DIYers ask, “Will the expansion gap make my hardwood floor look unattractive?” The gap will preserve the hardwood floor’s integrity and its beauty by allowing it to move freely.
No one should ever see an expansion gap after installing the baseboard molding. The baseboard or skirting will cover any gaps between the floor and the wall for a tight finished look. Other gap-covering accessories include beading or shoe molding, T-moldings, vent covers, and pipe covers.
Baseboard moldings hide the expansion gap and protect the wall from getting kicked with feet, scratched with toys, or bumped with the vacuum cleaner.
Solid hardwood floor expands more than an engineered wood floor. However, when either wood floor is a floating floor, they expand across the entire room as one unit. A floating hardwood floor must move freely over the subfloor. When installing any molding or skirting, never attach it to the wood floor. Nail or glue it to the wall so that the floor is free to slide underneath it.
There are other ways a hardwood floating floor can get pinned down. Did you know that heavy furniture and cabinets can weigh down the floor, preventing it from moving? If a heavy bookcase or island sits atop one end of the floor, the entire hardwood floor will only have one direction to expand and contract. The expansion gap may not be wide enough on one side to handle the additional movement and show a gap or create a crowning situation.
Avoid setting furniture or cabinets over 500 pounds directly on top of the floor. Instead, install those items first and build the hardwood floor with a gap around them. To see the issues and how to avoid them, watch “Understanding Hardwood Flooring Gaps.” It’s a good overview of the topics we discussed.
Are you having issues with the wood floorboards lifting or crowning? Chances are there is not enough expansion gap, or it’s pinned down somewhere. The fastest way to check is to remove the baseboard. You can tell if the hardwood floor has enough gap or if it’s pinned down.
When it comes time to install a solid oak hardwood floating floor, Check out Easiklip, it’s the easiest floating floor to install for DIYers and pros alike. Follow the advice here and leave an expansion gap around the room to keep your hardwood floor flat and beautiful for a lifetime.
Is it time to replace the old hardwood flooring in your home? Do you have a sloping hardwood floor or uneven spots on the floor right now?
When remodeling an older home, it's common to find squeaky hardwood floors that are uneven and not level. Ideally, you want a subfloor that's both flat and level. In some homes, it's not possible to get hardwood the floor completely level, and that's OK if it is "in-plane" or flat. A hardwood floor can be level from one wall to the other, but it's not flat if there are dips or high spots in the middle.
When any rigid hardwood flooring covers a dip or hump, it will most likely come apart and cause gaps. One plank can rise above the next one creating a "lip" and tripping hazard.
Easiklip solid oak hardwood floors are the easiest hardwood floor to install. But before you do, you must check if the subfloor is flat and level. A stable and level subfloor is critical to having a beautiful, straight, and squeak-free floor. In this post we will share some builder's tricks to level a subfloor depending on the cause and condition.
Wood shims are the remedy to fix most hardwood floors that are out-of-level or out-of-plane.
Have you heard of the "Marble Method" to determine if the hardwood floor is out-of-plane? It's a fool-proof method and works by dropping a few marbles around the hardwood floor to see where they roll. You can quickly tell if you have a slope or if there are high and low spots (called "heaves" and "dips" in the flooring trade) within the flooring area.
The other method is to use a 6 or 8-foot carpenter's level to check the hardwood floor's slope. If you see a gap under the level, that's a dip. If the level rocks slightly, that means there is a heave under part of it. You'll see a slight gap between the level and the floor at the high point.
Before you can fix the level problem, you need to find the root cause of it. Typically, age and settling cause an unlevel floor. Other causes of an uneven floor include:
To find the exact cause, you may need to get under the hardwood floor if there is a crawlspace or basement. Otherwise, you'll need to take up part of the subfloor to examine the structure below.
If you find insect damage, cracks in the foundation, or rotted joists, call in an expert to repair them. It's critical to fix these issues before attempting to level the subfloor.
Occasionally, shoddy construction or a weak foundation can be the cause of an unlevel floor. Before there were uniform building codes, some builders saved money using undersized lumber or spaced the joists too far apart when building the floor joist system. These shortcuts resulted in weak, sagging, or bouncy floors.
Especially in older homes, the foundation footings can sink, or the basement walls can crack and shift due to soil and water pressure. It's best to have a specialist inspect the foundation if you think there may be a problem.
Once you've uncovered where the problem areas are on the floor, here are some remedies you can do yourself.
If you performed the marble test and they rolled away from a certain point, it probably means that a floor joist is bowed up. Bowing creates a unlevel area on the floor.
Fixing this is not too difficult. It requires removing the subfloor over the bowed joist and then planing or shaving down the high part until it's level across the top. Mark it by popping a chalk line along the top edge of the bowed joist from end to end. The chalk will highlight the high point. Then you can use a plane or sander to remove the excess wood.
Most modern wood subfloors consist of plywood or OSB (Oriented Strand Board). They are sturdy building products unless water has a chance to soak in. Then they expand and delaminate, causing heaves to form.
The first step is to eliminate any water issues, such as leaky plumbing. Next, you'll need to replace any warped or delaminated subflooring with new material.
You can apply a cement-based self-leveling floor compound for sloping or multiple dips in the floor. The liquid slurry settles into low spots or the low side, creating a level surface.
Because of the weight and the liquid, it's a technique best used on cement floors on the ground floor or basement. Installing hardwood over an unlevel concrete floor requires a leveling compound. If you have a concrete floor, you can learn more in our blog, "How To Level An Unleveled Floor With Floor Leveling Compound & More."
For minor floor leveling, using wood floor shims is the easiest way to level floors.
If you are not familiar with wood floor shims, they are thin, tapered wedges that look like doorstops. Made of wood or plastic, builders use them to make slight adjustments to doors, windows, and floors to make them level.
Flooring contractors use wood floor shims by wedging them between a subfloor and floating floor or the joist and subfloor to make them level and flat.
Shimming a hardwood floor is a common practice. Anytime a wood floor meets or transitions to another type of floor such as carpeted floor or ceramic tile floors, like tile, there is a difference in the two thicknesses. Installers must shim the hardwood floor to match the height of the tile floor to make it look good and avoid a tripping hazard. Shimming can create a seamless transition and avoid a threshold in the middle of a room.
For example, Easiklip is a 3/4" solid oak floor. If you plan to install an Easiklip floor next to the tile, it may be lower than the tile, and you may need to add shims. This article will help you, "Floor Transition Strips & All Your Options for Wood Floor Transitions."
Leveling a wood subfloor or hardwood floor depends on the extent of the problem. If the entire floor slants to one side, you'll need to cut long shims from 2 x 4s. They attach to the original floor to support a new subfloor that creates a level surface across the room. This video shows one way to cut long shims for flooring with a circular saw.
Another method of leveling a wood subfloor with swells or many dips is to make plywood flooring shims under the new subfloor. This video shows you "How to level sagging floor in an old house using shims."
If the subfloor is in reasonably good shape but has dips in several areas, you can use wood veneer or door skins to level the areas thoroughly. This video demonstrates the technique.
Before installing an Easiklip floating floor, it's better to ensure that the sub-floor is flat and level. As you install the oak floorboards, keep checking to ensure they stay level. You can install thin hardwood floor shims under individual boards to make them tight. It's best to staple or glue the shim to the subfloor to keep it from moving or squeaking in the future.
Installing an Easiklip floor on a flat, level subfloor will make it look like a professional installation. It will last for decades. Learn more about how to install Easiklip solid oak flooring here.
Introducing Easiklip Floating Solid Hardwood Flooring, the floor that installs using clips instead of glue, nails or screws. You can even take it with you if you move!
Easiklip flooring allows you, the do-it-yourselfer, to bring the warmth and beauty of real solid hardwood floors into your home or office. The simple design means you can install your floor in hours instead of days.
]]>
A fireplace is almost a sacred place in the homes that have them. It’s where everyone gathers on cold nights. It’s usually the focal point of any room, no matter what time of year it is. The area where the hardwood floor meets the hearth must be handled with care. Not just for safety but the overall beauty of the room.
Surrounding the fireplace with a floating hardwood floor is not hard to do. However, there are some safety and installation tips you need to know before beginning. This article will provide you with the details of how to install hardwood flooring planks around a fireplace hearth.
I think people who come into my home feel comfortable and welcome, and loved. And the biggest thing in my living room, the fireplace, is in and of itself an expression of love. |
Any wood flooring close to a fireplace has the potential to get burned from sparks and embers. Typically, wood-burning fireplaces have more potential to have sparks than a gas-log fireplace. To minimize the hazard, always use a metal screen to prevent popping embers from flying out and landing on the hardwood floor. We will get into more safety tips in a moment.
The primary protection for hardwood floors from fire damage is distance, and that’s the purpose of a hearth extension. It’s the flat area that extends out from the front of the fireplace and meets the hardwood flooring. It’s always a non-combustible material such as concrete, tile, or stone.
Building codes consider a vented gas fireplace as an appliance, not a real fireplace. You can install hardwood flooring right up to the base. However, follow the manufacturer’s installation requirements.
This building inspection article, “Fireplace hearth extension rules,” shows proper and improper hearth extensions.
Just to be clear on some definitions, a hearth is the fireplace floor. It’s where you build a fire. The firebox surrounds it with fireproof bricks, and the smoke rises out of the chimney. The tile or stone you see in front of fireplaces is the hearth extension. We use the generic term fireplace to describe the entire unit.
The UBC (Uniform Building Code) states that a hearth extension must extend at least 16 inches in the front and 8 inches beyond each side of the fireplace opening. For oversized fireplaces with openings of 6 sq. ft. or more, the extension must be a minimum of 20 inches in front and 12 inches beyond each side.
Easiklip floors are solid ¾-inch white oak hardwood flooring that clips together. There are no screws, glue, or nails required, making it the most effortless solid hardwood floor to install. It floats on top of the subfloor. If you have a fireplace, there are a few ways to install the hardwood flooring around it for a seamless, professional look.
Laying Easiklip hardwood flooring is simple. Layout the boards on the subfloor and fit them together using the aluminum clips provided. When it comes to fitting the hardwood flooring planks around the fireplace, you can use a few techniques. Plan well before you cut anything, especially brick or stone.
Pro Tip: Start laying the hardwood flooring from the fireplace and work outward from there.
Typically, there are four popular methods for installing hardwood flooring around a fireplace. They are undercutting, using a contour, molding, and the picture frame method.
If you are retrofitting a new hardwood floor to an existing fireplace, you may need to undercut the brick or stone and slide the hardwood flooring underneath. You don’t want to butt the wood flooring up against the hearth and leave an ugly gap.
If it’s new construction, just communicate the hardwood flooring thickness to the fireplace builder, so they can leave a gap large enough for the flooring to slide underneath. Before you start, gather these tools:
You may also need a jigsaw or a miter saw, depending on the type of hardwood flooring installation method.
Undercutting the stone is more effort, but it will give you a seamless look without caulk or molding.
Rent an undercut saw and purchase a diamond-tipped masonry blade. Hardwood flooring installers use an undercut saw to cut the bottom of door jambs to install hardwood floors. It’s the same procedure except you are cutting stone.
Set the height of the blade to match the planks and start cutting. You should wear a mask and have someone hold a shop vacuum hose close to the blade to mitigate the stone dust. When finished, sweep out any chips, and the boards should slide right in.
To see a demonstration of how to undercut a stone fireplace for hardwood flooring, watch this video.
Undercutting a brick hearth is the same technique as cutting stone above. Here is a video, “undercut brick for wood flooring,” demonstrating the undercut saw and shop vac combination. He uses a chisel to break out the remaining brick then tests the cut all along the entire perimeter using a scrap piece of hardwood flooring to check that it fits.
Much easier than undercutting stone, the contour method leaves a gap that you must fill with caulk. This video demonstrates the technique. If you are not a perfectionist and don’t mind a caulk line around the stone, it’s a less messy and easier way to solve the problem.
Place a new wood floorboard next to the stone, then press the contour guide into the rock and trace the outline onto the plank. Work your way down until you have scribed one board. Cut and fit the board. Repeat this process until you have cut all the hardwood floorboards to fit around the hearth.
Alternatively, you can use a compass to trace the contour of the stones onto the plank. Use either a jigsaw or bandsaw to cut along the scribe mark. Install the boards, then fill the gap with flexible sanded grout or caulk. Try to match the filler to the color of the grout or stone.
Hardwood Floorboards typically expand and contract width-wise rather than lengthwise. At Easiklip, we recommend orienting the hardwood flooring so the butt ends of the boards touch the hearth rather than the long edge. It also simplifies the scribing method.
Molding is the easiest solution to hide the expansion gaps, adopted mainly by inexperienced installers, but it’s not a professional look. It should be the last choice for finishing a hardwood floor in front of a fireplace. Use 1/4-round shoe molding and glue or staple it into place.
If the fireplace has a hearth extension or rectangular slab at floor level, the framing method will look great. It creates a clean, finished look. Depending on the type of hearth material, you may need to use either the undercutting or contour methods described above to make a seamless transition.
Build a picture frame around the hearth using two widths of hardwood floorboards in front and along the sides. Measure and miter tight 90° corners. You must saw off the tongue on the left side of the frame. You can glue and face nail the frame to the subfloor, then run the rest of the floor up against it.
This video shows the steps of installing hardwood flooring around a stone fireplace. Unfortunately, the man in the video didn’t take our advice of starting at the fireplace and working outwards. As you’ll see, he needed a second cut.
Now that you’ve installed beautiful hardwood flooring around a fireplace, here are some easy tips to prevent sparks or heat from damaging the hardwood floor.
If for some reason, the existing fireplace does not have a hearth extension, you can purchase or build one relatively quickly. It must be a minimum of 2 inches thick and made from non-combustible material like concrete. Most building codes require a hearth extension as a buffer between the fireplace and the combustible hardwood floor.
There are limitless varieties of fireplace covers, from glass doors to wire mesh curtains. Always have them in place whenever you are not tending to the fire.
Sometimes people like to burn up loads of paper like Christmas wrapping. Prolonged paper burning can make the fireplace or woodstove too hot and can damage nearby hardwood flooring.
Also, avoid burning softwoods like pine. It tends to pop and throw sparks a long way.
Fireplaces and wood stoves can withstand heat, but building roaring fires for long periods can weaken the structure, and the excess heat can damage the hardwood floors. Burn only what you need to add warmth or ambiance to your home.
A fire-resistant hearth pad or fireplace rug protects the wood flooring directly in front of the hearth from burning embers. Never use an ordinary carpet because an ember can ignite it, and you’ll immediately have a dangerous problem on your hands. Be sure the rug is flame resistant.
Follow these precautions, and your hardwood flooring in front of a fireplace will stay safe and burn mark-free.
Hardwood flooring around a stone fireplace makes the room look classy. For hearths that sit above the wood flooring, use the technique of undercutting stone or brick. It provides the best look and will fit in seamlessly. For hearth extensions that are almost flush, the picture frame method gives a classical appearance for any hardwood floor in front of a fireplace. If time and cost are more important than the finished look, you can use shoe molding to hide the opening between the wood flooring and the hearthstones, but only as a last resort.
Hardwood flooring transitions are a crucial element in any interior design. This simple detail will make your hardwood to stairs transition look fluid and finished. Furthermore, it will protect the stair edges. Inevitably, there are design questions about the color or patterns between the two.
Here is an example from a DIY forum. “I have golden pine floors on the main floor, but I’m installing red oak treads. I can’t match stains since oak has a reddish tint, and I cannot find that deep yellow-gold color of pine. What should I do?”
Or this one. “We are remodeling a condo and have a problem where the flooring meets the top of the steps. The best “look” would be to install the planks 90° to the top step. Unfortunately, that will make small lengths leading up to the step. Installing the boards parallel to the top of the step is easier but does not look as good. Is there a workaround?”
These are typical questions that people have creating a hardwood floor transition to stairways. We will reveal the answers to these adjoining floor issues in just a moment.
Although we focus on solutions using floating hardwood floors, the techniques also apply to engineered flooring.
You are familiar with hardwood floorings, but are you familiar with a floating floor? It refers to the installation method. For example, Easiklip floors are solid oak floating floors. To install them, you simply clip them together using patented aluminum clips. As the floor comes together plank by plank, the weight of the floor holds it in place. It “floats” on top of the sub-floor, unlike a permanent floor that uses nails, screws, or glue to attach it to the sub-floor.
Before installing a floating floor, or any floor for that matter, you must ensure that the subfloor is flat and level. Making a floor level can be tricky, but If you need advice on leveling a subfloor, check out our blog, “How to Use Wood Shims for Leveling a Wood Subfloor.”
At some point, your hardwood flooring and stairs will meet either at the bottom, the top, or both. Or maybe you’ve got one of those sunken living room situations. One homeowner asked how to lay the boards leading up to the stairs, parallel or perpendicular, for the best look.
A flooring professional answered this way...
“How long do you spend looking at the foot of the stairs? As long as it takes to put your foot on a step. For this situation, let’s be practical. If the space is 3ft x 3ft, that’s only 9 square feet. If the room is 900sf, that space is just 1%. Do you want to change 99% of your floor to make 1% of the space fit? The bottom line is, this is a transition space, and you do whatever you need to make it work.”
Plan the transition before you purchase or start to lay the floor. This way, you’ll have enough material, especially if you plan to use a herringbone or diagonal pattern that requires extra boards.
In other words, don’t stress too much over the look at the transition point. Concentrate on the larger floor.
The staircase is both a transition and a focal point. If both floor types are the same, either carpet or wood, then use the same material on the stair steps. If there are different materials on the two floors, try to coordinate one of the materials to match the other. The best choice is to make the stair treads from the same wood as the floor. The risers (planks that cover the vertical surface between stairs) can be a different color, but matching the treads creates a uniform look for the space.
The other design question posed in our introduction revolved around color. The person wanted to make pine and red oak look alike. There is no way to make two very different species look alike unless you cover them completely. The only two options to make them look alike, in this case, are to cover the stairs with a runner or paint them so the color and grain won’t show.
Installing a floating floor from Easiklip has many advantages.
Save Cost and Installation Time
An Easiklip floor comes pre-finished and ready to install. There is no need to sand and finish on-site, which can add a week to your project and hundreds of dollars in labor or tool rental.
Easiklip floors simply clip together using aluminum clips. You don’t need nail guns, compressors, glue, or screws. See why it’s the easiest solid oak flooring to install here.
Eco-friendly and Sustainable
Floating floors are environmentally friendly because they use less wood. Easiklip uses white oak, a tree species grown around the world.
Also, floating floors don’t use adhesives that can outgas fumes. Both the wood floor and the aluminum clips can be dismantled and used again in another location. This portability reduces the need to use more lumber or metals.
Added Comfort
One of the nice things about walking on a floating floor is they are comfortable under your feet. Unlike tile, concrete, or stone, these floors offer some flexibility due to the slight cushion of the underlayment between the hardwood floor and subfloor. Walking on a floating floor is better for your knees and back.
Remove and Relocate
A floating hardwood floor does not attach to the subfloor. It’s easy to pull up the planks and unclip them should you need to repair or replace one. You can also relocate the floor to another room or another home entirely.
Whether you want to convert the stairs from carpet to hardwood or you want to match the stair treads to the floor, here is what you’ll need to do.
If you use one plank to create the tread, you should sand it first. Whenever you cut the ends or back, set the table saw to a 5° angle. The angle makes a tight fit on the board’s face but leaves a slight gap behind it. The gap allows for the addition of adhesive and provides a squeak-free fit.
You need to measure and cut each tread and riser using a stair gauge. It provides the exact size and angle of each cut on both ends of the board. This video shows you how at the 2:15 minute mark.
Measure and cut each tread individually as most stair steps vary slightly. When measuring the depth of the tread, be sure to add a 1¼ inch overhang.
If you use Easiklip flooring, you’ll use stair nose molding to ensure the proper overhang.
This article won’t go into the entire stair-building process. For more details on assembling Easiklip flooring for stair treads, go to “How to Install Oak Stair Treads With Molding and Riser.”
Let’s examine a hardwood floor to stair transition at the top of the stairs. The easiest way is to run the floorboards parallel to the length of the stair treads. That’s usually the way most second-floor hallways run anyway and applies to the staircase landings as well.
There are two types of stairs molding you can use, overlap stair nose or flush mount. A flush mount nosing butts up tight against the adjacent floorboard, such that the flooring surface remains equal height.. It is the same height as the floor, making it flush. You may need to use shims to make both the floor and the molding flush and level. Tack or glue the shims in place before installing the molding.
You can attach the flush mount stair nose molding using adhesive or pre-drill holes and nail it to the subfloor. If possible, use the tongue and groove side of the Easiklip flooring to attach the nose molding. Watch How to Install Flush Stair Nosings to see how to do it.
Another option is to glue flush stair nosing to the subfloor and use T-molding to cover the floors expansion space between the floor and the nosing.
Overlap stair nose molding covers the required expansion space between the floor and the molding. It overlaps the adjacent board, sitting slightly higher than the board. For this reason, it’s not the best nosing for stairs as it can create a tripping hazard.
Start by gluing 1/4 to 1/8 inch shims under the floating floor. You don’t want the shim to extend under the gap. Position the molding to overlap the floor by 1/4 inch to 3/8 inch but leave an opening for the required natural expansion gap. Apply two 1/4-inch beads of construction adhesive to attach the molding to the subfloor. Additionally, you can pre-drill pilot holes and nail it in place.
When transitioning from the bottom floor to the staircase, you can cover the gap between the riser (the vertical surface between each stair) and floating floor using a piece of shoe molding (that you can easily attach with finish nails or a couple beads of construction adhesive) if necessary.
The question that owners of multi-story homes ask is, should the stairs match the floor upstairs or downstairs? Experienced interior designers and flooring experts agree on this answer. Stairs are the transition between both floors, and therefore, should coordinate with both the upstairs and downstairs flooring.
For example, if you have carpeting upstairs and wood downstairs, you can use a matching carpet runner to transition between floorings.
Most designers opt to unify the transition from floor to stairs by using the same wood on both. As your eyes travel from the floor and up the staircase, it has a seamless look that you can only achieve by using the same hardwood.
Easiklip floating hardwood floors work on any floor and the stairs. You have five prefinished color choices, and we offer matching stair nose molding to make your DIY job look professionally finished.
]]>Have you ever noticed how one oak floor may look uniform and have tight, straight grains while another has bold, undulating grains? This is because both types of planks can come from the same tree. It’s how the sawmill cuts the log that determines how the finished board will look on the floor.
There are multiple ways to cut straight boards out of a round log. We will discuss those methods and how the boards look afterward.
Regardless of species, all logs go through the same process, and each type of cut yields the same look. Therefore, today, we will refer to only white oak.
The type of cuts used to make the planks affects the lumber’s clarity, graining, price, and grading. So let’s start by looking at the different ways lumber mills cut up the logs.
There are primarily three cuts that you’ll see at your local flooring store. They are flat, quarter-sawn, and rift cut.
Flat sawn or plain sawn is the most common and least expensive method of sawing lumber for flooring. However, as the saw blade reaches the beginning of the heartwood, the log turns 90-degrees, and the mill continues cutting. After they cut all four sides, they finish by cutting boards out of the heartwood.
It is a more efficient milling method than a quarter or rift sawing. However, they don’t use the heartwood for flooring material which generates more waste. These boards are strong, yet they are the most likely to have issues like warping, twisting, and cupping.
Quarter sawn lumber, as the name implies, starts by cutting the entire log into quarters. Then, the mill cuts a board from one flat surface, rotates the log, and cuts the next board, alternating as they cut. As a result, they end up with ever narrower boards until only a wedge piece is left.
Quarter-sawing yields stronger boards than plain sawn, but the higher waste adds to its cost.
This promotional video does an excellent job of demonstrating the difference between quarter and plain sawing.
Rift sawn white oak lumber, like quarter sawn, starts by cutting the log into quarters. The difference here is that the mill cuts each quarter into a spiral pattern. Visualize the end of a log and the circular rings like a clock face. Rift cut boards come out of sections at the 2, 4, 8, and 10 o’clock positions. When viewing the end of the board, the grain pattern runs between 30 to 60 degrees from the face, with 45 degrees the optimal cut.
Rift cut lumber is difficult to make and creates the most waste. However, the boards are the most uniform, have the straightest grains, and have the most resistance to warping or cupping.
This animation demonstrates how the rift-cut boards emerge from the log. It’s like cutting a pie into slices, except the process does not use the center wood core.
There is one more cut we need to mention. It’s called live sawn lumber.
Before there were electrical or steam-powered saws, good old-fashioned two-man saws and muscle turned trees into boards. Live sawn was the only way pioneers could cut boards to make their homes and barns. They cut boards from logs by slicing them lengthwise, and hopefully, kept each board the same width. Lumber mills are recreating the look again due to increasing demand for rustic or old-timey look of barn wood and wide planks.
The technique is called Live Sawn. Other terms for this cut are French cut or European cut. It’s the simplest way to cut a log. A lumber mill will place the tree on their saw and cut slices down the length of the tree without turning it. It’s like slicing a loaf of bread lengthwise to get long, uniform slices. These planks provide a full range of the tree’s characteristics and grades of lumber all in one board. The center cuts will show a cross-section of the entire tree with the darker heartwood and cathedral grain patterns in the middle to the tight grains of the outer sapwood.
Live sawn is the only method that includes the heartwood. Typically, lumber mills discard heartwood and use it as pallet-grade lumber.
White oak has a unique grain that lends itself to a variety of different looks. Depending on the type of cut, oak can look like an entirely different species.
The rings that intersect the board are no more than 35 degrees from the top plain of the board. The grains resemble dark cathedral or flame shapes and designs.
Flat sawn planks yield an irregular grain pattern depending on where the board came from inside the log. For example, a board near the outside of the log looks like quarter sawn, while planks from the center have a curved or cathedral grain pattern.
Quarter sawn boards have more consistent graining because the growth rings run parallel to the larger faces of the board. However, the grains on the long edge of the board may still be inconsistent and not parallel.
With this cut, the growth rings are at 90 degrees to the face of the board. Because the cuts are not across the grain as in flat sawn, the board’s face has straighter graining. This cut produces white oak’s signature “tiger stripes” called medullary rays. In the living tree, medullary rays carried nutrients within the tree. They can be very wide and pronounced or thin and subtle.
Rift sawn yields boards of the highest quality and clarity. Each board is nearly flawless, with arrow-straight lines unmarred by tiger stripes, knots, or color variations.
Before we talk about the price, you must understand the different grades and descriptions. The National Wood Flooring Association (NWFA) describes the various flooring cuts as follows:
Other factors in the price of oak flooring are the grade of the boards. The three grades are:
Grading is not about quality. It’s about the appearance of the board and the length. For example, Select has very few imperfections, such as knots or large grain patterns. #2 common or Rustic has lots of character, including knots, varieties of color, and grain patterns. Grading is a way to order the look you want on an oak floor.
When it comes to plain sawn flooring prices, this method is the most common and easiest to produce, resulting in the cheapest option. The next step up in price is quarter sawn white oak. There is more waste in the cutting process, but the boards have a more uniform appearance. For example, in furniture making, a custom leg in quarter sawn white oak can be twice the price of the plain. Another reason for the price increases is that fewer mills produce this type of lumber.
The rift sawn white oak flooring price is the highest. Because of the high waste and low supply, rift sawn is the most expensive lumber for oak flooring. It’s also the highest grade and the most dimensionally stable of the four cuts.
Few lumber mills produce it due to the high labor cost and waste. However, if you can afford it, a rift sawn oak floor is gorgeous.
Generally speaking, when you move up the quality ladder from plain sawn to rift and quartered, expect to add about a dollar to the cost per foot.
Each type of cut creates boards of unique character. For example, flat sawn oak makes boards with that distinctive significant flame or cathedral grain pattern on the surface. However, since the grains go in different directions, these boards can expand and contract more. As a result, it’s more prone to warping, cupping, and twisting than other cuts with straighter grain patterns.
(Flat sawn white oak boards)
Quarter sawn oak doesn’t show the big cathedral grains of flat sawn, and it’s less likely to warp. However, it displays straight, even grains highlighted with the rays or tiger stripes desirable in oak flooring.
(Quarter sawn white oak boards)
Rift sawn oak is the best choice if you want a floor that’s entirely free of dark or uneven grains. On the other hand, it can look monotonous across a large floor, so most people like the look of a mixture of rift and quarter sawn.
(Rift sawn white oak boards)
Easiklip is a mixture of plain sawn, rift sawn, and quarter sawn oak flooring in 5-inch wide, prefinished planks. It’s an excellent choice for DIYers and anyone who wants a moderately priced solid white oak floor. It comes in five colors. You can see them and order samples here.
On This Page:
Tung Oil has been around for centuries, although not originally as a floor finish. The Chinese philosopher, Confucius, mentioned it around 400 B.C. The Chinese used it to waterproof their wooden ships.
The oil comes from a large round green nut from the tung oil tree. Manufacturers extract the oil and then heat it to 500°F (260°C) in an oxygen-free environment. Heating increases the viscosity and helps to create a harder film (polymerization) once the oil cures. Typically, commercial tung oil has a 1:1 ratio of solvent. After applying it, the solvent evaporates in about 20 minutes, but the oil needs 15 to 30 days to cure completely, depending on humidity and temperature.
Tung oil for wood floors makes them highly water-resistant. It adds a light golden, satin finish to the wood that doesn’t darken with age.
If you aren’t familiar with tung oil, read on to discover why wood floor enthusiasts turn to this environmentally-friendly floor finish and how to use it.
Pure Tung Oil is the toughest and longest-lasting all-natural finish you can find. 100% pure tung oil is a natural product. It penetrates the wood’s pores and then slowly dries to a hard, non-oily finish, almost like polyurethane. Pure tung oil uses no hydrocarbon solvents. It’s ideal for food contact surfaces like cutting boards and wooden bowls, emitting no VOCs (Volatile Organic Compounds).
Pure tung oil is too thick and heavy to penetrate deeply. Typically, tung oil for wood floors will have a solvent to help it penetrate deeper into the wood.
The advantage of finishing floors with tung oil is that it hides scratches and dents better. It penetrates the wood, becoming a part of it, while finishes that lay on the surface, like polyurethane, tend to show scratches more easily.
There is a difference between pure and regular tung oil. Pure Tung Oil has no solvents. Products that say “Tung Oil” are typically polymerized and thinned with a 1:1 ratio with solvents like mineral spirits or paint thinners.
Polymerized tung oil has been heat-treated to encourage polymerization, creating denser molecules and a harder finish. The process increases the density of the oil so that manufacturers must thin it with solvents. Almost all commercial tung oils are polymerized.
If you are going to finish the floor, don’t use pure tung oil. It is too heavy, won’t penetrate as well, and will take too long to cure properly. Thin it with a solvent such as citrus oil or mineral spirits.
Tung oil is a light honey-blond color. It creates a matte or satin finish which highlights the wood’s natural grain. Always test a sample to see if it’s the look you want before sealing the entire floor. Tung oil for wood does not create a glossy finish. It penetrates deeply into the wood, filling the open cells. It makes a smooth thin sheen on the wood’s surface without a heavy build-up, as you see with polyurethane coatings.
Tung oil looks great. Here are seven tips and questions on how to apply it.
Use tung oil for wood and various surfaces, including brick, concrete, and stone. You can even use it to protect decorative pieces made of cast iron. Wipe it on and allow it to dry at room temperature. It’s good waterproofing that is resistant to alcohol or oil.
For wood floors, use tung oil only on unfinished wood that will allow the oil to penetrate. Apply it with a cloth, foam roller, or brush as you would for stain. Allow it to penetrate the wood for one hour, then wipe off the excess with a cloth. Plan on at least two or more coats with a drying time of 1 hour between coats. Buff each layer with a soft abrasive pad before applying the next coat to achieve a smoother finish.
Pro Tip: If you start with pure tung oil, thin your first coat with a solvent such as turpentine or mineral spirits. For a “greener” solvent, use citrus oil. Watch this video, “How to Apply Pure Tung Oil to Wood (the right way),” for more details.
If you are curious whether tung oil is suitable for your floor, here are some popular questions people have about it.
Mixing a dye into tung oil is tricky, especially if you plan to cover a large room. You need to measure the dye precisely, or else you might end up with different shades across the floor.
A liquid or solvent-based dye doesn’t mix well with petroleum products. You’ll need to thin it with Acetone and then add that mixture to the tung oil in carefully controlled amounts. To see a demonstration, watch “Tinting Tung or True Oil with Wood Dyes.”
Another option if you want to color tung oil is to use oil-soluble aniline dye crystals. You’ll first need to dissolve them in odorless mineral spirits or a citrus solvent before mixing with the tung oil.
Staining the wood with a water-based stain before applying tung oil is your safest bet because you have more control over the floor’s color. Do not use an oil-based stain. It will prevent the tung oil from penetrating the wood and make an oily mess. You can also buy tung oil pre-mixed with stain to save you the trouble.
Tung oil doesn’t evaporate and is exceptionally durable. Guitar makers use it on guitar necks where there is a tremendous amount of wear. A guitar maker claimed that he applied tung oil to one guitar, which lasted over 15 years.
Expect to re-apply a thin coat for wood floors once every two years to maintain the finish. It’s not as tricky as using polyurethane, and you only need to let it cure for a day before you can use the room again.
How many coats depend on the type of wood and how much it absorbs. You want to wait at least 45 minutes to an hour between coats to see if the wood will absorb more. You can lay down three coats in one day if you want to. Before you quit for the day, wipe up the excess with cotton t-shirt material because it’s lint-free. When you come back in the morning, you’ll need to wipe it again.
For some pro tips, check out this video, “How to Use Half & Half Tung Oil on a Wood Floor.”
Regarding the amount of tung oil the man used in the video above, DIYer Matt Yates shared his experience about applying tung oil to his floor.
“I did a 2,000 sq foot condo and used way too much on the first section. I had a gooey mess that still wasn’t dry eight months later.
What worked for me was to wipe a very thin coat on with a rag, and that’s it! No more! Do not do the usual manly thing and apply coat after coat, as I did. I had to re-sand the gummy portion after eight months and re-apply a thin coat. One gallon of the Tung oil and one gallon of the citrus solvent, for a total of two gallons, would have been more than enough for the 2,000 sq feet, probably with a lot left over. A thin coat dries after a day, although you can walk on it almost immediately. The amount he is applying in the video is way more than you need. Use just a little bit on a rag to wipe it on, trust me!”
There is no shortage of cleaning options when it comes to cleaning. The safest cleaner is to mix one cup of white vinegar with a gallon of water. The solution should remove most dirt and build-up on the floor without harming the finish.
If you have some stubborn grime, you can replace the vinegar with ammonia. If there are shoe marks, spray some WD-40 onto a rag and wipe them off.
It’s a 3-step procedure to clean a wood floor with a tung oil finish:
You can walk on the floor as soon as it’s dry.
A word of caution. NEVER use a soap-based cleaner like Murphy’s Oil Soap. The soap will strip the tung oil and leave a dull smear.
You don’t polish a tung oil finish. You recoat it. For a small area, use rubber gloves and a clean rag to apply a new coat over the floor. Use a rectangular floor dust mop with a new pad dampened with the oil for larger areas.
After applying the coat, let it absorb for an hour, then wipe off excess. Allow at least 24 hours to dry. You can walk on newly oiled floors with bare feet or socks. Avoid walking on the freshly coated floor with shoes for a month. They will leave permanent marks on your beautiful floor.
There are two ways to remove tung oil from wood floors, either solvents or sanding. If you want to strip the floor with solvents, try a test spot in an inconspicuous area. Apply turpentine or paint thinner and let it dissolve the oil. You should see it bubble up slightly. Once it’s soft and doesn’t damage the wood, remove it with a paint scraper or steel wool.
The other option is to sand the floor down to bare wood as you would with any other floor finish. You can review our article “How to Use A Wood Floor Sander Machine” for tips.
Pure, unadulterated tung oil is thick. It doesn’t penetrate well, which is why most commercial brands use a 50% solvent mix. It penetrates deeper and dries faster. Humidity, airflow, and temperature affect the curing time.
A tung oil finish using solvents can dry in a day or two, but it needs between 15 to 30 days for a complete cure. However, you only need to wait a day between coats before you can walk on it. Again, don’t walk on it wearing shoes. Tung oil can dissolve some shoe’s sole material leaving permanent marks.
Tung oil generates heat as it dries. If you use rags applying or cleaning it, don’t pile them up indoors. There is a risk of tung oil rags spontaneously combusting if not appropriately handled. Hand-wash any rags in a bucket of soapy water and spread them out or hang them outside for at least 24 hours to dry.
Whether you want to use tung oil on your wood floors is up to your taste and level of perfection.
Pros
Cons
Tung oil on oak makes a hard golden satin finish. It also enhances any type of wood, from yellow pine to mahogany.
Suppose you want a new hardwood floor with a durable finish that doesn’t require re-applying every year or two? Consider a pre-finished solid oak floor from Easiklip. It’s a snap to install, and you can walk on it immediately because the finish has been pre-cured.
]]>On This Page:
So, you decided on oak wood for your hardwood flooring. Besides its traditional timeless look that goes well with any décor, most people believe it adds value to their home. Not to mention, it’s durable, easy to maintain, and eco-friendly.
There are two species of oak used to make hardwood floors, white oak, and red oak. On the Janka hardness scale for wood, white oak is an impressive 1335, and red oak is slightly softer at 1220. What really sets red and white oak apart is the color, but it’s not the only difference.
Which oak should you choose for your hardwood flooring? Of course, deciding which wood is “better,” red vs. white oak flooring, is subjective. Choose based on personal taste and the design you want to achieve. Let’s dive in and highlight the essential differences between these two oak species to help you make the right choice.
Of the 90 or so oak species in North America, manufacturers only use red and white oak for hardwood flooring. These two species grow large enough and have straight, knot-free wood to be commercially viable. If you want to know how to tell them apart, there are two areas; grain and color.
Red oak didn’t get the name from the color of the wood. Instead, the moniker refers to the color of the leaves in the fall. They turn a bright red, depending on soil conditions.
However, the wood does have a slightly reddish tinge, especially the heartwood in the center. On the other hand, white oak’s shade tends to be a golden tan.
Using a natural finish will enhance the color of each type of oak. The red will become more pink or reddish, while the white oak will get darker and more honey blonde. Both floors accept stains well. Red oak tends to get a deeper reddish tone when stained and white oak becomes a darker shade of brown.
If you place red and white oak side by side, you can see a definite difference in the grain of red oak vs. white oak flooring. When perfectly quartersawn, white oak has longer and more pronounced rays. Rays are the small dark lines in the wood grain which give oak its unique character. White oak has a smaller and tighter grain, giving it a much straighter and more uniform appearance.
Red Oak’s grain has more variations, swirls, deviations, and sometimes wavy or zigzag in appearance. These characteristics can hide dents and scratches more easily. Its grain is a bit wider than white oak, and red oak’s grain tends to be more visible because the wood is lighter.
This video describes the difference between the two types of lumber. You’ll see a demonstration of the three different looks depending on how a board gets cut, flat, rift, or quarter sawn.
White oak is highly water and rot-resistant, so many builders use it for external door thresholds. If you plan to install a solid hardwood floor where there are lots of wet feet or dog traffic, white oak is the better choice. Here are two fun facts about white oak.
Is white oak harder than red oak? Yes, white oak is slightly denser and harder, but both species are ideal for creating durable and beautiful solid hardwood floors.
When it comes to red oak vs. white oak hardwood flooring cost, is white oak more expensive than red oak?
Typically, white oak tends to be slightly more expensive than red oak. However, both are affordable choices for a new solid hardwood floor. You can expect to pay between $3-$6 per square foot. For example, you can find thin, ½-inch oak hardwood flooring online for just over $3, but you’ll need to purchase the tools and hardware to install it or pay someone to install it.
On the other hand, a pre-finished, solid, 3/4-inch white oak solid hardwood flooring made by Easiklip runs $6-8 per sq ft. The price includes all the installation hardware, which is quite a savings. There are no glue or nails because it just clips together, making it a perfect choice for any DIY flooring project.
Red and white oak are not interchangeable. If you need to finish out a room because you don’t have enough of the same boards, you need to keep looking for the same type of hardwood flooring to continue the floor. They just don’t match. But, it can happen.
The situation of mixing red oak and white oak hardwood flooring happened to a professional installer, Dennis. Here is how he corrected the problem:
"If you try to feather in or stagger red and white oak boards together, it will stick out like a sore thumb. If you run out of suitable oak and have no other choice, you can always try the fix mentioned above, paint the floor, or use a big carpet.
Otherwise, you could make a decorative border using one type and finish the main part of the floor with the other."
As always, red oak vs. white oak hardwood flooring comes down to design and personal preference. White oak is the more popular option because of its simple and elegant wood grain. The colors range from beige to medium brown, and it works with all neutral colors of wall paint, kitchen cabinets, and accent pieces. White oak hardwood flooring is excellent for modern or contemporary homes.
Red oak’s subtle red or rose-tinted undertones and wavy grains make it stand out. It adds a touch of color to rooms that are white or primarily muted earth tones.
If you plan to stain the hardwood floor in a white or gray hue, you will be better off with white oak. For medium to dark stain colors, either one will work.
Ultimately, when choosing between red oak vs. white oak solid hardwood flooring, use your design instinct. Choose the species of oak that has the tint and grain pattern that most appeals to you.
Before you purchase any hardwood flooring, you should consider all of your options and the costs involved. Finding a “great deal” online for oak hardwood flooring doesn’t mean that it’s the right choice. Is there enough of that style to complete your project? Sometimes manufacturers close out a style or color, and you won’t have enough.
Will you install the floor yourself, or will you hire someone? You must factor in the price of shipping, labor, and materials.
If you plan to install a white oak hardwood flooring yourself, look at Easiklip solid hardwood flooring. Each board is a full 3/4-inch thick and comes pre-finished in one of five colors.
With Easiklip hardwood flooring you don’t need special tools, glue, screws, or nails. The boards simply clip together. To see the colors and learn more, visit Easiklip here.
]]>On This Page:
Although solid hardwood floors can last for centuries, the finish won’t. Floor finishes can fade, change color, or wear off completely, leaving a wooden floor that looks like something from an abandoned home.
So, you’ve finally decided that it’s time to do something about your scuffed and dingy hardwood floor. It had to happen sooner or later. You have to refinish the floor, and the first step is sanding it down to bare wood.
If you know nothing about sanding a floor, floor sander rental, or how to use one, you’re in good company. This article will help any DIYer take the mystery out of a floor sander rental.
Most people, including your friends and neighbors, don’t have a floor sander lying around. Your only options are to purchase or rent one. This equipment is expensive, and unless you plan to go into the flooring business, leasing is your only option.
In this floor sander rental guide, you’ll discover how much it costs to rent a floor sander, where to get one, and which type of machine you should choose. We want to help you get the right floor sander, save time and money.
There are three types of floor sanders, Drum, Orbital, and Edge. Here’s the low down on each one.
As the name implies, a drum sander uses a rotating cylinder or a large belt with sandpaper. It’s similar in size to a small lawnmower. Like a mower, you push and pull it using a handle. However, there is a definite technique to use a drum sander correctly, or you’ll ruin the floor. For tips on using it, go to our article, “How to Use a Wood Floor Sander Machine.”
The body of a drum sander consists of the motor, the drum, and a large dust bag. The drum has easy access so that you can attach belts of sandpaper in varying grits. We’ll cover grit sizes in a moment.
The drum sander is the big workhorse of any floor sanding job because it covers about 90 to 95% of the floor. Due to its bulk, it won’t sand up to the baseboard, doorways, or get around corners. For tight spaces, you need an edge sander.
To see what a floor looks like when the operator doesn’t use a good drum sanding technique, check out this video.
Pro Tip: If you can find a belt-type floor sander versus a drum, it will reduce the chances of leaving chatter marks.
An edge floor sander, or edger, is much smaller than a drum sander. Most edge floor sanders have two handles to control them. It uses a rotary plate from 5 to 7 inches wide, to which you affix the sanding discs. However, sometimes you can use a belt sander, but the rotary version does a smoother job with less mess. An edge floor sander has a removable dust bag, or you can attach a shop-vac hose to contain the dust.
When you use an edge sander, always keep the disc moving along the floor. Never stop in one place. Instead of moving side to side, it’s best to use a zig-zag pattern and finish with one long stroke before moving to the next section. This will help reduce wavey patterns that you won’t notice until after you apply the finish.
There are two reasons to rent an edge floor sander. First, they are more powerful than the typical hand-held orbital sander. Second, you need a sander specifically for all the places a drum sander misses.
Like the drum sander, you operate an orbital vibrating floor sander while standing up. The difference between the two is the sanding head vibrates in tight circles rather than revolve in a drum. A random orbital floor sander may have one large disc or three smaller ones depending on the model.
You don’t have to sand in the same direction as the wood grain with an orbital machine. You can sand in any direction. Keep in mind, it’s not as aggressive as a drum sander, even using coarse 24-grit paper.
Like orbital sanders, vibrating sanders are used primarily as a finishing sander to smooth out the wood after using the drum sander.
A vibrating sander uses vibrating pads rather than circular discs. The rectangular head is 12” x 18” and is about the same size as a drum sander but is lighter. It removes material at about the same rate as an orbital sander. They are less likely to damage the floor and a good choice to finish sanding after using the drum sander.
For old, deeply gouged floors, or where there is a heavy build-up of paint or polyurethane, you’ll want to use the drum sander. Vibrating or random orbital sanders work well to smooth out the floor after the drum sander. If your floor is new and unfinished or old, but in good shape, you can get by with just the orbital sander.
You’ll need an edge sander no matter what type of sander you rent for the rest of the floor.
At a minimum, you’ll need to rent two sanders;
Floor sanders are commercial-grade tools and operate at a higher capacity. Here some safety tips when using one:
Stay safe by respecting the power of the machine and the hazards of excess sanding dust.
There are five grades of sandpaper, categorized by the size of the grit. Here is the list with the corresponding grit numbers:
The best place to buy sandpaper is the same place you rent your machine. They will stock the exact belts and discs that fit the machine. Buy plenty of extras for each grit. Usually, the rental store will repurchase the unused paper.
If you are sanding an old floor with lots of old finish, start with a very coarse grit like 24 or 30-grit. After each pass, you’ll work across the room using ever finer sandpaper. It can take 4 to 5 passes with various grits to make the floor super smooth and ready to finish.
So that you know, you won’t find a floor sander rental at Lowes. They don’t rent (as of 2021). You can opt for a floor sander rental at home depot, and there are plenty of places to rent floor sanders and purchase accessories. It’s a good idea to look for a floor sander with vacuum rental.
Click the link to visit their online stores. To find a drum floor sander rental near me, here is a list in alphabetical order:
If you plan to take two or three days to complete the job, be sure to get a daily rate, not an hourly rate. Also, just because the website lists the sander you want to rent, call the store first. They may not have it at your location. You can do a quick search for a “drum floor sander rental near me.”
Floor sander rental costs vary depending upon location, but you should be able to rent a drum sander for about $50 to $80 per day. Orbital sanders and edge sanders will rent slightly less. Rent for a more extended period, like a week, to save money.
The rental won’t be your most significant expense unless you already have lots of DIY tools. The real cost is in the sandpaper and accessories.
Besides the sanders, you’ll need some tools and accessories to complete a floor sanding job.
Material or Tools |
Cost |
Edger Floor Sander |
$37 to $60 per day |
Sandpaper |
$0.25 each for 5 inch discs / Drum sleeves - $4-$5 |
12/3, 15-amp extension cord |
$70 |
$8 |
|
Respirator |
$30 |
Shop vacuum |
$70 - $170 |
$10 per pair |
|
Heavy duty trash bags |
$25 |
Pro tip – The cost of renting a sander is nothing compared to what it will cost to replace the floor because you don’t know how to use it. Floor sanding is a critical skill best left to experienced professionals. The final finish coats will magnify any chatter marks and other damage from improper sanding.
Before you rent a sander and start sanding away, you need to know what kind of hardwood floor you have. It’s OK to sand and refinish solid hardwood floors multiple times over their useful life. You can check the floor in an inconspicuous place like inside the closet if you’re not sure. Pry up a small board to see if it is solid hardwood or something else.
Older homes tend to have solid tongue and groove wood floors. The wood should be 1/2in. to 3/4in. thick.
Newer homes or remodelled homes may have engineered hardwood. You may sand and refinish higher-quality engineered hardwoods once before needing replacement. It depends on the thickness of the top layer of the wood veneer.
Laminate flooring or vinyl plank flooring is not wood. It is a photographic copy of wood, so you can’t sand or refinish them.
Pro Tip – Most likely, you’ll have solid hardwood if a home is older than the 1970s. If it is an 80s house or newer, it could be any type of flooring, so you need to take a sample. Repeating wood grain patterns means the floor is a vinyl laminate, and you can’t sand it.
There is a learning curve when learning anything new. Sanding a hardwood floor is no exception. The mistakes we’re listing here came from DIYers who learned the wrong and expensive way. Hopefully, you’ll avoid making the same mistakes after reading these.
If your floors are in bad shape, start the coarsest paper, usually 24 grit. If you sand with grit, that’s too fine, it will take much longer, and you’ll spend a lot of money on sandpaper.
Sanding your floors is hard work! Whether the boards are a bit cupped or warped, you can’t stop until the floor is flat and all the old finish is gone.
With a drum sander, you want to sand in the direction of the wood grain. You can work diagonally to smooth out the boards. Just be sure to finish in the direction of the grain.
Sanding along the edges of the room is a chore and can be tough on your back. One shortcut is to sand the edges slightly less than the main floor, and you can stop after using 80 grit. The edge will be smooth enough and will save you some time.
Don’t get cheap, and try to get every last inch out of a sanding disc or sleeve. It will do a poor job and take you longer than changing the paper when it isn’t completely clogged.
After doing all the research and understanding what’s involved with sanding and finishing a hardwood floor, you may change your mind about refinishing. Given that installing a solid hardwood floor by Easiklip is easier and takes less time, why not go for a new floor? Easiklip uses aluminum clips, not screws, nails, or glue. See for yourself by watching the installation video here.
]]>On this page:
Owning hardwood floors is an interior decor dream come true for many. It's truly the best of what the flooring market has to offer. Whether you're only now looking into the market or have been dealing with hardwood flooring for a long time, learning about how to protect hardwood floors during a move is a good idea. Relocation can be stressful and chaotic enough on its own; there's no reason to add wrecked floors to the equation.
Even though it's great that we can look up nearly anything nowadays, this doesn't guarantee us that the information we find is valid. When it comes to protecting hardwood floors during a move, you shouldn't take risks with potentially unreliable sources. That's why it's best to contact professionals and ask them anything that you're unsure about. Gather a list of all the things that concern or trouble you and get your answers.
If you're looking to protect your hardwood floors during a move, you should contact professionals for help.
As an owner of hardwood floors, you're probably aware that you cannot simply hope for everything to go smoothly. Luckily, some items can help keep your floors safe. Investing in the products that'll help your floors last for a long time is a really smart approach.
Before purchasing the products made to help you protect your hardwood floors, you should have a solid base to start with. If you haven't purchased the hardwood floors for your new home yet, you should really think the investment through. Although they are a pricier choice, getting high-quality hardwood floors wins over purchasing a lower quality substitute any time. In the long run, making the more expensive choice will end up saving you some money.
If you're lucky enough to have found excellent quality hardwood floors, make sure to protect them during a move.
If you're not familiar with it, an underlayment creates a seamless surface for installing top flooring materials such as laminate, vinyl, premium vinyl tiles, tiles, carpets, and hardwood flooring. A hardwood floor underlayment offers a more suitable surface for building the top floor when the sub-floor is not flat and smooth. Getting an underlayment will ensure that your floors are installed correctly. It would give them a much better chance of staying intact if something heftier were to fall on them during moving.
For the ultimate protection for hardwood floors during a move, hardwood coating is the way to go. Having this extra layer of protection can really make a difference. There are different sorts of layers, including UV-Primer, UV-Putty, UV-Seallers, and UV-Top Coats. Every one of them has a particular function that helps your floors stay intact no matter the surroundings.
If you want even the hardwood coating layers to stay safe and protected during a move, you should cover your floors with something. Moving furniture into your home can be quite a challenge. To avoid dents, scrapes, and scratches, don't forget this step. There are several items on the market you can use for this. You want this material to cling to your floors, protect them, and be easy to remove later.
To make sure your relocation goes as smoothly as possible, you will probably want to hire a moving company. Aside from the usual services that they offer, residential movers can also help you protect hardwood floors. An experienced crew by your side will ensure the easy transfer of your household items without any damage. Before the moving day, contact your movers and ask for any tips about what you can do to maximize protection.
The best way to make sure there is no damage to your hardwood floors during a move is never to drag heavy furniture. It doesn't matter what you use to cover your floors or how well you've secured them. This can scratch the surface of the finish and create dents in the wood, regardless of the type of wood floor you have. You should load lightweight products and boxes onto rubber-tired dollies. Also, if you can't carry big pieces of furniture, such as a sofa, use furniture sliders for help.
Cover the bottoms and edges of heavy or bulky furniture, such as tables and chairs, with a soft cloth or wrap them in padding. That way, you will avoid damage should you accidentally drop something. Moreover, if it's raining or snowing outside, be extra careful not to bring in salt, mud, or water. Failing to do so can damage hardwood floors. Keep a big heavy-duty mat by the front door for visitors to clean their shoes before entering.
If you're looking to protect your floors during a move, think about taking some extra precautions. If you're installing the floors before moving in, make sure to clear out your home completely.
Getting a warranty will undoubtedly give you some peace of mind. The Easiklip Warranty comes into effect from the date of the original purchase. If you've purchased your floors online, the email that confirms your order will suffice as proof of the original purchase. It would be best to print and store it someplace safe. This warranty can only be invoked if all of the conditions detailed in it have been fulfilled. However, you should contact the distributor if you have any doubts about what the warranty covers.
If you don't overcomplicate things, the chances of something going awry will be far lower. To protect hardwood floors during a move, you need to set a strict schedule and ensure that nothing overlaps. If you do everything according to plan, you'll significantly lessen the chances of your floors getting wrecked. Of course, you cannot have complete control over the situation. However, you can do whatever is in your power and then trust that you've done enough.
]]>Have you ever stepped out of a nice, air-conditioned building and into a hot, muggy day? Your body must adjust to the new humid environment. It’s the same for wood flooring, but the process is gradual.
Wood flooring does need time to acclimate to your location before you can install it. If you don’t, you could end up with cupped or warped hardwood floorboards within a few weeks of installation. Your expensive new hardwood floor will look like salvage from an old mining shack or sunken ship.
Fear not! You’re about to learn everything you need concerning wood floor acclimation.
Acclimation is the process of allowing the hardwood floor planks to adjust to the new environment. The purpose is to allow the moisture content of the wood to match the surrounding conditions of the room.
The best practice is to have the wood flooring moisture level within 4% of the subfloor. For solid wood planks wider than 3 inches, the flooring should be within just 2% of the subfloor.
Wood is a natural, porous product that expands and contracts due to variances in humidity. Before installing a wood floor, the
wood needs to reach a moisture content equivalent to normal living home conditions.
Failing to acclimate hardwood floors properly may cause excessive expansion or shrinkage. The results are an uneven, terrible-looking floor. Depending on the moisture level, the wood can warp or shrink so severely that the gaps will make the floor look like bathroom tiles and possibly cause permanent damage to the wood.
Let’s say you live in the dry, hot Tucson, Arizona. If your new hardwood floor ships from an unheated warehouse in Chicago in January, there will be approximately a 30-degree temperature difference and a 30% drop in humidity from north to the southwest. Installing these boards immediately without acclimating them first would be a disaster.
Hardwood flooring is a hygroscopic material. That means it releases moisture during the winter heating months when humidity is low and absorbs moisture during the humid spring and summer months. The room’s air humidity directly affects the wood’s moisture content.
The HVAC system plays an essential part in keeping wood floors at a consistent moisture level.
You want the floor’s moisture to equalize with surrounding temperature and relative humidity (RH). Flooring experts say fully acclimated hardwood floors have a 6.9% moisture content in a 70°F and 35% RH environment. Hardwood that has adjusted to 70°F and a higher 50% RH will have a 9.2% moisture content. You can see the chart below how that works.
Let’s look at an example using maple wood. 30% to 50% RH is the most comfortable humidity range for indoor environments like a basketball arena or a living room. The Maple Flooring Manufacturers Association’s (MFMA) specification for kiln-dried maple boards is 6% to 9% moisture content. Their members will reject wood outside of that range to manufacture hardwood flooring.
Here are a few of the symptoms that can occur.
Buckling – In extreme cases, the wood plank pulls away from the subfloor.
Cupping – As the name implies, the edges curl up higher than the center, creating a cup-like appearance.
Crowning – This symptom is the opposite of cupping. The center is higher than the edges creating a speed bump.
Warping – This results in a twisted board with raised edges that are no longer straight.
If the moisture content is too high while installing the floor, the boards will eventually shrink, causing unsightly gaps and making the floor look unfinished.
By acclimating the floor, you create a balance of moisture in the wood flooring and the room’s environment. This way, the wood floor stays straight and flat all year long.
Always consult with the manufacturer to see what they recommend. Typically, you want to acclimate hardwood floors for at least three days minimum.
That said, some flooring installers don’t recommend acclimating at all if the wood meets specific guidelines. Check the moisture of the subfloor and wood floor. You don’t have to acclimate if:
...you can install without problems.
Your wood flooring needs the same temperature and humidity as you. Usually, you want the room to stay at an even humidity level between 30% to 50% all year long. Likewise, keeping the room’s temperature between 60° and 80° Fahrenheit means you’ll be comfortable, and the wood floor won’t expand or shrink excessively. Always check with the manufacturer for your specific species of wood floor for the optimal levels.
So, how do you acclimate wood flooring? It’s a simple six-step process that takes some patience.
Step 1 – Turn on the Heat or A/C
If it’s an unoccupied space such as a new home, turn on the air conditioning or the heating at least five days before the flooring gets delivered. You want the home to be at a typical temperature and humidity for that time of year.
If the permanent HVAC hasn’t been installed, rent a portable heater or air conditioner until the permanent system comes online.
Step 2 – Receive the Shipment
Once the home’s humidity and temperature have stabilized, proceed with the delivery of your flooring material. Rent, buy or borrow a moisture meter to check the moisture content as soon as it arrives. If you’re not familiar with this tool, watch this video, “What is a moisture meter?”
Step 3 - Check the Subfloor’s Moisture
As we’ve mentioned, the subfloor’s moisture content should be 12% or lower and within 2% to 4% of the new floor. If the subfloor has a high moisture content, you will need to dry it out before installing the floor.
There are different options for checking subfloor moisture depending on whether it’s concrete or wood. This video, “Subfloor Moisture & Hardwood,” will demonstrate the tools and techniques.
Step 4: Install or Acclimate
If both floors have the correct moisture levels, you can proceed with the installation. Otherwise, you need to acclimate until it does.
For best results, don’t store acclimating floorboards inside the boxes or stacked one on top of the other in tall piles. The best practice is to arrange boards staggered in layers, so the surface of the wood gets equal exposure on all sides.
Wait until the moisture meter indicates that they have achieved moisture equilibrium with the subfloor, which can be up to three days.
One way to speed up the wood floor acclimation process is to break the shipment into smaller lots. This will increase airflow and surface area exposure to the environment. Cross-stacking individual planks with spacers between layers improve circulation. You can see this technique in the 1-minute video, “Flooring Preparation - How To Acclimate Hardwood Flooring.”
It is possible to acclimate hardwood flooring in the box, but it will take much longer due to the lack of air circulation. How long to acclimate hardwood flooring in the box depends on the room, how it’s stacked, and the amount of wrapping.
If you have the time and space to store the boxes, remove both ends and any plastic wrap from the wood. Cross-stack the boxes, leaving spaces between them. Keep the boxes in the same room you plan to install the flooring or somewhere with a similar temperature and humidity level.
Bear in mind that this applies to engineered wood flooring as well.
Engineered hardwood flooring has a plywood or synthetic core, making it more dimensionally stable than solid hardwood floors. It’s more resistant to possible expansion or contraction due to humidity changes. However, manufacturers still recommend acclimating engineered hardwood floors for at least 48 hours or until they reach moisture stability in the top wood veneer or plywood core.
Check with your engineered floor manufacturer for recommendations and instructions as to how to acclimate their product.
Most engineered wood floors have plywood cores, with the grain running perpendicular to each other on alternating layers. The top is a solid wood veneer. Although the plywood makes the plank more directionally stable, it is still wood. It is subject to the same seasonal changes and humidity as hardwood. Engineered floors do expand and contract like solid wood floors, although not as much.
Most experts say to acclimate the planks for two days, as we mentioned above. If the moisture level between the subfloor and engineered floor is less than 4%, you can install it right away.
A prefinished floor has multiple coats of finish that are already dried and cured. The moment you lay them down, you can use them.
When you opt for a floating floor like EasiKlip, there are no adhesives that must dry. It installs without glue, screws, or nails. Plus, they are prefinished and ready to go. Because they are solid, 3/4-inch white oak, you still need to acclimate them as described above.
]]><On This Page:
Anyone who has ever operated powered woodworking tools knows that they kick up a lot of dust. Some home woodworkers are fortunate to control sawdust with a local exhaust ventilation (LEV) system. For most of us, it’s the shop vac attached near the saw blade or belt sander. While shop vacs do a great job of catching sawdust, they aren’t good enough to keep you safe from breathing the airborne particles.
Even though you may have worked around wood all your life and think sawdust is no big deal, it is. Sawdust is hazardous to inhale for extended periods. We’ll show you why you need to protect your lungs and the best woodworking dust masks to use.
Before we talk about masks, let’s talk about the types of dust and the potential hazards of breathing it.
There are a few types of dust in the home construction industry that are hazardous to breathe:
You should always wear a quality mask when cutting or sanding anything.
The U.S. Dept. of Labor warns that exposure to wood dust can cause various adverse health effects. They include dermatitis, allergic respiratory effects, asthma, hypersensitivity pneumonitis, chronic bronchitis, and possibly cancer. Additionally, wood sap contains compounds that can irritate the skin and cause other allergic reactions when they come in contact with mucous membranes.
The National Institute for Occupational Safety & Health set the recommended exposure limit (REL) of wood dust for an 8-hour workday at 1 mg/m3.
Inside the lungs are microscopic air sacs, or alveoli. Inside the alveoli are special cells called macrophages that will push the dust particles back up to the throat. Eventually, you either swallow or spit out the dust. Long-term exposure or dust in large quantities will overwhelm the macrophages. Dust accumulates in the air sacs where it causes injury to the lungs and irreversible damage.
The symptoms of sawdust inhalation are the same as any allergen:
If you are having difficulty breathing or have shortness of breath, coughing more, or notice excess mucus, it could be due to inhaling dust particles. You should consult with a doctor right away before it leads to scarring and irreversible lung damage.
The only effective way to clear your lungs is the natural process of coughing. Breathe filtered or dry, air-conditioned air as much as possible.
60% of household dust comes from outside, either from the air or hitchhiking on our shoes and clothing. As for wood dust, sanding, routing, and sawing are the byproducts of woodworking. There’s no doubt that breathing dust is bad for you. The next question is...
The best dust masks fit snugly around your mouth and nose. They should have two or three adjustable straps that comfortably seal the mask around your mouth and nose. Additionally, they should have disposable filters and a way to vent the breath down and away from your eyes to prevent your glasses from fogging.
Sanding creates clouds of particles that are harmful when breathed in large quantities. You should always wear a mask, even for short projects.
A quality respirator is your best defence against breathing wood dust, and higher quality masks can filter out solvent fumes if you do a lot of finishing work. The quality you need depends on how much exposure you have per week.
The ubiquitous 95 Disposable is an inexpensive basic throw-away mask that filters out 95% of airborne particles. It has two yellow elastic bands that keep the white, bowl-shaped mask snuggly over your mouth and nose. They come in boxes of twenty and are the perfect mask for part-time woodworkers.
For woodworkers needing long-term protection, this silicone respirator offers comfortable protection. The design features a valve cover that directs exhaled breath and moisture downward to prevent glasses from fogging up. It uses adjustable straps for a firm fit, and the 65003QL offers a variety of replaceable filters depending on the working environment.
The Base Camp M is a nylon dust mask that is reusable. It features two quick-release adjustable straps and has two replaceable filters consisting of six layers. The adjustable nozzles direct breath away from your glasses. The mask is lightweight, breathable, and washable. It’s a comfortable mask if you must wear one for hours.
If you need to purchase a sanding mask or reusable dust mask, here is some information that may help you find the right one for your needs.
When it comes to a dust mask vs. respirator, a respirator is just a more efficient version of the simple dust mask. It filters out smaller particles, and it seals better around your mouth and nose. Typically, they will have a certification for the type and amount of particles they can filter.
A quality respirator is reusable or comes with replaceable filters. It will have an official NIOSH-approved rating (the National Institute for Occupational Safety and Health) that consists of the following letters and numbers.
And...
The little white dust mask with a single thin elastic strap will not seal your nose or mouth properly. The best respirator for woodworking will have at least two elastic or adjustable straps to hold the mask firmly in place.
Typically, disposable dust masks are a mixture of paper and synthetic plastic fibers.
The filter parts of reusable masks often use durable synthetic materials that are lightweight and easy to clean. However, some reusable dust masks use a fabric that users can hand wash.
Respirators are better than a plain dust mask. They fit better, preventing leaks around the mouth and nose. They also filter out smaller particles.
The FDA states, “Surgical masks are not respiratory protective devices like respirators.” The reason is surgical masks do not seal well. They are there to contain larger droplets of moisture from your breath.
Two researchers from Northwest University did a study on how to build a mask at home that’s as effective as an N95 mask. While the study aimed at preventing COVID-19 virus transmission, the DIY masks work well for filtering ordinary wood dust.
The technique uses two layers of terry cloth or four layers of Kona cotton (a quilting material) or a combination of both. To see one man’s take on a DIY dust mask, watch “How to Make the Best Face Mask, No Sewing.”
NIOSH recommends replacing a disposable dust mask when:
It’s a good practice not to wear a disposable dust mask for more than 8 hours of continuous or intermittent use.
Also, don’t share dust masks, even if they look clean.
You can find full-face respirators online ranging in price from $60 to $190. Typically, you will need to buy replacement filters that attach to the mask, with most masks requiring two.
Is there a dust mask for beards? If you have a beard, you can wear a dust mask at home. However, if you are an employee in a “respirator-required” work environment, you can’t. OSHA considers a beard to be anything over a two-day growth. The hair will prevent a proper seal around the mask, and the employer could get fined.
For home use or less regulated environments, use a half or full-face dust mask that you can tighten and compress the hairs to offer some particle filtration around the sides.
This video, “How to wear a mask if you have a beard,” demonstrates a neat way to protect your lungs and your beard from wood dust.
Don’t want the mess and hazards of sanding a floor? Buy prefinished solid hardwood flooring from Easiklip. It’s the DIY’ers dream. It’s easy to install because there are no screws, glue, or nails. It clips together with patented aluminum clips. You select from 5 prefinished floors, including Natural Oak, Gunstock, Rustic White Bleach, Greywash, and Rustic Smoke Stain. There is no sanding necessary unless you cut a board to length.
]]>
On this page:
If you’re about to embark on a journey of installing a hardwood floor in your home for the first time, make sure you have the right wood floor saw for the job. Why spend good money on flooring only to ruin the floorboards by cutting with the wrong blade or saw? The wrong type of blade can take your beautiful new hardwood floor planks and turn them into jagged splinters.
Don’t worry. This article will cover the best saw for cutting hardwood floors and the best saw blade for cutting hardwood flooring or any other type of floor you plan to install.
If you plan to buy a saw specifically to install hardwood floors, then a table saw would be the best bet. You may need to rip planks lengthwise to make them fit, and a table saw is the best tool for the job.
If you are a DIYer who needs a saw to help build additions and treehouses, a portable circular saw would be a more versatile choice.
Miter saws are best for cutting cross-grain, making short bevel cuts, and diagonal cuts.
Once you determine the functions and features you need, shop for the best price. There is no need to invest in top-of-the-line if you don’t plan to use it often. Instead, put your money into quality saw blades for the best results.
There are four types of hardwood floor saws you can use. They are:
The two best types of saws for cutting hardwood flooring are a miter saw and a circular saw.
Miter saws are portable but are a bit bulky and take up space. If you want more portability with your saw, try one of these brands of circular saws.
One or two of these saws will handle all the hardwood floor cutting you need for DIY flooring projects and beyond.
Modern saws can change blades quickly to handle different materials. But there are specific blades you want specifically for hardwood, engineered wood, or laminate flooring.
General Purpose Blade - Combination or general-purpose blades can handle ripping and cross-cuts or cuts made against the grain. They have both alternately beveled teeth (ATB) like cross-cut blades and Flat teeth (FT) like rip blades. If you only buy one blade, a combination blade with 80 to 100 teeth will make different cuts and there is no need to switch out the blade.
Rip Blade - This blade is the one to use for ripping through hardwood and leaving a clean edge. Rip blades usually have fewer teeth, around 10 to 40 teeth. The space between the teeth, called the gullet, is larger than other blades allowing it to displace more material required in rip cuts.
Plywood Blade - Usually made from High-Speed Steel (HSS) with 100 or more fine teeth. It’s best for cutting moldings and engineered flooring. The finer teeth make cleaner cuts.
To see the variety of blades and how they work, check out this video, “Selecting Table Saw Blades - Types, Uses and Buying Advice.”
Now that you have the right saw and blade, how do you use them?
If you have a circular saw, here’s what you need to do:
This video, “How to Make Rip Cuts with a Circular Saw,” shows you this technique.
Here are some other videos to help you get the most out of your saws safely.
Two beginner table saw mistakes to avoid
Pro Tricks for Cutting Laminate Flooring
]]>
On This Page:
Steve and Katy decided to buy a fixer-upper and flip it for a profit. They found a lovely ranch in a decent neighborhood, 1,800 square feet, 3 bedrooms, and 1.5 baths. As they pulled into the driveway, they could see the exterior needed some paint, landscaping and the roof looked good.
When they opened the front door, they got a surprise. There was no carpet, tiles, or hardwood in the living room, only the OSB (Oriented Strand-Board) subfloor.
Now they had a decision to make. Since hardwood floors will cut into their slim profit, their next viable option is to choose between vinyl vs laminate flooring. These look almost identical. The cost and installation for both are about the same. So, which floor should Steve and Katy choose?
Keep reading to discover the differences, pros, and cons between vinyl vs laminate flooring.
The couple knew that this house would most likely have kids and dogs due to the family-friendly neighborhood. They needed flooring that will withstand dog claws, running kids, and spilled drinks. To make the decision, they needed to understand the makeup of each flooring product.
Vinyl and laminate flooring are two different materials requiring two unique manufacturing processes.
Vinyl flooring, sometimes called resilient flooring, is all synthetic material. The base layer of standard vinyl sheets and tiles is usually fiberglass coated in PVC vinyl and a plasticizer. The top is a graphic print of stone, ceramic tile, wood, or other design, embossed for texture. The textured surfaces simulate different materials, and polyurethane protects the surface.
Vinyl comes in sheets or planks with sheets about 1.5 mm thick and rigid planks up to 5 mm. Generally, the thicker products are of higher quality, have more extended warranties, up to 15 years, and cost more.
The primary difference with laminate flooring is that the core uses wood by-products bonded with epoxy-type resins. Laminate flooring looks like luxury vinyl planks because both use a printed design layer, protected by a hard, transparent plastic wear layer.
Laminate flooring is a bit stiffer. Individual planks have interlocking edges that snap together. The thickness of laminate flooring planks ranges from 6 mm to 12 mm.
There isn't much difference in the appearance between these flooring materials of the same grade. Both flooring materials recreate realistic three-dimensional embossing on their surfaces. You can buy accurate images of wood, ceramic, or stone to complement any decor.
Luxury vinyl plank flooring has a thicker solid core and deeper, more realistic texture embossing. The texture recreates the feel and appearance of real wood grain texture.
Laminate flooring offers texturing in more options like hand-scraped hardwood, stone, ceramics, and other materials.
If you plan to install in an area of high humidity or potential moisture, avoid laminate flooring. The core is mostly wood which will swell up and delaminate if exposed to moisture for a long time. Replacement is the only option if it swells up. It's best to use laminates in low moisture areas and where you can pick up spills quickly.
Vinyl flooring is 100% synthetic material. It can be fully immersed in water, dried out, and utterly unaffected like nothing happened. Vinyl is the right choice for bathrooms or mudrooms.
This video, "Laminate vs Vinyl Flooring," provides a visual overview of these flooring materials' construction and cross-sections.
Insulation keeps the temperature from moving from one place to another. We measure it as an "R-value." The higher the R-value, the better the insulation. For example, a 1-inch thick slab of Styrofoam (extruded polystyrene) has an R-value of 5.
For comparison, wool carpet's R-value is 4.2, plywood is 1.0, Vinyl Composition Tile (VCT) is 1.6, and laminate flooring is 2.35. Laminate wins over vinyl when it comes to keeping your toes warm.
Let's say that you are standing in the middle of your newly remodelled home. All the floors are bare, stripped down to clean, and level sub-floors. On the one hand, you've got a sample of vinyl flooring, and on the other, you have a laminate plank. To choose the best one, we'll make a list of pros and cons for comparison. You might need both depending on the room.
Keep in mind, we compare a vinyl product that's 12mm thick and comes in planks that snap together. We're not comparing the roll-out sheets of vinyl.
Vinyl flooring is relatively thin and doesn't stand up well to heavy loads. Sharp or falling objects can damage it. Consider the furniture and activities that will occur in the room before choosing to install vinyl flooring.
If your family tends to drop things like curling irons or hairdryers, laminate flooring will not dent or scratch as easily as vinyl can.
Laminate flooring can warp if it stays wet. If you want a worry-free floor in the bathroom, vinyl will be the best choice.
Stay away from laminate flooring if you have full bathrooms and wet basements. Depending on the traffic in your kitchen, you can go with either one. For wet floors, you'll want vinyl for a carefree floor.
Since water is not an issue for these rooms, either vinyl or laminate will work for living and dining room spaces. Laminate has the durability that families with kids and pets need. However, luxury vinyl is also quite durable, comes in both wood and tile patterns to match any decor.
The choice comes down to budget and style.
Let's look at the separate spaces in the home to see if one flooring may be a better choice over the other.
Living Space |
Vinyl |
Laminate |
Entry Ways |
✔ |
✔ |
Formal Living Rooms and Dining Rooms |
✔ |
✔ |
Recreational, Mud, and Utility Rooms |
✔ |
X |
Home with pets |
X |
✔ |
Kitchens |
✔ |
✔ |
Bathrooms |
✔ |
X |
Bedrooms |
✔ |
✔ |
For wet zones, choose vinyl. In high traffic areas and where aesthetics count, laminate will be the better choice.
Both vinyl and laminate are easy to clean and stand up well to dog claw scratches. Stick with waterproof vinyl if you have dogs or other pets that routinely spill their water or make other wet messes. Choose a matte finish that will hide scratches better than a glossy finish.
Both laminate flooring and vinyl flooring are typically less expensive than natural hardwood, engineered wood, and many ceramic or porcelain tiles.
According to Home Depot, the average total project cost to install laminate flooring with an underlayment is between $3.80 and $4.80 per sq. ft. Their laminates run 8 to 10 mm thick. However, depending on the manufacturer, the price per square foot can be as high as $8.
Most estimates for vinyl installation and material costs range from $4 to $6 per sq. ft.
Both types of flooring are about the same, depending on the quality of the material. Keep in mind, you can get a high-quality, 3/4-inch solid white oak plank flooring for $5.95 per sq. ft. It's a floating floor, so there are no nails or glue. If you install it yourself, there is no additional labor cost either.
Installation Similarities and Differences
Laminate flooring is easy for DIYers who can use a saw. The planks install with a click-and-lock system. There is a tongue on one plank that fits into the adjoining plank's groove at an angle. Pressing the first plank down until it is level with the other plank locks it in place. You only need a circular or table saw equipped with a fine-tooth blade, or even a hand saw, to cut the planks.
Most laminate floors are floating. That means you don't need to use adhesives, screws, or nails. The weight of the planks holds it in place.
Vinyl planks are also installed using a click-and-lock system. The difference is that you can cut vinyl flooring planks with a utility knife instead of a saw. That's an advantage if you need to work quietly at night. Measure, then score using the utility knife. Bend at the score to break the planks to length. If you use vinyl tiles, they will have a pre-glued backing where you just remove the paper and stick them in place. Some planks also have a self-stick backing. However, most vinyl requires an adhesive making it more labor-intensive to install than laminate.
One issue with vinyl is that the locking channel can have excess material inside it from the factory cutting. You need to check each piece before trying to snap them together. It's thin, and there is more opportunity to come apart or not snap together securely.
Both types of flooring require an underlayment, so include that in your estimate.
So, what did Steve and Katy buy? They chose vinyl for the bathroom and mudroom. As it turns out, for laminate's price, they could afford solid hardwood for the rest of the home.
Easiklip is the hardwood floor for DIYers on a budget. It's easy to install because it clips together using patented aluminum clips. It's a floating floor so that you can use it over moisture barriers in basements. It's easy to replace individual boards should they become damaged. Best of all, Easiklip floors are solid oak. They are beautiful and will add to the value and comfort of your home.
]]>
On This Page:
The most magical feature of a house is usually its deck; it’s also one of those parts of your house that demand high maintenance. When winter comes to an end, people invest thousands of dollars on their decks before harsh weather conditions strike. Nobody likes being continually forced to revive their winter deck. If you are in the same situation, you must consider composite decking, a low-keeping alternative to timber. If you find it difficult to select the best deck, stop worrying now! We have compiled a list of tips for you to remember before finalizing your purchase.
Most people want to have waterproof flooring. Composite decking consists of a combination of board fibers, plastic, and small quantities of additives, such as pigments. Bodies of wood fibers are resistant, while finished boards are protected against damage by plastic. However, the moisture performances of composite wood decking brands differ widely. The resistance to humidity depends on how thoroughly wood fibers are encapsulated. To avoid these technical problems, you can choose the Futurewood Composite Decking compost cover, which is the best since it is water-resistant and can last longer than most of the other brands.
Composite decking is an excellent choice for those who want to have a quality product within a limited budget. The best composite decking is priced at $3 to $7 per square foot. Find a variety of plastic and wood-style and paint to match your home aesthetics. Take into account the deck scale and installation costs. Also, remember you will find fewer colors, repeated grain patterns, and fluid or combed finishes if your budget is low.
A basic design and material will be low-maintenance and will lower your deck's total cost. Use the regular board and railings to build the deck to the best of your abilities. Do you want to save some more money? Choose composite coverings that are cost-effective because they have facial screws rather than concealed fasteners attached.
Since composites are denser than wood, they appear to absorb heat, and in the summer, they become uncomfortably hot. This can affect the quality of your time that you spend on your deck. Thus, you must evaluate temperature efficiency before making a decision regarding your deck’s material.
Futurewood Composite Decking is a popular option for compound covering material. Our strong core technology guarantees the ultimate longevity and resistance of all composite deck boards against water, rot, and harsh weather conditions. You can check it out yourself by requesting a free sample!
If you care for your floor or your deck, the appearance might make you worried. However, there's no reason to worry about a composite deck unless you want it to look like wood. The high-end composites have a fantastic grain pattern, and both appearances look exceptionally "woodlike." Some choices include wood shading and different grain fluctuations so that the boards look nice and uniform.
Many factories are also going to buff the factory boards so they will not have any plastic shine looks. At the higher end of the spectrum, you will have many colors and grain models to choose from, which will certainly meet your needs. Consider items like railings, caps, and decoration to make your deck look its best.
A credible Evaluation Service (ESR) Report must be given for synthetic decking materials to be accepted for use by several local building departments. The nonprofit code-compliance testing organization publishes ESR reports. They show test results for the absorption of moisture, resistance to abrasions, fasteners’ spacing, appropriate tension, etc.
Many people couldn't care less if the fasteners are visible. However, if you are bothered by them, select a device that operates with secret attachments. The slanting mechanism eliminates holes and needs fewer screws.
Clipping systems operate with a lightweight grooved deck with a thinner profile than face-twisting systems. However, if you do not add end caps or special cutting pieces or use a design covering the systems, they may have open ends that gather leaves and dirt. Hidden fastener systems are more expensive than facial screw systems. The secret fixing devices will increase the price by 30%.
Many traditional houses are designed with wood decks, so when shopping for a home, people often look for this "modern" aspect. What many people don't understand is that the best composite decking by using updated technology could give them the classic porch they desire without having to rebuild it. Wood is beginning to vanish since people now understand that it cannot last long with low maintenance. Keep in mind your whole home’s aesthetics when it comes to the construction of your porch.
Make sure your deck color goes well with the entire home color palette. Nothing is worse than a house with an unattractive deck that is a side-character to your aesthetic. Make your deck sleek and lovely, and let it integrate with your house.
Place some plants on the deck to add more appeal to your composite deck, particularly for spring and summer. Plants will make the ambiance of your deck peaceful and serene. You can give your patio a beautiful appearance with lots of planters in every corner of your deck. Your visitors will never pause to consider whether the deck is wood or not because it will look beautiful with all the beautiful plants.
You would not need to have specialized instruments as composite decking material requires the same simple tools as any wood deck. However, the total budget is just a slice of the cover. A concealed attachment or deck torso is required for each device. Use screws for composite material for best performance. Also, you could need end caps, refurbishing components, special trim or jacks, and add-ons, including railings, posts, and post caps, depending on the device. Search the installation and the add-ons so that you can see the full cost before buying the decking.
There you have it! Now before you make your purchase, try to see if you can alter some of the prices. Try to customize elements of the deck according to your needs. Check different textures and types of materials each brand is trying to offer, compare them, and then buy the decking most suitable for your needs. Futurewood welcomes you to try out the decks which can make your house shine bright and look great. Do not believe us? Request a free sample now, or check out the options available on our site!
]]>On This Page:
Hardwood floors and water are as compatible as cats and dogs. They can get along briefly, but over time, it won't end well.
Some people love solid hardwood floors so much that they want to install them everywhere. That includes places that get wet, like bathrooms or basements. Hardwood planks that sit in areas with continuous high moisture will eventually grow mold and rot. Typical solid hardwood floors can withstand an occasional splash of water if it's dried up immediately. However, hardwood is porous like a sponge and absorbs water quickly. Ignoring spills, pet accidents, or tracked-in snow will ruin the wood.
Water-damaged solid hardwood floors are expensive to replace. If you're going to install hardwood flooring in wet areas, we will show you the best waterproof solutions and water-resistant hardwood options.
Water-resistant and waterproof are two different characteristics. Let's define the differences between water-resistant and waterproof as it relates to hardwood flooring:
A water-resistant hardwood flooring can repel water for a short time. Water beads up and does not absorb right away, giving enough time to wipe it up. A water-resistant hardwood floor is less likely to incur any lasting damage from short-term spills.
These materials are excellent for spaces where water is controlled, like in a powder room without a shower or bathtub. However, if left wet, water can get into seams and eventually under the topcoat, causing stains, mold, and mildew.
A waterproof hardwood floor will repel water indefinitely like tile. It can't absorb water. To make hardwood waterproof requires a permanent sealer all the way around the board. Water won't penetrate the waterproof coating.
Typically, waterproof hardwood flooring materials will be more expensive, but you won't need to replace the floor after a few years, either. They offer long-term protection for wet rooms.
Although they use fancy trademarked names, "waterproof hardwood floors" are simply engineered hardwood floors with added waterproofing layers. They have a sandwich of synthetic materials on the bottom, a top layer of hardwood veneer, and a clear, waterproof coating over the hardwood.
It’s like a giant chemical lasagne that you can walk on!
Here are a few manufacturers and their version of waterproof hardwood flooring:
Engineered hardwood flooring is an excellent compromise if you want the look of real wood in a continuously damp environment. Bear in mind though, engineered flooring is rarely environmentally friendly due to the chemicals and glues it is made of. Manufacturing is a resource-intensive process and at the end of its life, there is no way to recycle it. Its only option is to become another pollutant in a landfill.
Waterproof hardwood flooring looks great in any room. However, due to the added cost of manufacturing, it's best to reserve it for the wet rooms and use water-resistant flooring for the rest of the home. Some of the most logical places for waterproof wood flooring are:
You should install waterproof flooring in areas where there is the possibility of standing water or high humidity, such as hot tubs and saunas.
It's possible to install hardwood in a basement, but you need to prepare the cement slab first, even if you're installing waterproof flooring. This article provides in-depth information about installing wood floors in a basement.
All concrete slabs wick up moisture from the ground regardless of if they are at grade (ground level) or below grade (the basement level). Use a moisture meter to check how much moisture comes up to determine the best moisture barrier to use.
Just because a particular hardwood flooring is waterproof doesn't mean it won't become moldy and nasty from sitting on a wet slab. If the slab or basement on which your home sits is in an area with high moisture or a high-water table, you should seal and waterproof the cement slab before installing a hardwood floor. This will reduce the chances of mold and mildew growing under the floor.
Another option to prevent moisture damage is to put down a moisture barrier underlayment. Typically, this is plastic sheeting that has sealed seams. It creates a barrier between the hardwood floor and the cement slab that is impervious to water.
Moisture barriers, also known as vapor barriers, prevent moisture from contacting the flooring. Some moisture barriers also have underlayment pre-attached for added comfort and soundproofing.
Sealing the concrete slab and installing a moisture barrier will go a long way to protecting any hardwood floor. But is the hardwood floor waterproof? Not yet.
Waterproof hardwood flooring can withstand direct contact with water indefinitely and not affect the look. Water-resistant floors give you time to clean up spills but will affect the appearance if not dried quickly.
The best you can do for pre-installed hardwood floors is to make them highly water-resistant. Due to the exposed plank edges and ends around the room, standing water can absorb into the wood. That doesn't mean you can't give your wood floors a fighting chance against occasional spills. Two or three coats of quality polyurethane over a freshly sanded and vacuumed floor will do the trick.
Pre-finished solid hardwood floors automatically have built-in water resistance. If you plan to refinish the hardwood floor, here are the necessary steps:
Step 1 – Clear the room – Remove all furniture and obstacles from the floor. This is your opportunity to do spot repairs and to fill gaps, and repair gouges.
Step 2 – Sand the hardwood floor – A quality sanding job is critical to the final finish's success. It's the most time-consuming and tedious process but necessary to get a good result. Start with the edges and use rough grit sandpaper. Depending on the hardwood floor's condition, you'll need two to four passes changing to finer sandpaper each time. End with 180 or 220 grit. Next, thoroughly vacuum and dust between passes. Our article, How to use a wood floor sander machine, has some excellent tips.
Step 3 – Apply the Finish – To ensure the most protection and the best look for the solid hardwood floor, follow the manufacturer's instructions for applying the top finish. If possible, do the work on a warm, dry day to finish the hardwood floor.
It is possible to create a uniformly sealed hardwood floor surface using polyurethane and allow it to stand up to wet feet and dogs coming from the outdoors or the shower. Multiple coats will prevent spills from soaking into the board's seams and give you time to clean them up.
Natural hardwood floor is still the most popular floor type for home buyers. If you need a waterproof hardwood floor for potentially wet spaces, you'll need to go with one of the engineered hardwood floor options we listed above. Unlike solid hardwood, waterproof hardwood floors have protection on all four sides.
If you can get by with a water-resistant finish, you'll have more options for the type of wood floor you can install. You can also refinish your existing hardfloor, adding three or more polyurethane coats. The polyurethane will make your current floor scratch and water-resistant for many years.
You don't need a waterproof floor for most applications and rooms. A factory prefinished hardwood floor will last for generations. Easiklip carries a line of 3/4-inch, solid white oak floors with four double coats of UV-cured polyurethane. They are water-resistant on the surface, making them suitable for kitchens, bedrooms, and living rooms.
Because they are floating hardwood floors that don't use screws or nails, Easiklip hardwood floors are an excellent choice for solid hardwood floors in the basement. They will not pierce the waterproof membrane between the hardwood floor and the concrete sub-floor. Provided there is no flooding or humidity above 60%, you can enjoy hardwood floors without the extra expense of a waterproof floor.]]>Home improvement projects are the best way to add value to your house. By implementing the right upgrades, you'll be able to attract more potential buyers without hurting your asking price. That's the catch, though - not all upgrades are worth your time and money.
How to determine which home improvements you should decide on, then? The answer is simple - you need to consider the project's ROI (return on investment). It measures how much money or profit one can make on investment as a percentage of its cost.
In short, it indicates how much money you can recover from your project.
Of course, improving your home is not the only way to sell a home effectively. You also need to consider your neighborhood, the current state of the real estate market and make your offer stand out.
Nevertheless, renovating your house should increase home value the most. And to help you make the right call on what to improve, we've prepared the following guide.
The best thing about the garage door projects is that they impact both the house's appearance and practicality. What's more, with an ROI of 97,5%, replacing your garage door is one of the best ways to increase the value of your home.
Of course, everything depends on the type of door you get. Choosing a garage door can be tricky, and there are various things you need to consider. Should you purchase one of the Wayne Dalton garage doors? Sectional or slide to the side?
Your choice will affect your house's appearance and security, so make sure you do your research first. The cost of garage door replacement depends on the material. However, it shouldn't exceed $1500.
You can also consider DIY installation, but we recommend you use a professional service. Garage doors can be tricky to replace, and you shouldn't do it yourself if you don't have experience.
One of the worst mistakes you can make when selling your home is investing in excessive renovation projects. Many people believe that the more they spend on their house remodeling, the better. The reality, though, is entirely different.
If you're looking for the most effective way to increase your home value, it's the minor projects that come with the most profitable ROI. For instance, a moderate kitchen remodel comes with 80% of ROI.
It's the small projects that count. With that in mind, you can, for instance, give your kitchen cabinets a new coat of paint, add crown molding, replace doorknobs, or change light fixtures in your bathroom. In addition to style, such improvements should also increase your energy-efficiency.
Don't go too far, though. An excessive kitchen renovation project may ruin your budget and provide you with a much lower ROI.
Flooring plays a crucial role in your home value. If your floors are old, scratched, or full of stains, home buyers will be less willing to investing your property. And when it comes to flooring, your best choice is hardwood.
Changing your old floors with hardwood is a fantastic idea, both in terms of ROI and aesthetics. According to the National Association of Realtors (NAR), hardwood floors allow homeowners to recover even up to 106% return on investment.
That's not all, though. According to one of the NAR's survey, hardwood flooring can increase a home value by 2,5%. It also states that 54% of home buyers are more willing to purchase homes with hardwood flooring instead of carpet.
The only thing that may seem slightly off-putting is the price. Hardwood doesn't come cheap. However, you can save some money on DIY installation or cheaper hardwood alternatives. The overall costs will also vary depending on the space you want to cover with your new flooring.
Old windows and doors can negatively affect your home's value. First of all, they look terrible. Secondly, they aren't energy-efficient, and if there's one thing home buyers look for, it's energy efficiency.
A leaky front door and windows can significantly increase heating and cooling costs. As such, if you believe your doors and windows require replacing, make it your top priority.
Investing in modern, insulated low-emissivity windows and a set of new doors will significantly your exterior appearance and resale value.
What's more, entry door replacement comes with a high ROI of 75%. Not to mention it's one of the cheapest ways to increase home value, as an average installation cost is $1000 depending on the material.
With the increasing ecological awareness, more people want to own a real smart home. And while it can be challenging and costly to make your home smart, it doesn't mean you can't do anything about it.
If you don't want to spend too much and still wish to make your house more eco-friendly, investing in smart appliances is an amazing idea to attract buyers and increase home value.
We recommend you consider purchasing:
These appliances shouldn't ruin your budget too much while increasing your property value. People should also feel more attracted to a smarter home, as it will provide them with more comfort.
It's not a surprise that homes with higher square footage and more storage space usually attract more potential homeowners. And while you can't make your home bigger magically, you can reinvent your rooms to make them seem more spacious.
Take a look at your floor plan and see how you can maximize your space. See what you can change in your living room. A good idea can be to convert your old bathroom into the laundry room or combine your kitchen with the dining room.
The possibilities are endless, but making the right call may require time and skill. Remember that you can always consult real estate professionals like interior designers or realtors to find out how you can make the most out of your space and increase your home value.
When looking at homes, what is the first thing that you see? A curb appeal, of course. How a house look indicates its price and can make a huge difference among potential buyers. After all, who would want to live in an ugly home?
With the right colors, nice looking garage doors, and organized garden, you'll be able to ensure your home makes an electrifying impression. If a house looks astonishing, real estate agents can use it to their advantage and negotiate a higher asking price.
You only have one shot at making the right first impression, and if your potential buyers face a home that stands out from the street in a good way, they'll be more likely to trust you.
Besides upgrades, you also need to take care of the necessary repairs. Ensure there aren't any leaking pipes, loose roof tiles and that all your kitchen and bathroom appliances work as they should. Ensure to refinish your wood flooring or clean carpets.
A good idea is also to perform a house inspection. However, make sure you hire a professional to do it. They will check every detail, ensuring you don't skip anything.
Another thing you should do is clean and declutter your entire home. It may not add value to your property, but a tidy house can make a huge difference, as buyers are more willing to spend their money on well-maintained homes.
Many things can impact your home's value. Everything from Shutterstock pictures you use and picking the right time to sell to working with a reliable real estate agent can make the difference.
However, if you intend to get the highest price possible, you should perform the right home improvement projects. Sure, upgrading your estate is a long way that takes time, but there's no better way to add value to your home.
Fortunately, as you can see, there are plenty of things you can renovate to give your home equity a boost. Before making the decision, though, we recommend you take a look at the National Association of Realtors' official site.
There, you'll find which projects come with the most profitable ROI, and as such, are worth your money and time. A good idea is also to compare similar homes in your area to see what kinds of upgrades they have.
No matter the upgrades you add when selling your property, it's essential to make it look clean and organized. Sometimes, even the tiniest things can make the difference. And when it comes to the real estate market, that statement couldn't have been more accurate.
]]>
Have you ever walked into a stately home filled with elegant furnishings, and then you noticed how bad the floor looked? Wood floors get damaged from wear and tear but also develop cracks or gaps.
If the gaps, high heel marks, chips, nail holes, or knotholes are significant, the floor may require a professional repair job. But, if they are minor, you can use wood floor filler.
In this post, you will discover the top products and methods used by flooring professionals to conceal cracks and other damage that can happen to wood floors.
Unless the gap is seasonal and will close eventually, you can use wood filler to repair narrow gaps and cracks. Fillers can be water or solvent-based. There are two functions of wood floor fillers:
The wood filler for holes will be a thick paste, whereas pore fillers have a batter-like consistency that spreads and fills tiny pores.
Wood filler will dry hard. If repairing a floor with it, add a finish layer of polyurethane and let it dry. You won't have any problems walking on it.
Before you can answer this question, we need to know the extent and width of the gaps. Are there gaps between every board in the room, or is just one or two? Do the gaps appear seasonally and then close again, or are they permanent?
Wood filler for hardwood floors can fill short, thin gaps in one or two places. There are better solutions for wider or seasonal openings, which we'll explore later in the article.
Here are the most significant differences between these two products:
Wood Filler | Wood Putty |
---|---|
Water-Based |
Oil or Solvent-Based |
Dries hard |
Stays pliable |
Best for unfinished wood |
Suitable for finished wood |
Indoor application |
Outdoor/Indoor application |
These are generalities, and there are exceptions. When it comes to fixing wood floors, the question is...
Painters use wood putty to fill nail holes that will be painted or stained. It's not a good choice if you don't plan to paint or seal it because it dries very slowly. Putty will pick up dirt and become discolored compared to the wood around it.
Wood fillers typically won't shrink and they dry hard. They are a better choice for surface repairs, while the flexibility of putty is better for gaps where it can expand and contract with the wood.
We've compared reviews from contactor websites and found five of the most popular brands that the pros use.
Flooring experts like this pre-mixed filler because it shrinks less than any other wood floor filler. It is a better choice for filling large areas. It also accepts the color of stain, Rubio, and polyurethane very well. It doesn't have a chemical binder in it, so it quickly reconstitutes when mixed with water, even when dry. It comes in Red Oak, White Oak, Maple, and Ebony. However, Timbermate mixes with oil or latex tints, dyes, and stains, accurately reproducing any wood color.
When matching colors, they recommended that you add color to the putty and match it while it's wet. The product dries lighter and returns to its original color when coated with a clear finish.
To see how to work with Timber Mate, watch this video.
You mix this resin with the fine sanding dust retained from sanding the floor. The advantage of this product is it creates wood filler that exactly matches the floor. Use sanding dust, a.k.a. wood flour of 80 grit or finer.
Glitsa wood flour cement has two significant advantages. First, the epoxy itself lasts a lifetime. Secondly, there is no waste. You can mix just the amount you need for each job. Another advantage is that you can mix up a different color for spot filling using a different dust shade. Sometimes, maple sanding dust looks better on a light spot in an oak board. Unfortunately, Glitsa is only available by the gallon and, due to its toxic nature, cannot be shipped via parcel services.
To see a product demonstration, check out the first 2 minutes of this video.
Minwax stainable wood filler works well to repair cracks, small gouges, nail holes, knot holes, and other wood defects. It works best on unfinished wood, both indoors and outdoors.
Squeeze a liberal amount from the tube and work it in with a clean putty knife. Once dried and sanded, it accepts either oil-based or water-based wood stains. The drying time varies between 2 to 6 hours.
Elmer's calls their wood filler for hardwood floors "color-changing" because it turns pink only when it's completely dry. That's a bonus for DIYers, so they know when to sand, paint, or stain. Elmer's is one of the best fillers for larger holes because it won't shrink or crack. It's also water-based for easy clean-up and non-toxic.
There may be large gaps between boards if you are restoring an old home with wide plank flooring. A liquid filler may not be strong enough to fill the gaps and maintain the height. The answer is a flexible gap filler that you stuff into the gap to fill it.
Draughtex comes in 10 or 40-meter rolls and three thicknesses. The thin product fills gaps less than 3mm, the standard size fills 2 to 7 mm, and the thick fills 6 to 11 mm.
Here is the product video for your reference.
We need to mention this technique for filling round holes like screw heads. You can make real wood plugs that glue into a hole. After staining or painting, the holes are virtually invisible. They can also match the grain of the original wood where putty or fillers can't. Here is an excellent video teaching the technique of How to Make and Install Wood Plugs.
For small gaps between a few boards, use your finger to press a color-matching putty into the gap to fill it.
For a roomful of gaps such as parquet floors, you'll need to use a larger quantity of liquid filler. The best solution is to mix your own filler using fine sanding dust from the floor, 80 to 100 grit. You'll work it into the gaps using a large trowel. It creates a wood floor filler in the same shade as the rest of the boards. This video shows you how to make it.
For permanent, wide gaps, you'll need to fill them with wood dowels, shims, or manila rope. Filling gaps with rope is an old-time method you might find in a farmhouse or restored barn floor. It's a straightforward repair:
If you don't plan to cover the rope, dip it in a matching stain and allow it to dry before installing it. Here's a quick video demonstration:
Fill the gaps when the weather is the most humid, as the gap should be at its smallest.
Of course, you don’t have to have a major issue to replace your floors. Our homes just need a little change on occasion. Fortunately, hardwood flooring by Easiklip flooring comes in a variety of options. Find different species of wood, warmer or darker tones, or a new texture or grade. Brand-new hardwood flooring can completely transform your home, giving you the fresh style or look you crave.
Easiklip flooring allows you, the do-it-yourselfer, the floor that installs using clips instead of glue, nails or screws. You can even take it with you if you move! Bring the warmth and beauty of real solid hardwood floors into your home or office. The simple design means you can install your floor in hours instead of days.