

Why the Right Tools Matter
Hardwood installation demands precision, and the right tools make all the difference. Traditional installs require 10+ tools, from saws to nail guns, but Easiklip’s floating clip system reduces the list to just three. Learn what each tool does, why it matters, and how Easiklip makes hardwood installs faster, cleaner, and more DIY-friendly.

If you’re planning to install hardwood floors yourself, you’ve already won part of the battle. Choosing the right hardwood floor installation tools can make the difference between a project that looks pro and one you’ll cringe at later.
Here’s the thing: in Canada, flooring isn’t cheap. According to NerdWallet Canada, installing hardwood runs about CAD $4 to $16 per square foot, depending on the wood species, design, and labour. And in Vancouver, you’ll see similar ranges, traditional hardwood, for example, runs about $3-$14/sq ft depending on type and install complexity. Floors Depot
Those numbers add up fast. If you skimp on the tools, you’ll either spend more fixing mistakes, or you’ll end up with gaps, squeaks, or worse. But if you show up with tools that actually help, you save time, frustration, and money, and your floor will look like a showroom, not a weekend project gone wrong.
“Quality matters when it comes to flooring. A good saw, accurate measuring, and the right way to join boards aren’t optional; they’re essential. Even if you do every other step perfectly, the wrong tool can make everything feel amateur.” — Local flooring pro from Supreme Flooring, Toronto (paraphrased from their customer-advice section)
What this means for you:
-
Before you swing the hammer or clip anything, you need a solid toolset.
-
You should understand what each tool does and why it matters. Some tools may feel like “extras,” but they prevent mistakes that cost more than the tools themselves.
-
Using high-quality tools doesn’t just help with performance; it builds credibility. When you show up with tools, materials, and prep done right, even people doing it themselves (DIYers) can feel like pros.
So now that we know why tools matter, let’s get practical. You don’t need a contractor’s truck loaded with every gadget under the sun; you just need the right essentials. Think of it like a starter kit: each piece plays a role in making your install faster, cleaner, and more professional.
Let’s break down the 10 must-have hardwood floor installation tools: what they do, why they matter, and how they’ll save you from frustration later.
The 10 Must-Have Tools for a Traditional Hardwood Installation
Hardwood floors look seamless when they’re finished, but the truth is: without the right tools, even the most beautiful planks will fail to impress. These are the ten tools you’ll need for a traditional nail-down or glue-down installation and exactly why they matter.

1. Chop Saw (Miter Saw)
Think of the chop saw as your precision cutter. It’s designed to make accurate crosscuts and angled edges, which you’ll need every time your boards meet a wall, a corner, or a transition.
Without it, you’ll end up with jagged edges or boards that don’t quite align, and those mistakes stand out like a bad haircut. A sharp blade on a miter saw delivers the clean, professional edges that make a floor look custom-fitted.
You’ll use this tool most often for:
-
Cutting end pieces to fit perfectly against the walls
-
Creating neat angles around corners or stairs
-
Trimming boards for transition areas
As Popular Mechanics notes, the miter saw is one of the most versatile cutting tools for any wood project.

2. Table Saw
While the chop saw handles short cuts, the table saw is your solution for long, straight rips. In almost every installation, the final row of planks will be narrower than a full board. That’s where the table saw earns its keep.
It ensures your last row looks intentional instead of cobbled together. You’ll also use it for ripping down boards to fit against irregular walls. Without a table saw, you’re left with uneven edges or the temptation to “make do” with gaps, which always comes back to haunt you.
You’ll use this tool most often for:
-
Ripping boards lengthwise for the last row
-
Custom-fitting boards to non-standard spaces
-
Correcting boards that are slightly too wide
See Home Depot’s overview of saws for flooring projects.
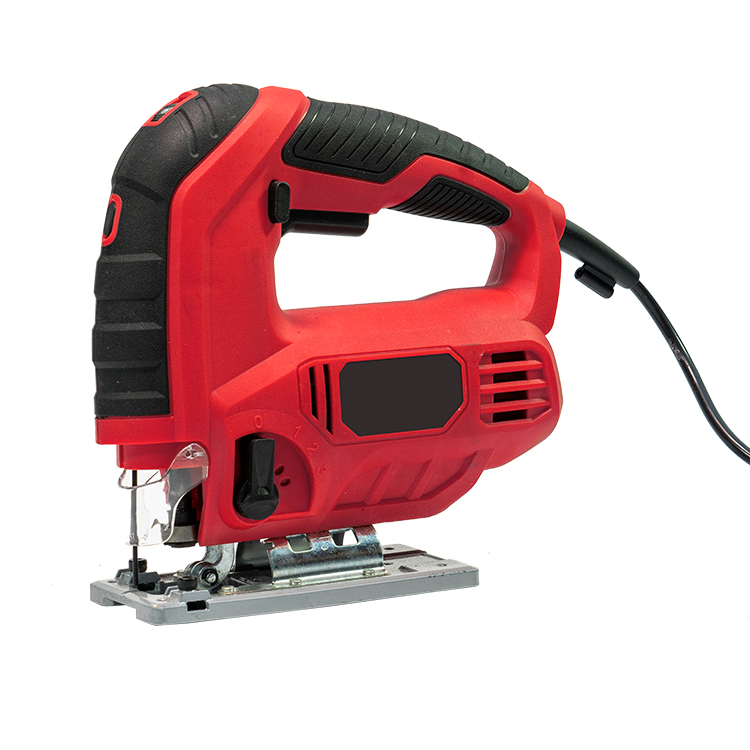
3. Jigsaw
Rooms aren’t perfect rectangles, and this is where the jigsaw becomes indispensable. From cutting holes for floor vents to shaping around pipes, posts, or awkward corners, the jigsawhandles what no other saw can.
Without it, you’d be left trying to force boards into shape or making sloppy cuts that ruin your floor’s polished look.
You’ll use this tool most often for:
-
Cutting around heating vents
-
Notching planks to fit around door trim or pipes
-
Handling irregular corners and custom cuts

4. Oscillating Multi-Tool
Every installer has a “rescue tool,” and this is it. An oscillating multi-tool handles all the odd jobs that slow a project down. It’s perfect for undercutting door jambs so your planks slide underneath cleanly. It trims baseboards, shaves edges, and fixes “almost fits.”
Without it, you’ll waste hours trying to finesse boards with the wrong saws or chisels. With it, you solve problems in minutes.
You’ll use this tool most often for:
-
Undercutting door casings for a seamless fit
-
Trimming boards in tight spaces
-
Correcting edges where boards meet obstacles
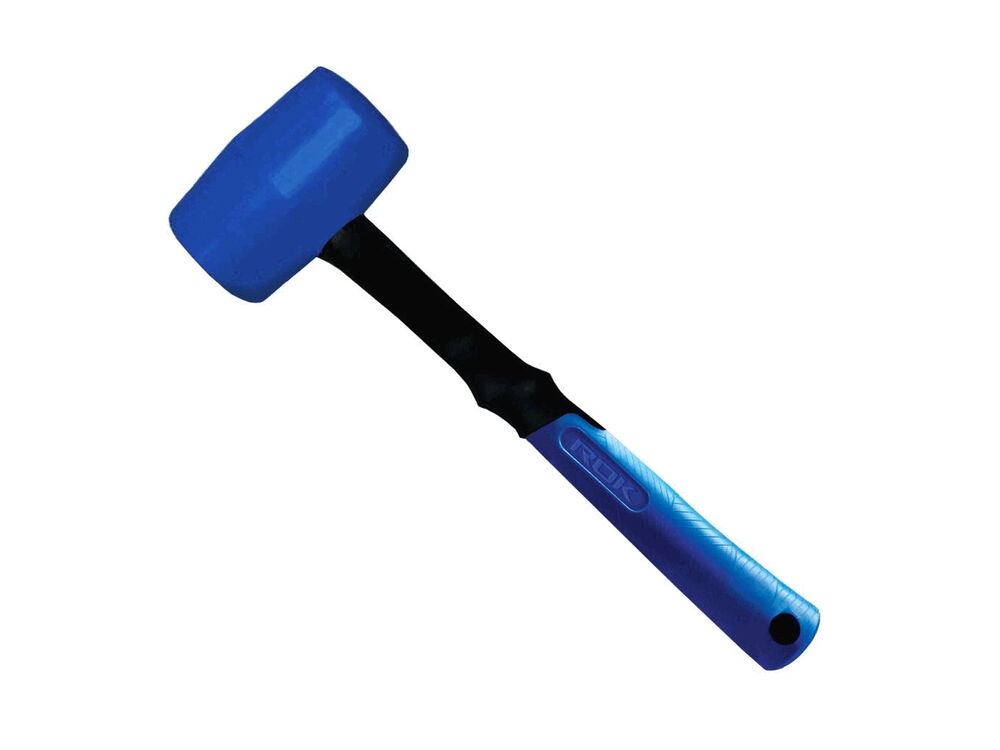
5. Rubber Mallet
Simple, affordable, and used constantly. The rubber mallet is what keeps your boards snug without damaging the wood. Every time you tap a plank into place, you’ll thank yourself for having one.
Without a mallet, many DIYers resort to a regular hammer, which leaves dents, chips, and frustration. Pair it with a tapping block, and you’ll get joints that lock tight and stay put.
You’ll use this tool most often for:
-
Tapping planks together during installation
-
Adjusting boards without scarring the surface
-
Working with Easiklip clips to snap planks in securely
6. Spacers
These tiny wedges might not look important, but they are. Hardwood expands and contracts with humidity. Spacers keep a consistent gap between your planks and the wall so your floor has room to move without buckling.
Skip them, and you risk boards pushing against the wall, popping up, or creating squeaks later. The NWFA highlights expansion gaps as critical for every hardwood install.
You’ll use this tool most often for:
-
Maintaining expansion space along walls
-
Preventing buckling during seasonal changes
-
Keeping installation lines consistent

7. Pry Bar and Hammer
Before new boards can go down, old flooring or trim often needs to come up. A sturdy pry bar and hammer make demo safer and faster, especially when removing nailed-down boards or tile.
Without them, you risk damaging your subfloor, or worse, injuring yourself.
You’ll use this tool most often for:
-
Removing existing flooring
-
Prying up baseboards and trim
-
Tackling stubborn nails or staples

8. Tapping Block and Pull Bar
Specialty tools designed to protect your boards while ensuring joints stay tight. A tapping block allows you to hammer planks together without damaging their edges. The pull bar helps you close gaps in the last row when there’s no space for a mallet.
Without them, you’ll end up with gaps between planks or scuffed edges. With them, your floor looks seamless.
You’ll use this tool most often for:
-
Locking planks together during installation
-
Closing gaps in the final row
-
Protecting board edges while tightening joints
:max_bytes(150000):strip_icc()/289-moisture-meter1-ec4c28b6eb314acfadd75fe86f7035c1.jpg)
9. Moisture Meter
Moisture is the silent enemy of hardwood. A moisture meter tells you if your subfloor and boards are ready to install. Skip this step, and you risk cupping, crowning, or even mold under your floor.
The NWFA requires moisture testing before installation, noting it as one of the most common causes of failure (NWFA Guidelines).
You’ll use this tool most often for:
-
Testing subfloor moisture content
-
Checking wood acclimation before installation
-
Monitoring basement conditions
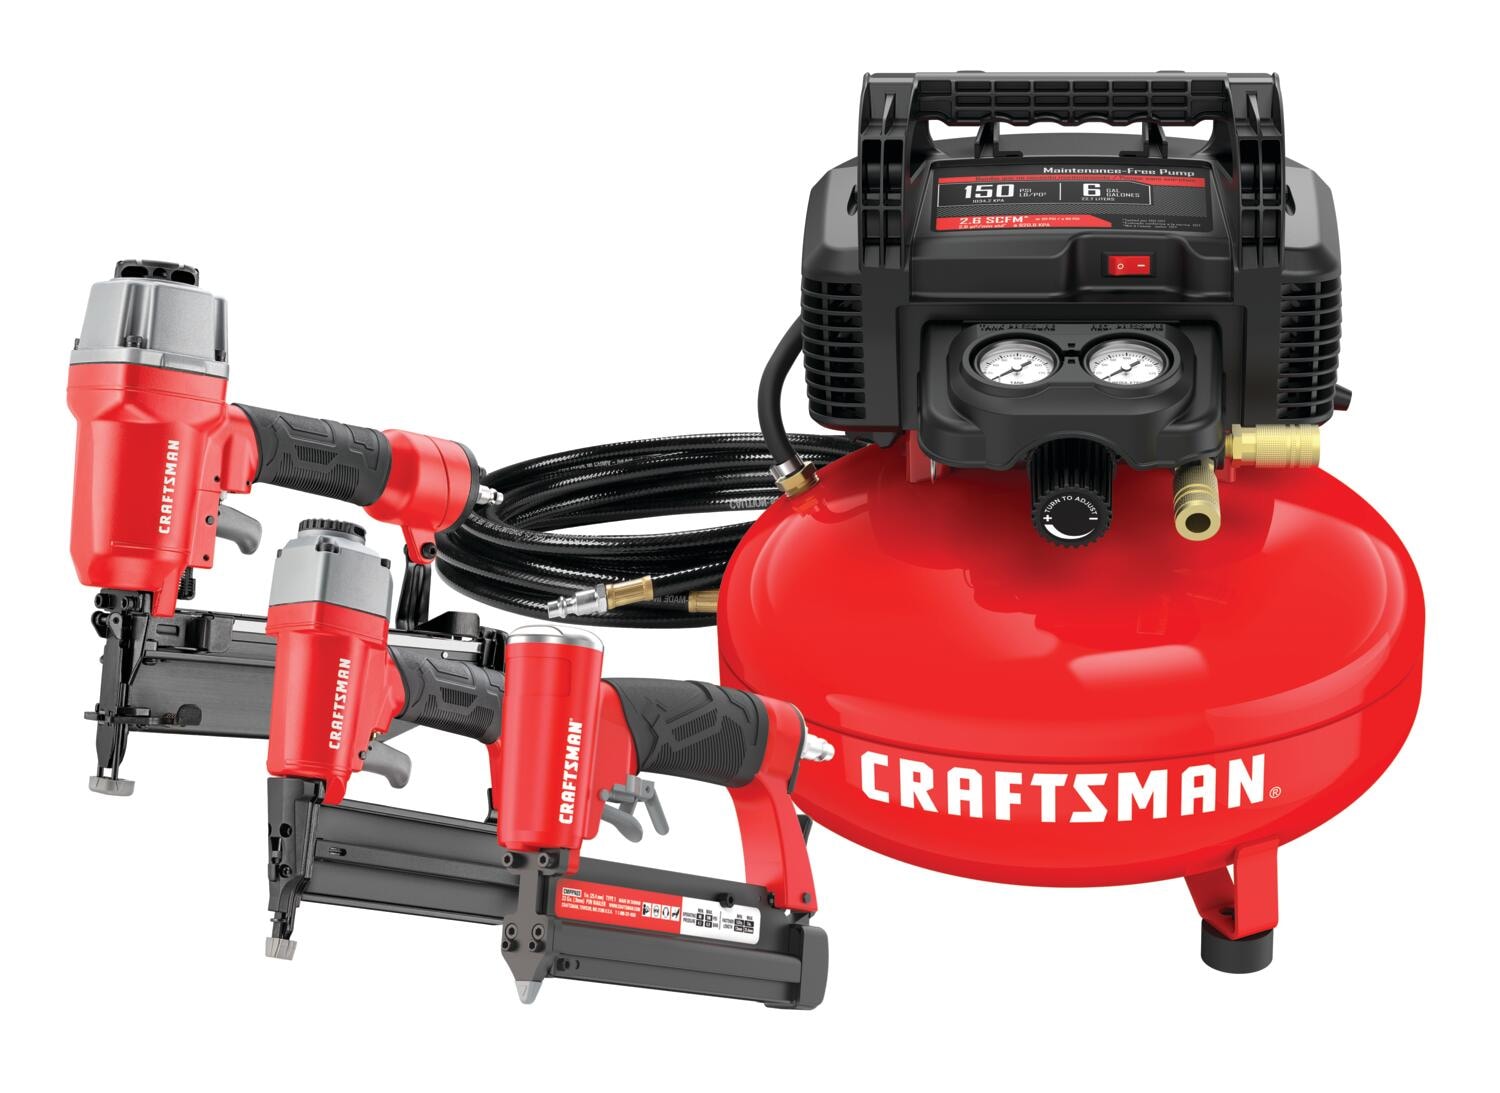
10. Nail Gun and Compressor (or Screw Gun with Jig)
Traditional hardwood installs often rely on a pneumatic nail gun with a compressor, heavy-duty, noisy, and expensive. It secures boards firmly but adds complexity most DIYers don’t want. In some cases, a screw gun with a special jig is used for engineered flooring.
Without the right fastening system, your boards can shift, squeak, or pull up over time.
You’ll use this tool most often for:
-
Securing planks in nail-down installations
-
Fastening trim or mouldings
-
Specialty fastening where required
Overwhelmed yet?
It’s a lot. Between saws, nailers, and specialty gear, a traditional hardwood floor installation toolkit can easily run into the thousands, and that’s before you even buy the flooring. For pros, it’s just another day on the job. For homeowners, it’s intimidating and expensive.
The Easiklip Difference: 3 Tools, Not 10
Here’s where Easiklip simplifies everything. Thanks to the patented floating clip system, you can install solid hardwood floors with just three tools:
1. Rubber Mallet
To snug planks securely into the clips without damage.
2. Spacers
To maintain consistent expansion gaps along walls.
3. Chop Saw or Jig Saw
For trimming boards neatly at edges or around obstacles.
That’s it. Three tools instead of ten. No compressors, no adhesives, no specialty jigs. Easiklip makes professional hardwood installation achievable for any homeowner, saving time, money, and a whole lot of stress. See how it works here.
If you’d like a clear, visual guide to walk you through each stage of installation, from moisture barriers to the final row, visit Easiklip’s full step-by-step tutorial here.
What Happens When You Cut Corners
Hardwood floors don’t forgive shortcuts. Every skipped step or missing tool leaves a fingerprint that shows up later, sometimes months down the road. Here’s what happens when you try to wing it without the right gear.
1. No Moisture Meter = Warped Floors
Skip moisture testing, and you’re rolling the dice with your investment. Wood that isn’t acclimated or subfloors that aren’t dry enough will expand and contract unpredictably. The result? Cupping, crowning, or gaps you can’t un-see. The National Wood Flooring Association (NWFA) calls improper moisture control the most common cause of hardwood failure. For a detailed homeowner’s guide, Easiklip explains how to acclimate hardwood flooring properly.
2. No Spacers = Buckling Boards
Forget to leave expansion gaps, and your floor has nowhere to move. Over time, boards push against each other and buckle, sometimes lifting right off the subfloor. Fixing it means ripping up sections and starting over. For more on planning for expansion, Easiklip’s guide to floor transition strips shows how to keep layouts seamless and stable.
3. No Chop Saw = Sloppy Cuts
Try cutting with the wrong saw, and you’ll see jagged ends, uneven joints, and boards that don’t fit. Those tiny gaps might not bother you at first, but dust, moisture, and squeaks creep in fast.
4. No Tapping Block = Damaged Edges
Hammering boards together without a block chips edges and crushes tongues. Instead of a smooth, continuous floor, you get visible scars and weak joints that loosen over time. Easiklip’s installation guide demonstrates how tapping blocks keep joints tight without damage.
5. No Multi-Tool = Bad Fits Around Obstacles
Pipes, vents, and door jambs demand precision. Without a jigsaw or multi-tool, you’ll end up forcing boards in or leaving gaps around fixtures.
6. No Pry Bar = Damaged Subfloors During Demo
Ripping out old flooring with the wrong tools can gouge the subfloor, creating uneven spots that sabotage your new installation before you’ve even started. Easiklip’s blog on removing old flooring before a DIY install shows how the right tools make prep smoother.
7. No Nail Gun = Shifting or Noisy Floors
In a nail-down install, nails and fasteners lock everything in place. Skip the right fastening tools, and your boards may move, squeak, or separate with use.
Why This Matters
Every shortcut shows up eventually. It might be a squeak underfoot, a plank that refuses to stay down, or a floor that warps after one damp season. Each one eats into the time, money, and confidence you thought you saved.
As flooring specialist Jon Namba explains in Floor Covering Installer Magazine:
“Cutting corners during installation will always show up later. Preparation and patience are what separate a lasting floor from one that fails.”
Bringing Warmth and Refinement Below Grade
Basements don’t have to be an afterthought. With the right preparation and the right product, they can become some of the most beautiful, functional rooms in the home. Hardwood adds natural warmth, timeless character, and long-lasting value, qualities that instantly elevate a space once reserved for storage or utility.
With Easiklip’s floating hardwood system, you get solid oak flooring that installs quickly, locks seamlessly, and looks like it came straight from a showroom. It’s hardwood designed for real life, easy for DIYers, trusted by pros, and elegant enough to redefine a basement living room.
Ready to start?
👉 Explore the full collection here: https://easiklip.com/collections/easiklip-hardwood-flooring
Still deciding?
👉 Order an Easiklip Sample Pack and see the wood in person before you commit: https://easiklip.com/products/easiklip-sample-pack
Bring elegance below grade. With Easiklip, installing hardwood in your basement isn’t just possible, it’s practical, beautiful, and built to last.


