You’re trying to figure out just how much a hardwood floor installation will really cost. Perhaps you are a DIYer looking to install your own flooring or maybe you're a seasoned pro looking for better and faster installation methods? Until you have have an assessment done by a contractor, it’s tough to be too sure of what the hardwood flooring costs per square foot will be, but this article will arm you with some real-world numbers to help you with your decision making process.

We’ll start by presenting our case study of an 850 sq ft solid hardwood floor installation. We’ll present the job specifications and the actual real-life quotes we got from 3 different contractors in our city. We’ll show you before and after photos of the job we ended up doing mostly ourselves, and of course, we’ll show you the final bill. Lastly, we’ve got some great tips to help you save even more money when installing your hardwood floor.
Case Study: 850 sq ft Hardwood floor installation in office building.
Below is a birds-eye view drawing of our office space. This is a first-floor office with a concrete subfloor. Originally, the owners installed industrial tiles over the concrete and then in later years, installed carpet over top the tiles. We want to remove the carpet and install hardwood flooring directly over top of the tiles.

Job Specifications:
- Tear up and remove old carpet
- Purchase and install foam underlayment and moisture barrier
- Purchase and install hardwood flooring
- Purchasing and installing baseboards to finish the job
- Dump run for removal of wood scraps and packaging
Pre-Installation Photos:


Step 1: Remove the Carpet
Shown above is the 850 sq ft room we will install the hardwood flooring in. The room has a concrete subfloor that is covered with industrial rubber tiles and then an industrial carpet on top, which was glued onto the tiles when the owners decided to update the space years ago. These photos only show the tiles as we had already had our handyman remove the top layer of carpet before we took any photos. He took care of the carpet removal and dump run.

Cost for tear up and removal of carpet: $150 labour, $150 dump run.
Step 2: Get some quotes
Now for the fun part. Armed with our photos from above, we decided to use the TrustedPros website to reach out to some local wood flooring installation companies to see what kind of estimates we could get for materials and labour for our job.
Here’s what we got:
QUOTE #1
From the picture I cant tell if your wood floors is concrete or wood. If concrete you can not use Solid hardwood (NOTE: This guy doesn’t know about Easiklip solid hardwood which CAN be installed over concrete). I would recommend an engineered floor or higher grade laminate. As a commercial space you may have lots of wear and tear..
Approximate hardwood flooring installation cost would be about $10k material and labour..there may be some floor leveling to do as well.
You could always buy cheaper material but usually not worth it.
An open area as yours will take about 3-5 days to complete.
QUOTE #2
Cost per square foot Just for installation
Nails down 1.75$ +GST / per square foot
Glue-//- 2.25$ +GST / per square foot
Prices from 2,00$ up to 5.00$
Depends on styles
Installation 2 days

QUOTE #3
• Cost per square foot for install (hardwood/engineered)- Since you mentioned you have a concrete sub floor, therefore, we would have to go for an engineered product and float it on top (NOTE: This guy doesn’t know about Easiklip either) - that would be $2.25/ per square foot)
• Estimated materials cost (hardwood/engineered)- engineered wood starts from $5 per square foot to $20 per square foot - I would recommend going for a product at least $7.00/ per square foot for a commercial office.
• Timeline for job completion (if the sub wood floor doesn't need any leveling (Grinding and Pouring self-leveling compound, it shouldn't take us more than 3 days to complete)
Step 3: Work out the numbers
From quote #1: This guy estimated $10,000 for materials and labour to install an engineered product with a 3-5 day turnaround.
From quote #2: So many problems with this quote. Firstly, this guy is super hasty with his reply and leaves us questioning the hastiness of his work in general. Plus, he hasn’t seemed to notice that we are requesting solid hardwood over concrete subfloor. He quoted us for a nail down which is not possible over concrete without first installing a plywood layer over the concrete. And lastly, the price range he mentions for supplies ($2-5/ per square foot) is very cheap for solid hardwood. So we can assume he’s probably quoting based on engineered wood flooring, which isn’t what we want. Nevertheless, his average cost to install hardwood floor would be roughly:

- $1,500 for nail down installation (850 sq ft x $1.75)
- $1,900 for glue down installation (850 sq ft x $2.25)
- $1,700-4,300 for supplies
- Total is between $3,200-$6,200
From quote #3: Again, this guy doesn’t know about Easiklip and the ability to float a solid hardwood over concrete, so he is suggesting we use an engineered product. Further to that, he recommends we don’t go any cheaper than $7/ per square foot. Thus, his fees will look like this:
- $1,900 for glue down installation of engineered wood flooring (850 sq ft x $2.25)
- $5,950-$17,000 for material costs (850 sq ft x $7 | 850 sq ft x $20)
- Total is between $7,850-$18,900

Conclusion
Labour:
Quotes #2 and #3 both gave us $2.25 per square foot as an installation cost. So let’s take that number to work with. That gets us to around $2,000 for our 850 sq ft project.
Materials:
All these guys quoted us for engineered flooring, which was not what we wanted. But nevertheless, even if we do use their numbers, we’d fall somewhere between $1,700-$18,900 for materials. This number certainly doesn’t help us out much. But at least quote #3 recommended we not go any lower than $7/ per square foot for quality sake, so let’s take that number for starters. At $7/ per square foot for our 850 sq ft project, that gets us to around $6,000.

In conclusion, we are looking at a staring point of around $8,000 for our job ($2,000 for labour plus $6,000 for materials)…AND this is just for engineered wood. Not even solid hardwood, which is what we actually want.
Step 4: Install the flooring ourselves
So we now have an idea of the going rates for an installation of engineered wood flooring, but are going to move forward with installing our own Easiklip solid hardwood flooring over our concrete subfloor.
First we needed to round up a few tools and supplies for the installation:
- Miter saw. Purchased from local hardware store for $499.99
- Dust masks. Already had these lying around.
- Work gloves. had these lying around
- Tape measure. Purchased from local hardware store for $12
- Table saw. Borrowed from our handyman
- Broom and vacuum cleaner. Had this already.
- Hammer. Had this lying around.
- Staple gun. Had this already.
- Vapour Barrier. 10ft x 100ft roll purchased from local hardware store for $70
- Foam underlayment. 2 x 500 sq ft rolls purchased from local hardware store for $218
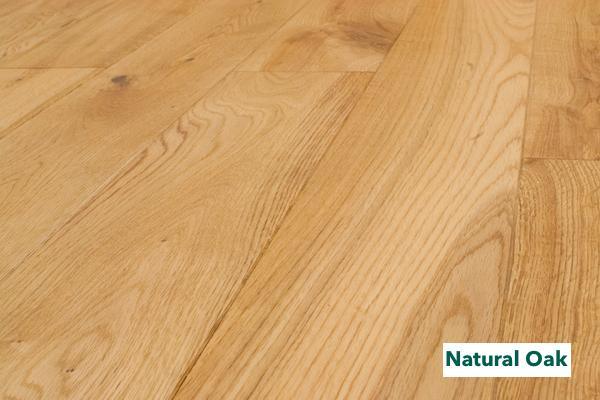
- Hardwood flooring. We elected our Easiklip “Natural Oak” flooring and prepared 881.4 sq ft of flooring. Currently valued at $4,750.75 (881.4 sq ft x $5.39/sq ft).
- Oak baseboards. Purchased from local hardware store for $84.04
- Nail gun. Our handyman had this already.
- T-mouldings. 2 x 78” mouldings purchased for $45 each
- Glue gun and glue for installing T-mouldings. Our handyman donated this.

Timeline of events for our hardwood flooring installation:
After assembling all our supplies, we completed our installation in the following order:
Day 1: Preparation
Tear up carpet, clear furniture and open up all the boxes of flooring to acclimatize them to the room.
Time spent: 3 hours approx.
Day 2: Laying the flooring
This was technically day 4, as we waited a few days for the wood flooring to acclimatize, but it was our second day of labour.
On this day, we installed all the hardwood flooring. Steps included laying the vapour barrier and foam underlayment, then installing the hardwood flooring over top. Below is a video of this entire process. At the start, you can see the opened boxes of flooring stacked on top of each other. We installed one row at a time. The majority of the work was completed by two people, but occasional help from a couple other office staff was used. No one on the work team had installed hardwood flooring before, so we all learned on the fly.
As you can see from the video below, the installation of all 850 sq feet of Easiklip click solid oak flooring was completed in one day (just watch the sunlight outside).
Time spent: 10 hours approx.
Day 3: Final touches
On day 3, we had our handyman install the oak baseboards with his nail gun. Here are a few shots from that process.
 He has had experience installing baseboards before, so the job didn’t take him long. He installed the t-mouldings last, and that was it. The job was done!
Time spent: 3 hours approx.
PROJECT CONCLUSION
Now that the job is complete, we can crunch all the real numbers and figure out exactly how much it cost per square foot for our hardwood flooring installation.
Here is our final list of expenses:
$150 - dump run
$500 - miter saw
$12 - Tape measure
$70 - vapour barrier
$218 - foam underlayment
$4,750.75 - “Natural Oak” white oak hardwood flooring
$84.04 - Oak baseboards
$90 - T-mouldings
$300 - labour costs (handyman)
ACTUAL TOTAL: $6,174.79
ORIGINAL ESTIMATE BASED ON QUOTES FROM CONTRACTORS: $8,000*
Actual cost savings over estimated budget: $1,825.21 or 23%

*Note that this estimated project cost was based on Engineered wood flooring and that our Actual Total represents a solid hardwood installation.
Wow, we clearly saved loads of cash by installing the flooring ourselves, but the costs of the actual materials really weren’t that bad either. Considering that we now have eco-friendly SOLID hardwood flooring in our office, we know we now have many more years of floor life than if we were to have installed an engineered floor instead.
The new wood floors looks great and the office is feeling refreshed and ready for a whole new level of business and pleasure! Here are the photos after completion:


NOTABLE FACT: Our actual waste factor
Note that we purchased 881.4 sq ft of flooring for this project. In actuality, the total square footage of the room was 866 sq ft. Typically, most hardwood flooring suppliers recommend purchasing 5-15% more materials than anticipated to account for defective materials and waste created by trimming down individual boards or human error. Somehow, our installation worked out almost perfectly and despite trimming down a few boards and discarding 4 defective ones we used up all the materials. As such, our waste factor worked out to be an impressive 1.8%!

Ok, but that’s not all. If it isn’t painfully obvious by now that installing an Easiklip solid hardwood floor is a no-brainer decision for almost any project, we wanted to shed even more light on how you can cut costs during your own hardwood installation.
BONUS: 13 Ways You Can Reduce the Cost of Your Hardwood Flooring Installation
- Don’t install on a diagonal. This increases waste materials as you have to cut oddly shaped pieces off boards when finishing rows that you won’t likely be able to use to start the next row.
- Rent the tools you will need instead of buying them. Check with your local home depot or hardware and tools rental companies. Some cities like Vancouver even have a tool library. A membership-driven low-cost solution for tool rentals.
- Purchase your tools and sell them right after. If you’re planning to take your time with the installation, tool rental costs can add up quickly since they’re often billed by the day or hour. Consider purchasing the tools you need (new or used) and selling them on Craigslist as soon as the job is done. If you purchase used tools, you might even be able to sell them for exactly the same amount you paid, incurring a net zero cost for your project. If you purchase brand new tools, you’ll loose a bit on depreciation, but it likely won’t be as much as the rental costs if you need the tools for a few weeks.
- Change your perspective. Although it may seem like you’re spending a lot of money on your flooring, think about the fact that this hardwood floor will likely be the only one you’ll ever have to install. That will surely beat the costs of constantly replacing carpets, cheap engineered wood flooring or outdated tiles.
- Remove the old flooring yourself. Many contractors charge around $0.20/sq ft just to remove old flooring like carpet. Tile or glued down wood flooring is likely to cost much more to remove. So cut that cost and do it yourself.
- Don’t take the old floor to the dump right away. When you install your new timber flooring, you will have more wasted materials to dispose of: packaging, unusable end pieces and damaged or defective planks. Add all of this to the old floor waste and do just one dump run. This way, you’ll save time, transportation costs and landfill fees.
- Remove appliances yourself. Many contractors charge additional fees to move your appliances for you. Find some blankets and straps to secure appliance doors and protect them from surface damage and ensure you have some soft slidable material to put underneath as you slide them along the floor to avoid floor scratches. This article has some great tips on moving large appliances: https://moving.tips/moving-day-tips/move-household-appliances/
- We’re kind of stating the obvious here, but buying cheaper flooring is yet another way of saving costs on your project. Of course, we don’t recommend you go too cheap, but it is an option. You can find the cheapest hardwood flooring on sites like Lumber Liquidators or Wayfair.com. Be aware of all the bad reviews though. They offer such cheap pricing because they buy insanely large amounts of flooring from their suppliers at one time to save costs. This means much less time for quality control and can cost you way more in the long run. Just take a look at this article that discusses how they dealt with the discovery of abnormally high levels of cancer-causing formaldehyde in their wood flooring.
- Account for waste the smart way. All hardwood flooring has a waste factor - usually between 5-15% of purchased materials will need to be culled due to imperfections, damages or your own wastage after cutting boards down or making mistakes. It is recommended that you add this number to your initial purchase so you don’t run out of flooring during your installation. When hiring contractors to install your flooring for you, it’s best to have more than enough material so they don't run out, stop work early and have to come back at a later date, as this will increase your costs. You can always take extra boxes back to the store for a refund if unused. If you’re installing by yourself or ordering online, you can reduce the waste factor and order a lesser amount of flooring to start. If you run out, no big deal. Take a break, order some more flooring, then finish the installation when the new stuff arrives. This will take a little more time obviously, but if you’re comfortable living and working around your unfinished floor for a little while, you may save a few hundred bucks.
- Use Easiklip for installations over concrete subfloors. Most solid hardwood flooring cannot be installed over concrete subfloors without first installing a plywood subfloor and moisture barrier. This ads considerable costs as plywood costs about $0.50/sq ft. Save money by installing Easiklip clip solid wood flooring directly over concrete subfloors with only a moisture barrier (thin sheet of plastic) and foam underlay. No plywood needed.
- Avoid expensive and more exotic woods. Here’s a shortlist of the hardwoods that are often the most expensive due to their exotic qualities. Stay away from these if you are looking to cut down on costs.
- Cherry
- Cabreuva
- Kempas
- Tigerwood
- You can expect to fall within the following price ranges for installations of Kempas and Cabreuva:
- Cabreuva DIY Installation: $20-21.50/sq ft
- Cabreuva Professional Installation: $16.10-17.90/sq ft
- Cherry DIY Installation: $14.60-$17.80/sq ft
- Cherry Professional Installation: $18.10-22.10/sq ft
- Save money by purchasing less expensive woods. Red Oak is consistently the cheapest hardwood flooring to purchase and install. Followed closely by white oak. You can expect to fall within the following price ranges for installations of red and white oak:
- White Oak DIY installation: $8-12/sq ft
- While Oak Professional Installation: $12-14.50 /sq ft
- Red Oak DIY installation: $7.30-9/sq ft
- Red oak Professional Installation: $11-$13.50/sq ft
- *All prices include estimated costs of underlayment in addition to flooring materials.
Call in the favours. Chances are you have some friends. And maybe they like good food. Offer them a nice home cooked meal and some of your services in the future in exchange for their labour to help you with your DIY installation. They’ll learn some handy new skills in the process and you’ll save on costly installation labour costs. Who knows, you might even have fun!
Are you ready to save big money on your hardwood floor installation?
We sure hope you are! Why not order a FREE Easiklip sample pack to get a feel for the quality product we offer. Who knows... you might just like it!
