

Step-by-Step: How to Install Solid Hardwood Floors in the Basement
Transforming a basement into a warm and inviting living space starts with the right flooring. While many homeowners shy away from hardwood below grade, modern installation methods and the right materials make it not only possible but highly rewarding. In this guide, we’ll walk you through the step-by-step process of installing hardwood floors in a basement living room, covering preparation, tools, underlayment, moisture protection, and finishing touches, so you can enjoy the timeless beauty of hardwood in every part of your home.

Basements are rarely the showpiece of a home. Too often they’re treated as afterthoughts, reserved for storage, utilities, or the occasional movie night. Yet when finished with care, they can become some of the most inviting rooms in the house. A finished basement transforms this underutilized area into a functional living space, adding comfort and long-term value. One of the most impactful upgrades is to install hardwood floors in the basement, a choice that brings warmth, continuity, and a sense of refinement that few other materials can match.
Hardwood is often dismissed for basements, overshadowed by concerns about moisture and maintenance. But when installed with intention, proper preparation, the right materials, and a thoughtful approach, it can deliver a space that feels refined, warm, and seamless with the rest of your interiors.
The National Wood Flooring Association (NWFA) emphasizes that moisture testing and subfloor preparation are critical when considering hardwood below grade. Basement installation requires special attention to moisture resistance and structural challenges unique to below-grade environments. When those foundations are properly established, a basement becomes a space in which hardwood’s natural character can truly shine.
As Michael Martin, President of the NWFA, observes:
“Wood floors can perform well in almost any space when installed correctly. It’s all about choosing the right product and following the right process.”
This guide moves step by step through the process of installing hardwood in a basement living room, from inspecting the subfloor to laying the final board. Whether you’re designing a space for quiet evenings or a setting for lively gatherings, the right flooring choice can anchor the atmosphere.
If you’re ready to begin exploring flooring options, take a look at Easiklip’s solid hardwood collection.

Why Hardwood in the Basement?
The basement is often cooler, quieter, and more private than the rest of the home, qualities that make it ideal for living rooms, media lounges, or guest suites. Choosing hardwood for this level might seem unconventional, yet it delivers a transformation that is both aesthetic and practical.
Hardwood introduces warmth where it is most needed. Its natural grain softens the starkness of concrete, while its timeless appeal elevates a space that is too often defined by function rather than design. Basements are moisture prone areas, which makes selecting the right flooring especially important. Beyond beauty, hardwood floors can also increase property value. The National Association of Realtors reports that homes with hardwood flooring consistently rank among the most desirable features for buyers.
Of course, there are long-held misconceptions about hardwood in basements. Moisture is the most common concern, and rightly so. Without the right safeguards, traditional nail-down hardwood may struggle below grade. When considering different flooring types, it's important to compare their moisture resistance and installation requirements to determine which is best suited for basements. Yet innovations in flooring systems, such as floating hardwood installations, make it possible to enjoy wood’s elegance in areas once considered unsuitable.
As interior designer Sarah Richardson has noted in her approach to basement remodels:
“The right flooring choice can redefine a lower level. By managing moisture and layering in natural materials, you create a space that feels every bit as polished as the rooms upstairs.”
Traditional nail-down hardwood, especially solid wood, is generally not recommended for basements due to its sensitivity to moisture and potential for warping. Improper installation can lead to moisture issues and moisture damage, which may compromise the integrity of the floor and result in costly repairs.
Floating hardwood installations have become a popular alternative for basements. However, proper installation is crucial to ensure long-term performance and to prevent problems related to moisture.
For homeowners looking for a proven solution, Easiklip’s floating hardwood system is designed with basements in mind and is suitable for below grade installation. The clip installation removes the need for glue or nails, making it flexible, resilient, and basement-friendly.

Preparing the Basement Space
The truth is, the success of installing hardwood floors in the basement has little to do with the planks themselves and everything to do with what’s underneath. Skip the prep, and you’ll pay for it later—often in the form of moisture problems that can damage your flooring.
Start with the basement floor. Walk it, tap it, really look at it. Any cracks, uneven patches, or signs of moisture seepage are red flags that need fixing before you move forward. Ignore them, and they’ll come back to haunt you in the form of squeaks, gaps, warped boards, or other moisture problems.
Moisture testing isn’t optional here — it’s essential. The National Wood Flooring Association (NWFA) makes it clear: too much moisture, and your boards will cup, crown, or warp over time (https://nwfa.org/technical-guidelines/). A simple handheld moisture meter will tell you exactly where you stand, and whether you need additional barriers or treatments. Incorporating a gravel substructure beneath the slab can greatly improve drainage and moisture control, helping to prevent future issues.
Once you’ve got moisture levels under control, it’s all about creating a smooth, level surface. Sweep thoroughly, then check for dips or high spots. If needed, a self-leveling compound will give you that perfectly flat base. Installing a plywood subfloor over the concrete acts as a moisture barrier and provides a stable base for your hardwood, making it an important step in basement installations. It may feel like overkill, but this step is what separates a DIY project from a pro finish.
When it comes time to install, Easiklip’s floating hardwood system removes the stress of adhesives and nails. Unlike traditional methods that require adhesive for installation, their patented clip design makes installation straightforward, but it still demands the same careful groundwork. Learn more at https://easiklip.com/collections/easiklip-hardwood-flooring.
Understanding Subfloor Options
Choosing the right subfloor is a key step in any basement hardwood flooring project. The subfloor acts as a buffer between your hardwood and the concrete slab, providing stability and helping to manage moisture—a critical concern in basements.
There are several subfloor options to consider. Plywood subfloors are a popular choice for many homeowners, offering a smooth, even surface that’s ideal for installing hardwood. However, plywood can be vulnerable to water damage if your basement is prone to moisture, so it’s best suited for dry, well-sealed spaces. Oriented strand board (OSB) is another wood-based option, but it shares similar moisture sensitivities.
For basements with higher moisture levels, cement-based subfloors or specialized waterproof membranes can provide added protection. These materials are designed to resist water and prevent moisture from reaching your hardwood flooring, making them a smart choice for below-grade installations. Some systems even combine a thin layer of insulation with a vapor barrier for extra peace of mind.
Ultimately, the best subfloor for your basement will depend on the condition of your concrete slab, the type of hardwood flooring you plan to install, and your home’s specific moisture challenges. By understanding your subfloor options and choosing the right one for your installation, you’ll help ensure your new hardwood floor remains beautiful and resilient for years to come.

Choosing the Right Materials
Not all hardwood behaves the same, and in a basement, your choice matters. When considering basement flooring, it's important to select materials that can handle moisture and humidity.
Solid hardwood is the classic. It’s beautiful, timeless, and luxurious. But it’s also sensitive. In spaces where moisture levels swing up and down, it can move more than you’d like. Installing solid hardwood in a basement can be challenging, especially when attaching hardwood directly to concrete, as improper installation can lead to warping or moisture damage. That’s why many professionals steer homeowners toward engineered hardwood in below-grade spaces.
Engineered wood floors are a practical alternative for basement wood flooring, offering greater stability and moisture resistance. Engineered wood, engineered wood flooring, and engineered flooring are constructed with multiple layers, often including a synthetic core, which enhances their durability and ability to withstand basement conditions. The top layer of engineered products replicates the look of real hardwood flooring, while a thicker layer allows for multiple refinishing and adds to the floor's longevity. These products are water resistant, making them a smart choice for basement environments.
If you’re still on the fence, this Home Depot flooring guide offers a helpful breakdown of both options (https://www.homedepot.com/c/ab/types-of-hardwood-floors/9ba683603be9fa5395fab9062c9f8ef?utm_source=chatgpt.com). Engineered wood flooring provides a similar appearance to solid hardwood, so you don’t have to sacrifice style for practicality. Oak is a popular species for both solid and engineered options, valued for its durability and classic look.
Don’t overlook underlayment. A quality underlayment paired with a moisture barrier isn’t just a nice-to-have, it’s the line of defense that keeps your floor safe and comfortable underfoot. Skip it, and you’re rolling the dice.
This is where Easiklip flooring shines. Each board connects with patented aluminum clips; no nails, no glue. That means faster installation and a system designed to expand and contract naturally with basement humidity levels.
As Jon Namba, Editorial Director of Floor Covering Installer Magazine, puts it:
“Moisture management is always the first concern in a basement. With the right barrier and product choice, hardwood can perform beautifully even in these environments.”
Choose smartly, and you’re not just laying wood. You’re creating a resilient foundation for design that will stand the test of time. For basement flooring, consider not only engineered wood floors but also other water-resistant options like tiles, which are well-suited for moisture-prone areas.
Flooring Options and Budget
When selecting flooring for your basement, it’s important to weigh both your style preferences and your budget. Hardwood flooring is a timeless choice, known for its durability and ability to add value to your home. Solid hardwood flooring offers unmatched natural beauty, but it can be a significant investment and may not be the best fit for moisture-prone basements.
Engineered hardwood is a popular alternative, delivering the look and feel of real wood with added stability and moisture resistance—often at a more accessible price point. If you love the appearance of hardwood but need to keep costs down, engineered hardwood vs laminate flooring is another option. Laminate can mimic the look of wood grains and textures, is easy to install, and is generally more budget-friendly, though it may not offer the same longevity as real hardwood.
For homeowners seeking maximum water resistance, ceramic tile and vinyl planks are excellent choices. Ceramic tile is durable, waterproof, and easy to maintain, making it ideal for basements that may experience occasional dampness. Vinyl planks offer a similar waterproof surface and come in a wide range of styles, including options that closely resemble natural wood.
Each flooring type has its own set of advantages, so consider your basement’s conditions, your lifestyle, and your budget when making a decision. By exploring all your flooring options, you can find a solution that brings both style and durability to your basement—without breaking the bank.
Tools You’ll Need to Install Hardwood Floors in the Basement
Installing hardwood isn’t complicated, but it does require the right tools. Think of this as your kit for success:
-
Chalk line to snap those perfectly straight layout lines.
-
Circular saw for clean, precise edge cuts.
-
Spacers to maintain expansion gaps at the walls.
-
Rubber mallet for tapping boards together without dents.
-
Tape measure—you’ll use it constantly.
-
Moisture meter to keep conditions in check.
With traditional hardwood, you’d also be hauling around adhesives, nail guns, or fasteners. But here’s the beauty of Easiklip: you don’t need them. The boards lock in with patented aluminum clips, giving you a secure, seamless floor without the mess. The Easiklip system installs much more easily than traditional methods, making it a great option for DIY projects. You can see the full system in action here: https://easiklip.com/collections/easiklip-hardwood-flooring.

Step-by-Step Installation Process for Basement Installation
Installing hardwood in a basement is equal parts precision and patience. The Easiklip system uses a floating floor installation method, making it ideal for basements where traditional nailed or glued-down floors may not be suitable. Follow this sequence for results that look professional and last for decades.
A basement hardwood floor can transform your space, making it perfect for a game room, movie room, or other recreational areas, enhancing both comfort and style.
Step 1: Lay the Moisture Barrier
Start by rolling out a polyethylene sheet or specialized vapor barrier across the subfloor. Overlap seams by several inches and tape them securely. This is your first defense against ground moisture.
Step 2: Position and Secure the Underlayment
Lay your chosen underlayment over the barrier. Foam or cork are popular options, providing both cushioning and sound absorption. Smooth out wrinkles to avoid unevenness underfoot.
Step 3: Begin with the First Row
Place your first row of boards along the longest wall. Insert spacers between the planks and wall to maintain a consistent expansion gap. With Easiklip, aluminum clips lock into the groove of each board, anchoring them firmly without fasteners.
Step 4: Continue Laying Rows, Staggering Joints
Work row by row, staggering board ends by at least six inches for stability and a natural look. Use a rubber mallet to tap each new board into place, ensuring tight seams.
Step 5: Cut Boards to Fit Edges
At the ends of rows, measure and cut boards to size with a circular saw. Always leave the recommended expansion space along walls and immovable structures.
Step 6: Install Transition Strips Where Necessary
Where your hardwood meets tile, carpet, or another flooring type, install a transition strip. This not only ensures a smooth threshold but also protects the edges of your hardwood. For a visual walkthrough, refer to Easiklip’s step-by-step installation instructions.
As the National Wood Flooring Association (NWFA) notes, the key to long-term success lies in maintaining expansion space and moisture protection throughout the process. See the NWFA Technical Guidelines & Publications for standards on expansion gaps and vapor barriers. https://nwfa.org/technical-guidelines/ NWFA
Finishing Touches
With the final boards in place, the details bring the installation together.
Begin by reinstalling baseboards or trim. These elements not only conceal the expansion gap but also give the floor a polished, architectural finish. Opt for clean-lined mouldings if you want the hardwood itself to remain the focal point, or consider more decorative profiles to elevate the room’s character.
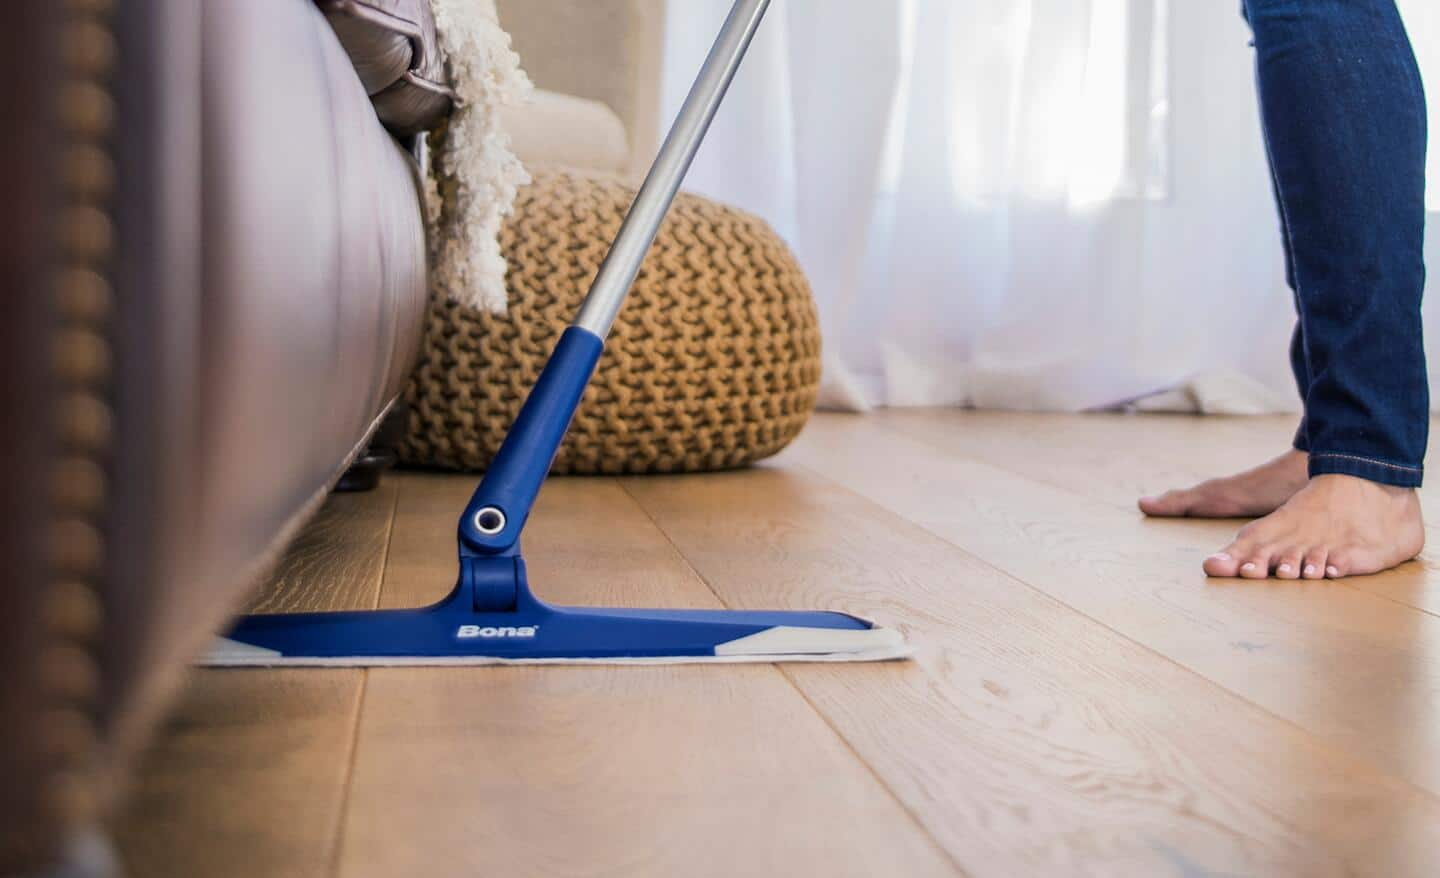
Next, carefully clean the floor. Use a microfiber mop or vacuum designed for hardwood to remove dust and installation debris. Avoid water-based cleaners at this stage; excess moisture is the enemy of new hardwood. For maintenance going forward, Easiklip recommends hardwood-safe products only.
Finally, allow the boards to acclimate before placing heavy furniture. Even floating floors need time to settle into their new environment. A period of 24 to 48 hours is generally recommended. During this time, maintain consistent temperature and humidity levels.
Pro Tip: Felt pads under furniture legs can protect your new floor from scratches, ensuring your basement stays as elegant as the day of installation.
Common Mistakes to Avoid When Installing Hardwood Floors in the Basement
Hardwood can thrive in the basement, but missteps during installation can lead to costly problems later. Avoid these common errors:
1. Skipping the Moisture Barrier
This is the most crucial step. Without a proper barrier, moisture rising from the concrete slab can damage the planks, causing cupping, warping, or worse, and often void manufacturer warranties. The NWFA’s guidelines recommend that every concrete slab on- or below-grade include a certified vapor retarder. (https://nwfa.org/technical-guidelines/)
2. Forgetting Expansion Gaps
Hardwood expands and contracts with humidity changes. Failing to leave adequate gaps along walls can result in buckling or warping. Always use spacers and respect the manufacturer’s recommendations.
3. Installing Without Acclimating Boards
Planks should acclimate to the basement environment before installation. Skipping this step risks uneven expansion later. Easiklip explains why acclimation matters in its installation guide (https://easiklip.com/blogs/news/how-to-acclimate-hardwood-flooring).
4. Neglecting Surface Prep
Uneven subfloors cause gaps, creaks, and premature wear. Invest the time upfront to level the surface.
As flooring specialist Jon Namba reminds installers:
“Cutting corners during installation will always show up later. Preparation and patience are what separate a lasting floor from one that fails.”
With a careful approach and an eye for these details, your basement hardwood floor can deliver both beauty and durability.
Maintenance Tips for Basement Hardwood Floors
After installing hardwood floors in the basement, realize that it requires thoughtful care to preserve its beauty and performance. With the right routine, your floor will remain a refined backdrop for years to come.
1. Regular Cleaning
Dust and dirt act like sandpaper against hardwood. Sweep with a soft-bristle broom or use a vacuum designed for hardwood. For a deeper clean, use only products specifically formulated for wood flooring. Easiklip’s guide to the best hardwood floor cleaners offers safe, effective options.
2. Monitor Humidity
Basements are prone to fluctuations in moisture. Aim for relative humidity between 35% and 55%. A dehumidifier during damp months or a humidifier in winter helps maintain balance. The Environmental Protection Agency (EPA) outlines basement moisture management best practices (https://www.epa.gov/mold/mold-cleanup-your-home).
3. Protect Against Wear
Area rugs in high-traffic zones, entry mats at exterior doors, and felt pads beneath furniture legs all help prevent scratches. Avoid rolling heavy furniture directly across the floor.
4. Address Spills Immediately
Even with moisture barriers, hardwood should never sit in standing water. Wipe up spills promptly with a dry or slightly damp cloth.
These small habits ensure your basement hardwood retains both its integrity and its atmosphere.
Bringing Warmth and Refinement Below Grade
Basements no longer need to be afterthoughts. With careful preparation, the right product, and a thoughtful installation, hardwood can transform this level into one of the most beautiful and inviting rooms in the home. It brings natural warmth, timeless character, and enduring value—qualities that elevate a basement from functional to extraordinary.
Choosing to install hardwood floors in the basement isn’t just possible; it’s one of the smartest ways to create a living area that feels seamlessly connected to the rest of your interiors. Every step, from moisture testing to finishing details, ensures a polished result that lasts for years.
If you’re ready to install hardwood floors in the basement and take your lower level from overlooked to unforgettable, explore Easiklip’s floating hardwood system. The patented clip design eliminates nails and glue, making installation as effortless as it is refined. Browse the full collection here.
Not sure which finish will look best in your space? Order an Easiklip sample pack and experience the textures, tones, and craftsmanship firsthand before you commit.
Bring elegance below grade. Explore Easiklip hardwood flooring, or start small with a sample pack delivered to your door.


