Installing hardwood flooring on concrete isn’t just possible—it’s transformative. But there’s a catch: most people get it wrong. Misinformation, moisture, and the wrong materials can turn your renovation dream into a flooring fiasco.
This guide sets the record straight. Whether you’re planning a basement makeover or rethinking your ground-floor layout, you’ll learn what works, what fails, and why Easiklip is changing the game for solid hardwood flooring on concrete.
👉 Get your free Easiklip sample here

Why Solid Hardwood Over Concrete Isn’t Crazy—It’s Smart
Now that you know it is possible to install solid hardwood over concrete without destroying your investment, let’s talk about why you should.
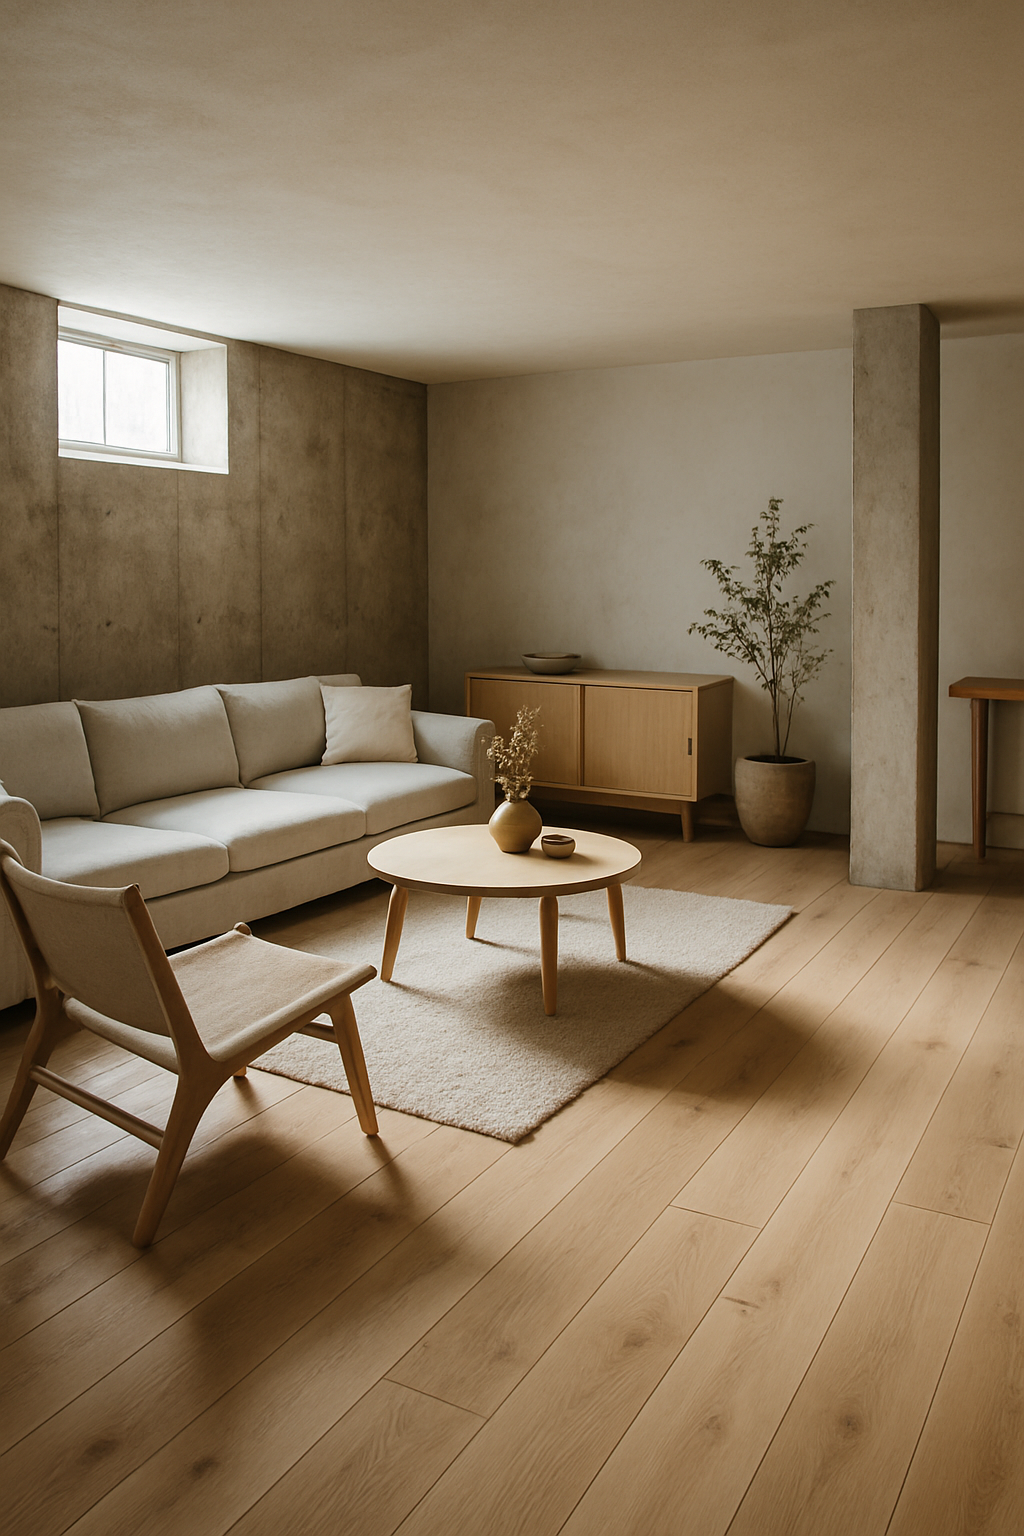
Forget what you’ve heard about basements being limited to carpet, tile, or (worse) just plain concrete. A hardwood floor transforms a basement from a cold, lifeless space into a warm, inviting, and high-value extension of your home. And when done right, it can last for decades.
Here’s why solid hardwood flooring is the best-kept secret for basements:
✔ Unmatched Beauty – Let’s be honest… bare concrete is ugly. It makes your basement feel like a storage unit instead of a functional, comfortable space. Hardwood instantly elevates the look, bringing warmth, elegance, and a finished feel that works with any design—modern, contemporary, or classic.
✔ Superior Warmth & Comfort – Walk barefoot on concrete and you’ll feel the problem instantly. It’s cold. It’s unforgiving. It sucks the warmth right out of your home. A solid hardwood floor not only feels better underfoot, but it also makes the space look and feel welcoming instead of like a forgotten warehouse.
✔ Higher Resale Value – If you ever plan on selling your home, listen up. According to the National Wood Flooring Association, real estate agents agree that homes with hardwood floors:
-
82% say they sell faster.
-
90% say they sell for more money—up to 10% more.
Translation? A finished basement with hardwood flooring is a value-boosting powerhouse. It’s not just an upgrade—it’s an investment that pays you back.
But before you start imagining your basement transformed into a beautiful, livable space, there’s one more thing you need to know…
How much will it cost? And can you do it yourself without breaking the bank?
The truth might surprise you.
Check out this DIY case study that breaks down the real costs, timeline, and materials needed for installing solid hardwood over concrete—without paying a fortune in labor.
👉 [See the full cost breakdown here]
The Truth About Moisture and Grade Levels
Before you rush out and order your dream hardwood floor, hold up. There are a few critical factors that will determine whether your floor lasts for decades or becomes a costly mistake. Concrete isn’t like plywood—it’s an entirely different beast. If you don’t account for moisture, grade level, and surface flatness, your hardwood floor could buckle, warp, or fail before you even get to enjoy it. Let’s make sure that doesn’t happen.
How Flat is Flat Enough? Prepping Your Slab for Success
One of the first things to consider is grade level. When flooring professionals ask about this, they’re not referring to quality. They want to know where the concrete slab sits in relation to the ground.
A slab that’s fully above ground level is considered above grade. A slab that sits right at ground level is at grade. A slab that’s below ground level, such as a basement floor, is below grade.
This matters because most hardwood manufacturers won’t honor warranties for flooring installed below grade. Basements naturally hold more moisture, which can damage wood. However, there is an exception—Easiklip is one of the few solid hardwood brands that allows basement installation and still honors the warranty, as long as proper installation steps are followed.
Is Your Concrete New or Old? Timing Matters
A freshly poured slab needs time to cure before installing hardwood. This process takes six to eight weeks, sometimes longer, depending on climate and humidity levels. During this time, the concrete releases excess moisture. Installing hardwood too soon can lead to warping and swelling as the wood absorbs the moisture.
If the concrete is older, it may not be releasing moisture at the same rate, but that doesn’t mean it’s safe to install wood flooring just yet. Old slabs can still trap and release moisture, especially if the foundation lacks proper drainage or if there are leaks in the walls.
Moisture: The Silent Hardwood Killer
Moisture is the number one enemy of hardwood floors, and concrete acts like a sponge, absorbing and releasing water over time. If you regularly run a dehumidifier in your basement, chances are there’s too much moisture in the space for hardwood to last.
Moisture can seep in from the ground, through the walls, or even from poor ventilation. Before installing hardwood, it’s crucial to test for moisture levels.

How to Test for Moisture in Concrete
Plastic Sheet Test (Basic Method)
Tape a 16-inch square of clear plastic to the floor, sealing all four sides. Leave it in place for 24 to 48 hours. If condensation appears underneath, the concrete has too much moisture.
Calcium Chloride Test (More Accurate)
This test measures how much surface moisture the slab emits. You place a calcium chloride dish on the floor, seal it with a dome, and wait 24 hours to see how much moisture is released.. You can see the kit and how it works in this video.

Wagner Rapid RH Meter (Most Precise Method)
For the most accurate reading, a Wagner Rapid RH moisture meter can be used to measure humidity levels inside the concrete. If the moisture emissions exceed three pounds per 1,000 square feet within 24 hours, hardwood cannot be installed without a moisture barrier.
Skipping this step could mean the difference between a floor that lasts a lifetime and one that fails within a few months.

Your Concrete Floor or Slab Must Be Flat
When installing hardwood flooring on basement, the concrete must be flat so the tongue and grooves of the hardwood meet and connect.
Old basement slabs can crack and buckle in places. You need to fill any large cracks and be sure that the entire floor is level. Otherwise, you’ll need to level it. That means pouring a thin layer of cement to fill in dips and gaps. Here is a short video to show you how to level a concrete floor.
To check the evenness of the slab, use a 6-foot or longer straight edge. You may have to cut one utilizing a table saw to ensure straightness. Lay the straight board on the floor and place a level on top. You should have no more than a 3/16” slope in a 10-foot radius or less than 1/8” inside a 6-foot radius. You’ll know if there are dips in the concrete if you see daylight at the bottom of the straightedge.
You’ll need to fill the dips using a floor leveling compound like the one in the video above. Follow the manufacturer’s instructions to ensure the compound cures enough to allow for hardwood flooring installation.
Final Thoughts: Get the Prep Work Right
Skipping any of these steps can lead to disaster. Installing hardwood over concrete isn’t difficult, but preparation is everything. Ensuring the right moisture levels and a level surface will make the difference between a floor that stands the test of time and one that becomes a costly regret.
Now that the foundation is set, let’s move on to the next step—installing the right moisture barrier to protect your investment.

Install a Moisture Barrier for Best Results
Concrete is very porous like a sponge. Water can quickly pass through it causing moisture problems, especially below grade. Before installing any wood floor over concrete, you'll need a moisture barrier. Typically, it is sheets of plastic laid on the slab and taped at the seams with waterproof tape. It will extend up the wall for about 2 to 3 inches, creating a “bowl” where your wood floor stays dry and protected. Watch this video to see how easy it is:
(He adds an optional underlayment on top of the moisture barrier for sound reduction.) There are other moisture barrier options. Ask your flooring professional what he or she uses.
Once you know the slab is level and dry, and you have a moisture barrier in place, it's time to look at basement subfloor options and how you'll install your new hardwood floor.
Three Basement Subfloor Options
A subfloor is the floor surface directly under the hardwood floor. The type of subfloor can determine how you'll install the floor.
1. Permanently Attaching to Concrete
In this case, the subfloor is the concrete slab. Although you can attach hardwood directly to concrete with glue or nails, it's not advisable. Wood needs to move as the humidity increases and decreases throughout the year. If the wood can't expand sideways, it will twist warp or cup as it absorbs moisture.
And, the traditional method of driving screws or nails through the moisture barrier turns your moisture barrier “bowl” into a sieve allowing excess moisture to wick into the wood. For these reasons, you should avoid gluing, nailing or permanently attaching directly to the slab.
To drive a nail or screws into concrete, you'll need to use a hammer drill and masonry bit to pre-drill each hole. It adds a lot of extra time and effort.

2. Build a Plywood Subfloor
Most subfloors over concrete use exterior grade ¾” plywood or OSB (Oriented Strand Board). It lays directly on top of the waterproof barrier, or combination of barrier and underlayment, to help cushion and insulate. Be aware of the additional height that the subfloor and underlayment add. They can add up to two inches in a basement that may already have a low ceiling.
There are many options for building a plywood or OSB subfloor. This video demonstrates a cost-effective method for DIYers.
A subfloor allows you to nail or screw into the wood instead of concrete. While this saves time from not having to drill pilot holes first, it still adds to the cost of installing a floor. A better solution is laying a floating floor.
3. Laying Floating Floor
When we talk about a “floating” floor, it means that the hardwood floor is not permanently attached to the subfloor. Floating floors rest or float on top, held in place by the weight of the floor itself.
You’ll want to install an underlayment on concrete floor in basement. A floating hardwood floor underlayment acts as a slight cushion that reduces noise and provides some insulation. Underlayments can combine water barrier protection and noise reduction.
Installing floors is a difficult DIY job. The easiest way to install hardwood is a floating floor. You may not need to build a plywood subfloor on top of the concrete slab, depending on the floor system you choose.
Basement Wood Flooring Options
You have two primary options for basement wood flooring: solid hardwood or engineered wood floors.
Engineered wood floors are constructed using multiple layers of wood chips or thin sheets that are pressed together with chemical adhesives under heat to form a sheet of OSB or plywood. A thin veneer of hardwood is then glued to the surface to provide the appearance of real hardwood. These floors can be natural or stained and come with a clear protective finish. However, if engineered floors absorb moisture from below, they can begin to delaminate, separate, or even warp. When installed over concrete, engineered wood is often floated rather than glued or nailed down to prevent splitting and other structural issues, which can be a concern for homeowners looking for long-term durability.
Solid hardwood floors are made entirely of real wood and come in either pre-finished or unfinished options. While unfinished wood floors require sanding, staining, and sealing—typically done by a professional—pre-finished hardwood arrives ready to install. Although solid wood offers unmatched durability and longevity, it is more susceptible to warping and rot if exposed to excessive moisture. To prevent damage, a proper moisture barrier is essential when installing hardwood over concrete. Additionally, maintaining room temperatures between 60 to 80°F (15.5 to 26.6°C) and keeping relative humidity levels below 60% will help protect the integrity of your flooring for years to come.


Engineered Floors Can Have Problems
Some engineered floors have reportedly emitted toxic fumes. It can be caused by the amount of adhesive used in the construction of the materials and gluing the veneer to the top.
Another issue is improper installation. If an installer nails the engineered floor too close to the edge, it can crack the board causing dangerous splinters lurking underfoot that can be up to 3 inches long in some cases.
(Big box flooring retailers don't want you to see this: Affordable solid hardwood flooring that you can install yourself...)
You don't have those concerns with a solid hardwood floor.
How to Install Hardwood Over Concrete – 3 Methods (From Worst to Best)
So, you want real hardwood flooring over concrete? Great choice. But how you install it makes all the difference. Get it wrong, and you’re dealing with warping, cracking, or floors that feel like walking on bricks.
There are three ways to install wood flooring over concrete. Two of them? Expensive, messy, and a total headache. The third? So easy, a first-time DIYer can do it in an afternoon.
Let’s break them down.
The Hard Way – Nails or Screws (A Nightmare in the Making)
Some people think they can just nail or screw their hardwood directly into concrete. Wrong.
First, you’ll need a hammer drill and masonry bit—and a lot of patience. Every single nail or screw requires pre-drilling through concrete (which is about as fun as a root canal). Miss a spot? Your floor shifts, squeaks, or worse—cracks.
And let’s not forget—you’re now putting holes in your moisture barrier, which means one thing: trouble.
So, unless you love extra labor, extra expense, and a floor that’s one moisture problem away from disaster, this method is not for you.
The Messy Way – Glue (Hope You Like Working Fast)
Gluing your hardwood directly to concrete sounds simple—until you realize you have exactly 30 minutes to get it right before the glue sets like cement.
One mistake? You’re stuck—literally.
To make matters worse, before gluing, you’ll need to paint on a moisture barrier since you can’t use an underlayment. Skip this step, and your beautiful new hardwood floor could peel up like old wallpaper in just a few months.
Still think glue is a good idea? Watch Bob Vila’s team of PROS do it in this video—and then ask yourself if you really want to risk it as a DIY project.
The Easy Way – Easiklip (DIY-Friendly, No Mess, No Stress)
Now, let’s talk about the smart way to install hardwood over concrete: Easiklip’s patented clip system.
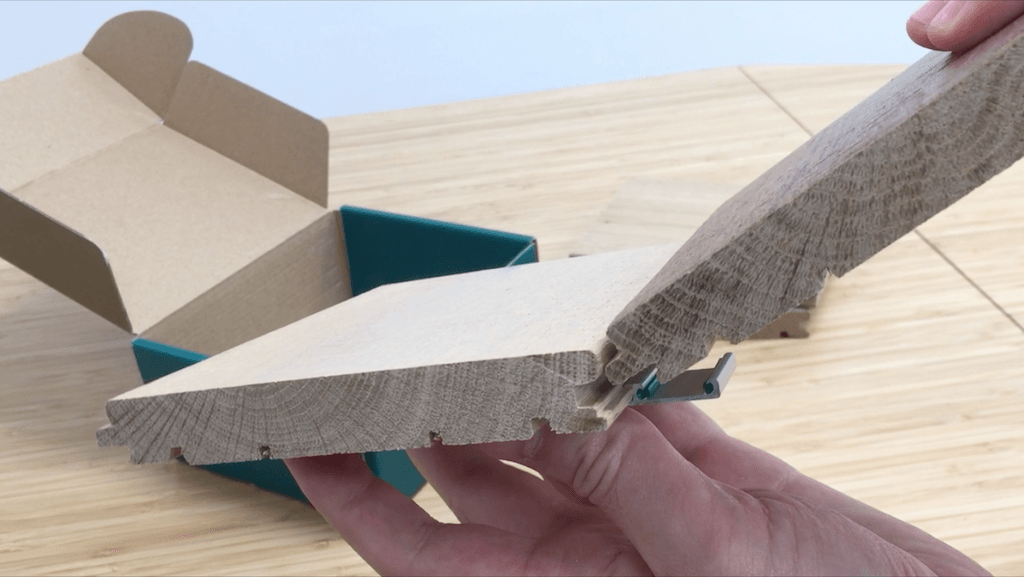
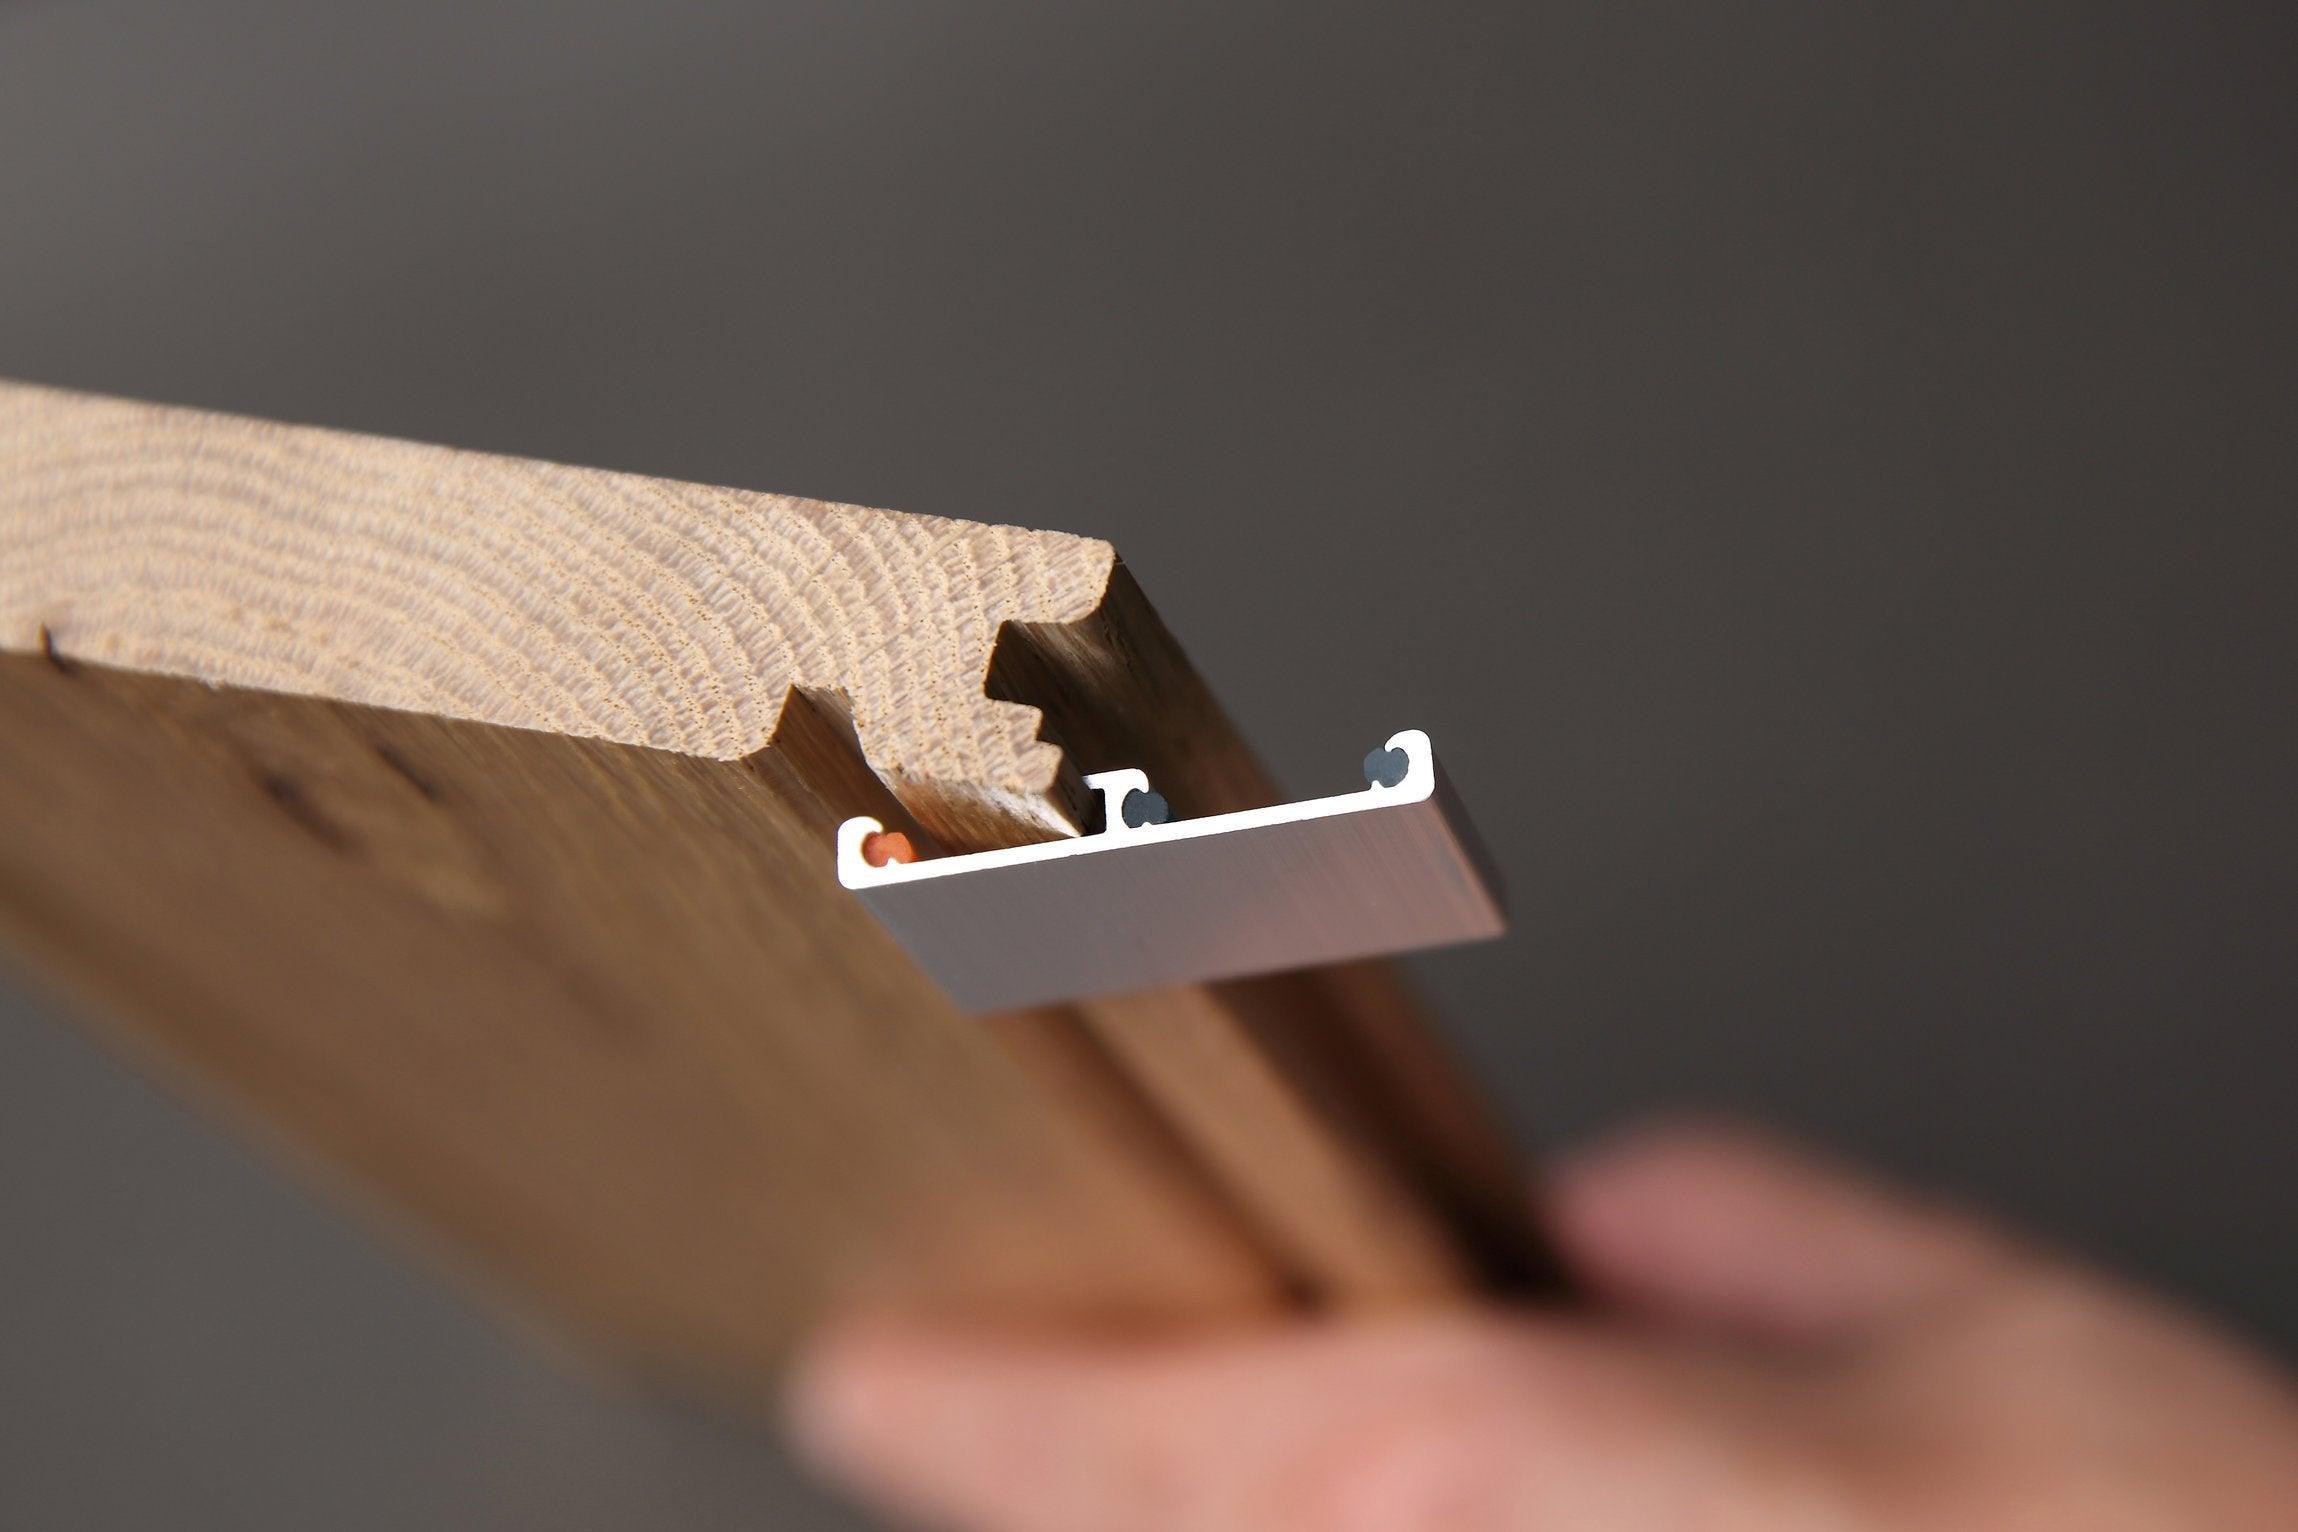
Forget about drilling, gluing, or swearing under your breath. Easiklip uses pre-finished, solid white oak boards that snap together with simple aluminum clips—no nails, no glue, no fuss.
Installation is so easy, a few people installed 860 square feet in just 10 hours. No waiting for glue to dry. No complicated tools. Just snap and go.
And here’s the kicker—because Easiklip is a floating floor, it moves naturally with seasonal humidity changes. That means no warping, no cracking, and no moisture problems—something glued-down and nailed-down floors just can’t promise.
So, if you want the easiest, fastest, and most hassle-free way to install real solid hardwood over concrete, Easiklip is the only way to go.
👉 Watch the installation video and see just how easy it is!
Three Installation Methods—One Clear Winner
Most flooring manufacturers run for the hills when you mention hardwood over concrete. They’ll tell you it’s a nightmare. Moisture issues. Expansion. Warping. They don’t want the hassle. But we do.
Easiklip is the only solid hardwood floating floor in North America that clips together—no nails, no glue, no mess. This means you get all the beauty, warmth, and longevity of real solid white oak, without the installation headaches that come with engineered wood or glue-down floors.
For over 10 years, Easiklip has been the go-to flooring solution for DIYers, homeowners, and even contractors across the U.S., Canada, Europe, and Asia. And once you see how easy it is to install, you’ll understand why.
Before You Start: 3 Quick Steps to Success
Although Easiklip is the easiest hardwood floor to install over concrete, you need to do three simple things before getting started:
-
Lay Down a Moisture Barrier – Concrete loves moisture. You don’t. A proper moisture barrier prevents any excess water from creeping into the wood.
-
Install an Underlayment – This helps soundproof your floor and provides an extra layer of insulation. Use a 2mm underlayment over a damp-proof membrane for the best results.
-
Acclimate the Flooring – Wood needs time to adjust to your home’s environment. Simply place the Easiklip boxes horizontally in the room, open the ends, and let them sit for 4-5 days to absorb the temperature and humidity.
That’s it. You’re ready to install.
No Fuss. No Mess. Just a Floor That Lasts a Lifetime.
Easiklip is built for DIYers who want a floor that looks high-end without a complicated install.
Each board is ¾-inch thick solid white oak—not some cheap, glue-filled composite pretending to be hardwood. With proper care, your Easiklip floor can last 50-70 years. That’s decades of beauty, durability, and value—without having to worry about glue fumes, warped planks, or costly professional installers.
Best of all, you can install a room in a single afternoon and be walking on it the same night. No waiting for glue to dry. No special tools. Just you, your tape measure, hand saw, wedges, and a broom.
Want to see how easy? Watch our installation video now!

Patented Clip System = Instant, Hassle-Free Installation
Here’s the secret to Easiklip’s foolproof installation: our patented aluminum clips.
These clips hold each board together without nails or glue, allowing the floor to naturally expand and contract with seasonal humidity changes. No creaking. No shifting. Just a solid, silent hardwood floor.
Simply attach 2 to 4 clips per board, align the tongue and groove, and snap them into place.

Safe, Economical, and Guaranteed for Peace of Mind
Easiklip is a floating floor—so you save time and money by skipping the messy process of building a wood subfloor.
And if you ever need to replace a single board (or move the entire floor to another room), Easiklip uninstalls as easily as it installs.
(Big box flooring retailers don’t want you to know this: You can have real solid hardwood flooring that you can install yourself… for way less than they charge.)
Even better? Easiklip is completely safe. Unlike many engineered floors, it contains no toxic adhesives or formaldehyde, making it perfect for basements, bedrooms, and anywhere your family spends time.
Plus, every floor comes with a 30-Day Money-Back Guarantee and a 25-Year Residential Warranty for peace of mind.

No Tools. No Glue. No Stress. Just Real Hardwood.
If you’re serious about upgrading your home with a real, solid hardwood floor, don’t settle for cheap imitations.
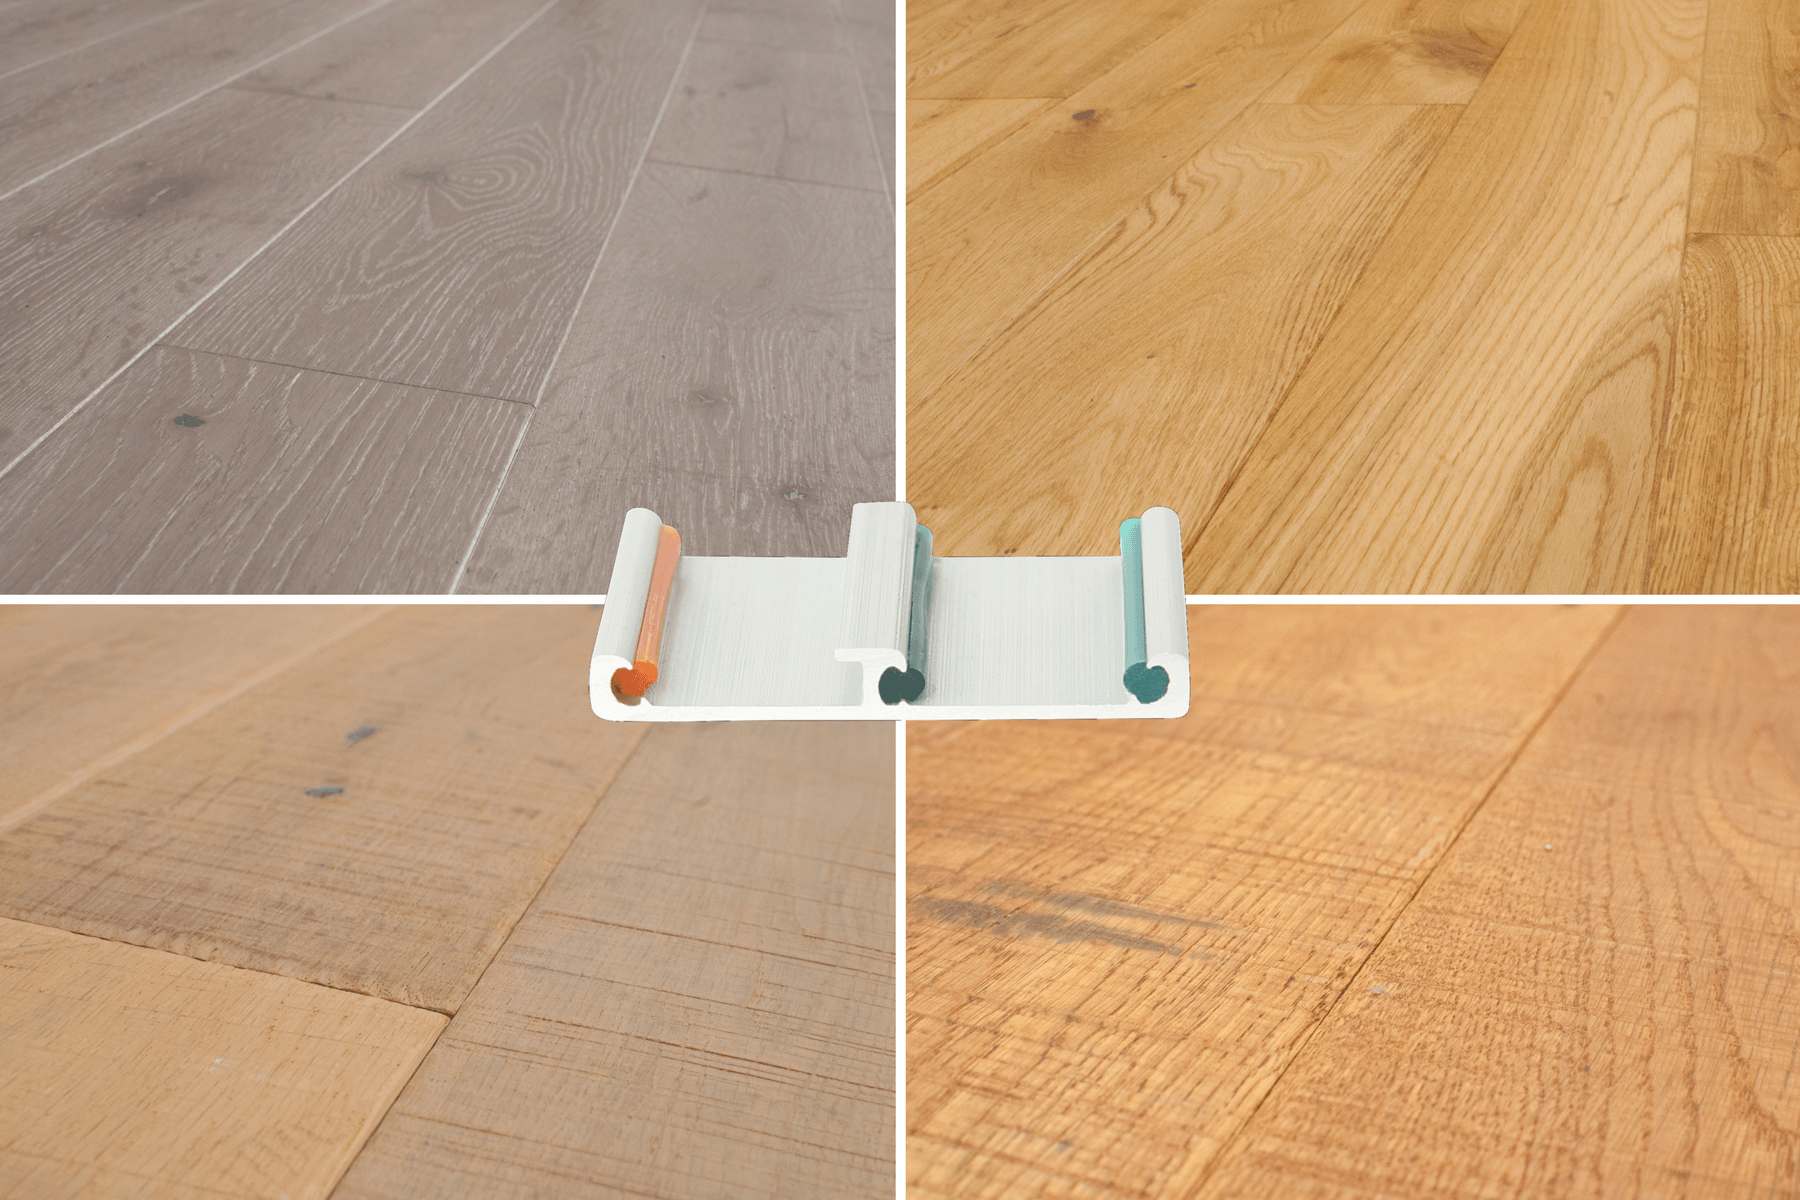
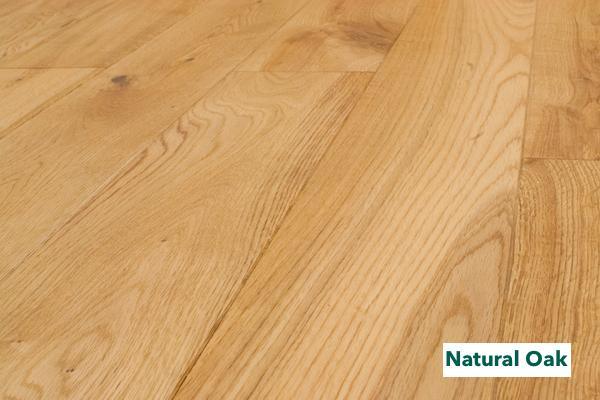
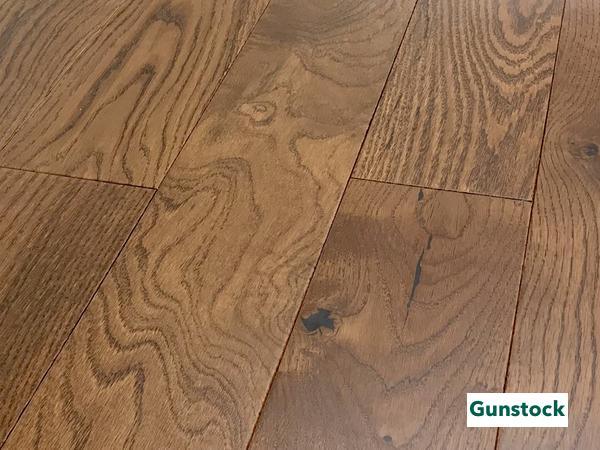
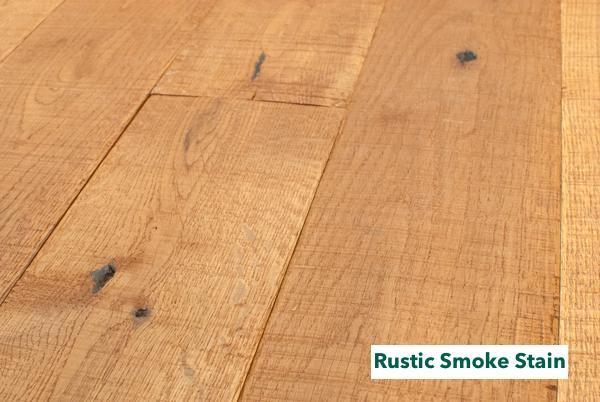
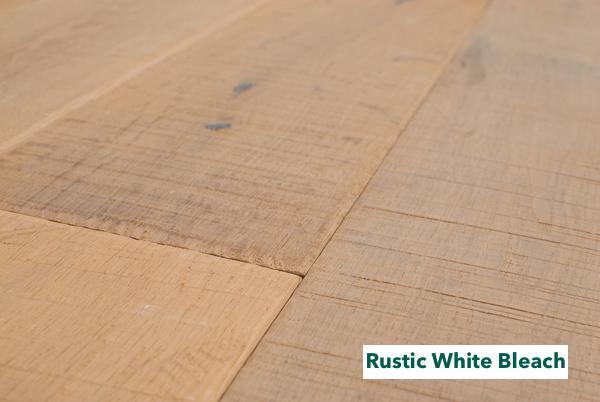
Before making a decision, experience the quality of Easiklip flooring for yourself. Order a FREE sample pack today and explore our Natural Oak, Greywash, Rustic Smoke Stain, and Rustic White Bleach finishes.
You’ll also receive two aluminum clips to test just how effortlessly the boards snap into place.
No more stressing over moisture. No more expensive, messy installations. No more settling for lifeless, fake-looking floors.
Order your free sample now and take the first step toward the perfect hardwood floor over concrete!

