

The Easiest Way to Install Hardwood Floors: A Beginner’s Guide to a Seamless Finish
Installing hardwood flooring doesn’t have to be complicated! This guide explores the easiest hardwood flooring options for DIYers with no prior experience. Learn about floating hardwood floors, snap-together planks, and pre-finished wood options that require minimal tools and effort. Discover expert tips on preparing your subfloor, ensuring proper plank alignment, and avoiding common mistakes. Whether you’re tackling a small room or a whole house renovation, choosing an easy-to-install hardwood flooring system saves time, money, and frustration. Get started with a stress-free installation process and enjoy beautiful, durable wood floors without the need for professional help!
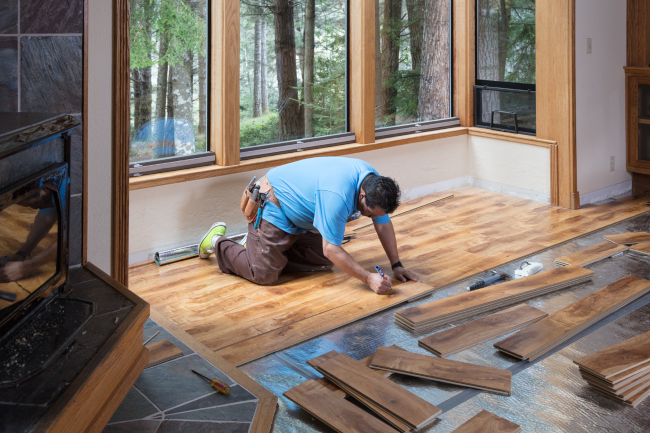
Few materials transform a home the way hardwood floors do. They bring warmth, texture, and timeless appeal to any space, a foundation that feels both luxurious and lived-in. Yet for many homeowners, the process of installation feels daunting. Glue, nails, sanding, and finishing can turn what should be a beautiful upgrade into a complicated project. That’s why so many homeowners today are searching for the best way to install hardwood floors, one that combines the elegance of solid wood with the simplicity of modern innovation.
Easiklip’s floating hardwood system makes that possible. With solid oak boards that clip together without glue or nails, installing hardwood becomes not only achievable but remarkably satisfying.
Why Hardwood Floors Are Always Worth It
It’s an easy decision.
Hardwood is practical. Wood has natural insulating properties. If you live in an area where cold weather is frequent, hardwood floors just feel better under your feet than other hard surfaces.
Hardwood is beautiful. Every board is as different as a snowflake with interesting wood grain patterns, making every room in your home unique. Hardwood floors are as cozy as they are elegant. They’re a blank canvas for your decorating ideas. With so many wood grains and colors from which to choose, it’s a designer’s dream.
Hardwood floors are durable. Installing hardwood and caring for it can make it last for generations. But, hardwood adds value, not just beauty.
The Hidden Values of Installing Hardwood Floors
By properly installing hardwood, it adds value and quality to your home should you decide to sell.
In a USA Today article, they found that 54% of home buyers are willing to pay more for hardwood floors. Most buyers prefer hardwood floors, with “25% of buyers under the age of 35, and 28% of those between 35 and 54, considered hardwood floors "very important" when looking for a home.”
“25% of buyers under the age of 35, and 28% of those between 35 and 54, considered hardwood floors "very important" when looking for a home improvement.”
Hardwood is easier to clean than carpets. Solid hardwood floors may need to be sanded and refinished every ten years, depending upon traffic. However, hardwood is still less expensive when you factor the cost of replacing the carpet, plus all the additional carpet cleaning.
Worried about paying someone else TOO MUCH MONEY to install your hardwood floor?
Do you want to know how much it REALLY costs to install hardwood? Check out this case study of a DIY hardwood installation with costs, timeline and list of materials:

Tax laws consider solid hardwood floors to be a capital improvement, and therefore the sales tax is lower (it may vary by state or province, but most governments charge tax on the material and not the labor for hardwood flooring). For carpet, you must pay tax on the full amount.
As a DIY project, installing hardwood may give you some tax benefits. Check with your tax professional about this, but in most cases, hardwood is considered a “capital improvement” so the sales tax should be lower. When you buy a carpet, you pay the full sales tax. Look into it.
Regarding ROI (Return On Investment) for hardwood floors, the hotter the real estate market, the higher your ROI. If your area is a seller’s market, 100% or more is not uncommon.
But, here are two big questions.
What is the best way to install hardwood floors? And, do you know how to install a hardwood floor that will look professional?
Before we go further, you need to decide what type of hardwood floor is best for your home.
Your DIY-Friendly Hardwood Options
You’ve already decided on the hardwood, so that narrows the field a bit. But, you still have three main choices before you can decide on the details like color and type of wood.
- Laminate - OK, so laminate flooring isn’t really hardwood, but it looks like it from a distance, so we had to add it. It’s made like a kitchen countertop where they glue a plastic layer that looks like wood over a base of plywood or similar material. They use a photo-printing process that uses a photograph of the wood grain to simulate the real thing.
- Laminate floors serve a purpose for inexpensive flooring; it just isn’t real wood. It can sound like a tap dance studio when you step on it, and it looks fake.

- Engineered Wood - Engineered hardwood flooring has a similar construction to laminate floors except the top layer is real wood. The cost varies by species and the thickness of the top veneer. They come pre-finished in a variety of wood and colors. Typically installed using glue and nails, a few can float above the original floor.
- Only thinly veneered engineered wood floors are less expensive than solid wood. Why then buy engineered wood if you can get solid hardwood for the same price?
- The main concern with engineered and laminate floors is volatile compounds such as formaldehyde. They come from the adhesive and the finishing chemicals. They can be a health hazard to your family.

- Solid Hardwood – When it comes to flooring, solid hardwood is the top of the line. You’ll find most boards come in 3/4" thickness and 3 to 7 inches wide. They usually have a tongue and groove system to hold them together.
- Solid hardwood floors can be pre-finished or unfinished.
- Even if you know how to install a hardwood floor, it is a complicated process. And, if you’ve never done it before there are many ways you can ruin the job. You might end up hiring somebody and spending a lot more money. If you purchase unfinished wood, finishing a floor is best left to professionals.
- For the DIYer, a floating floor that is prefinished is your best choice. Easiklip is North America's first eco-friendly, solid hardwood floating floor that clips together easily. They specialize in solid oak flooring for DIY projects and home renovations.
 When laying a solid hardwood floor, you can do it the easy way or the traditional way.
What to Consider Before You Buy
Equip yourself with the knowledge and skills to do it right, mistakes can be costly and delay your project for weeks.
Installing wood floors can range from easy if you use a floating floor system, to a demanding project requiring many tools, carpentry and finishing skills.
Before you tie on your carpenter’s apron and reach for your trusty tape measure, ask yourself:
- Do I have the skill level to install a hardwood floor?
- Will it look clean and professional?
- Do I have the time?
- How much money can I save?
- How big is the room? A small 150 square foot room is a DIY project, but 1,000 square feet is a big job.
- Is the layout complicated with odd corners and hallways?
Do-It-Yourselfers can easy install wood flooring themselves and have a beautifully finished floor.
All you need is the right floor system, preparation, tools, and installation instructions.

Two Essentials for a Flawless Install
- Check for Moisture - Wood flooring absorbs moisture and can swell, cup and buckle if there is too much. It’s a big issue if you are installing over a concrete slab that is ground level or below. This is known as “at grade” or “below grade” installation. Most hardwood floor manufacturers do not recommend installing below grade due to the moisture wicking through the concrete. Easiklip is one of the only hardwood floors suitable for above or below grade installations.
- You need to measure to ensure the moisture level of the concrete subfloor is less than 4%, and the humidity of the room does not exceed 60%. You should use a moisture barrier under the hardwood if installing over concrete.
- Acclimatize Your Boards - Wood is a natural product that needs to adjust to the surroundings. When you purchase wood flooring, you need to lay it flat in the area in which you plan to install it. Carefully open the ends of the boxes to allow the moisture in the wood to match the surrounding environment. You need to leave them for a minimum of three days before installing the floor.
Paying attention to the moisture in your home and where you plan to install the floor will make a big difference to the result.
The Four Common Installation Methods
There are four ways to attach and install your hardwood floors:
Nail Down - Nails fasten the wood to the subfloor. Nailing works best with thin wood flooring. If you’re installing over concrete, you’ll need to drill pilot holes through the wood and into the concrete to set the nails. Tip - Be sure the hole is deeper than the nail so that you can set the head just below the surface of the board. Here's a video of a guy doing a nail down installation
Staple Down - To staple a floor, use a staple gun made for that purpose. It angles the staple about 45 degree angle. You use a rubber mallet to hit the actuator on top that drives the staple into the wood. You may need to practice first. Staple too high, and you risk splitting the wood and missing the sub-floor. Staple too low, and you risk breaking the wood. Tip – Staple every 12 inches, starting 2 to 3 inches from both ends. You can’t use staples for concrete installations. Here is a video on the staple down hardwood floor installation method
Glue Down - Some engineered floors can use only glue while others use a combination of glue with nails or staples. Check the adhesive manufacturer’s recommendations on the trowel and spread rate. You can watch videos here on the proper technique.
Tip – Use a ¼ x ¼ -inch V-notched trowel to work your glue to an even spread. Here is a video on proper glue-down installation technique. The problem with gluing a solid hardwood floor is that it cannot move. As the temperature and humidity fluctuate, hardwood floors expand and contract. If they are glued down, the boards can’t move laterally, so they warp or get cupped. With glue, you must wait at least 24 hours before you can walk on the floor, a challenge if you have pets and kids.
Also, the glue is impossible to remove once it’s dry. You must continuously clean and watch for spots as you work. Want to see how difficult it is to install hardwood to concrete? Watch these guys pretend to make it look easy. You must drill, glue and nail. One amateur mistake will ruin your floor.
Floating - For the DIYer, there is no easier installation than a floating floor. It lays or floats on top of the subfloor. The weight of the wood holds the floor in place without nails or glue. You’ll want to lay down a pad or underlayment to reduce noise and act as a moisture barrier before laying the flooring.
Laminate floors or engineered wood floors meant for floating installation use tongue and groove or another system to lock them in place. Some require gluing together, which can be messy.
There are a few advantages of floating floors. You can walk on them immediately, and they are the easy flooring to install over most other sub-floors.
Best Way to Install Hardwood Floors
As we said earlier, hardwood floors need to move, and this is why installing them as a floating floor is the best way.
And, Easiklip floors make it even easier because you don’t need any glue, nails or staples. It’s snap lock installation using patented aluminum clips and ¾ -inch solid oak boards that come pre-finished. Once you’re done installing, you can have a party on your floor that night. It’s solid and will last for 50-70 years.
Why Floating Floors Are the Smarter Choice
There are five great reasons why Easiklip is the best choice for inexperienced flooring DIYers.
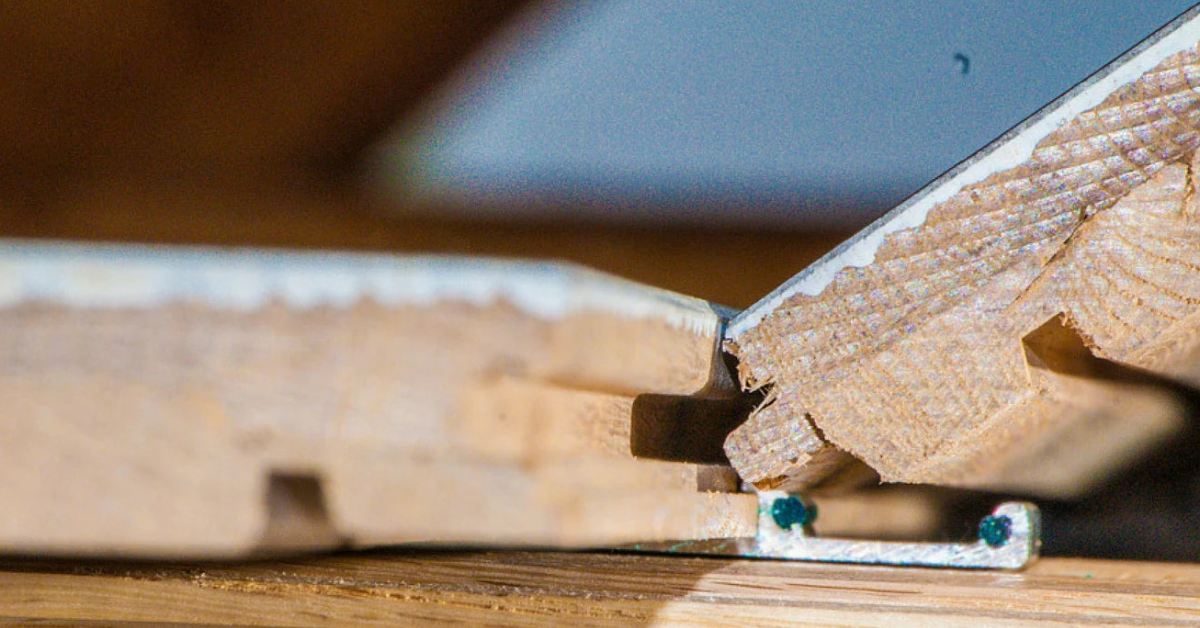
- Every board quickly locks together with a tongue and groove profile.
- Requires no glue, screws, nails or fuss.
- The unique patented aluminum clip system secures every board.
- Installs in just hours, instead of days.
- Install easily over concrete, in basements, condos and more!
Here are the three steps to install Easiklip flooring. Remember that you need to check for excessive moisture. Acclimate the boards for at least 3 to 5 days before you begin. Once your subfloor is clean and level, you can start.
Step 1 – Install a DPM (Damp Proof Membrane) and 2mm underlay over the subfloor to act as a moisture barrier and help to soundproof.
Step 2 – Fit 2 to 4 clips per board, depending upon the length, and start clipping the boards together starting from the right corner of the far wall. Usually, you’ll want to lay the Easiklip flooring with the boards running lengthwise down the longest wall. Allow for a 15mm or 1/2-inch expansion gap between the floor and each wall.
Step 3 - Once all the flooring is down, you can now remove any spacer blocks and reinstall your baseboards around the perimeter to hide the expansion gap.
That’s it! Solid hardwood floors with no glue, no nails, no fuss.
For complete directions and tips, visit Easiklip’s Installation page and watch this short video.
The clips in the Easiklip system have permanent silicone beads allowing for quiet, natural expansion and contraction.
Installation Made Simple: Three Easy Steps
There is a big difference in experience level and tools required to install floors with glue and screws, and installing Easiklip. For our comparison, we will assume the floors are pre-finished.
Tools required for:
Installing Floors With Glue and Nails Into Concrete:
- Nails, hammer and nail punch
- Glue, trowel or glue gun depending upon type of product
- Cleaning products for glue
- Hammer drill and extension cord
- Masonry drill bit
- Mitre and/or table saw to cut and fit individual boards
- Box cutter to cut underlayment
Installing Easiklip Over Concrete (Or Any Sub-Floor)
- Mitre and/or table saw to cut and fit individual boards
- Box cutter to cut underlayment

Why Easiklip Is Easier Than Glue or Nails
Easiklip is solid oak hardwood, not laminate or engineered. It can be refinished many times, and it is very durable.
Because floor boards are simply clipped together, you can easily remove the floor and take it to another location if you relocate. And, if there is an accident, with Easiklip, you’re able to make repairs to a single board without destroying the floor. You can’t do that with flooring that’s permanently anchored to the subfloor.
Here's a cool video of someone unboxing an Easiklip Sample Pack that shows you just how the clip system works and how sturdy it is:
Pro Tip – Order 5-10% more flooring than what you think you need just in case the floor is damaged at any time.
Warranty, Guarantee, and Customer Support
You get peace of mind two ways; with our warranty and our guarantee. When you purchase from Easiklip, a residential installation provides 25 years of finish and structural warranty. You’ll also get a full 30-Day money back guarantee.
And if you need support you can always call our customer service line at 855-539-5547 or email customercare@easiklip.ca.

A Smarter Way to Bring Hardwood Into Your Home
Hardwood flooring has always been a mark of craftsmanship and longevity, but that doesn’t mean it needs to be difficult. With Easiklip, the best way to install hardwood floors is also the simplest. The patented floating clip system lets you achieve a flawless, professional look in hours instead of days, without heavy tools or messy adhesives.
Whether you’re transforming a basement, living room, or an entire home, Easiklip offers the warmth of real solid oak and the confidence of a system built for everyday life.
👉 Explore the full collection here: https://easiklip.com/collections/easiklip-hardwood-flooring
Bring timeless design home — one click at a time.


