

Top 5 Wood-to-Tile Transition Mistakes
A beautiful floor deserves a flawless finish. Yet even the best renovations can fail where wood meets tile. In this guide, we reveal the top five wood-to-tile transition mistakes homeowners make, from skipped expansion gaps to uneven heights, and how to avoid them. Discover expert insights, design tips, and smart solutions using Easiklip hardwood flooring, the floating solid oak system engineered for clean, seamless transitions that stand the test of time.

A beautiful floor deserves more than just good materials; it deserves a flawless connection between them. Yet one of the most common failure points in home renovations isn’t the wood or the tile itself; it’s where the two meet. Poorly executed transitions can cause uneven surfaces, cracked grout, squeaks, and even structural damage over time. According to the National Wood Flooring Association (NWFA), the majority of hardwood installation failures stem from improper expansion spacing, subfloor preparation, or incompatible materials. The junction between wood and tile is small, but it plays a huge role in how durable and cohesive your flooring feels. This guide explores the top five wood-to-tile transition mistakes homeowners and contractors make and how to avoid them.
You’ll learn what causes expansion problems, how to level mixed materials, when to use the right transition profile, and how to finish edges for long-lasting beauty.
By understanding how wood and tile behave differently, and planning your transitions with precision, you can prevent costly repairs and achieve that seamless, continuous look seen in professional installations.

Mistake #1: Ignoring Expansion Gaps
Wood and tile behave very differently under changing temperatures and humidity. Tile is rigid and unmoving, while wood expands and contracts with moisture. Ignoring expansion space where these materials meet is one of the most common and costly wood to tile transition mistakes.
Without that small allowance, pressure builds as the seasons shift, leading to buckling, gaps, or cracked grout. The National Wood Flooring Association (NWFA) recommends leaving a minimum 10–15 mm (about ⅜–½ inch) expansion gap around all hardwood installations to prevent stress-related damage (NWFA Installation Guidelines).
This space is especially crucial in regions with seasonal humidity swings, such as most of Canada and the northern United States, where relative humidity can fluctuate by more than 30% between winter and summer. If wood is installed too tightly, even a few millimetres of expansion across multiple planks can cause major movement at the joint.
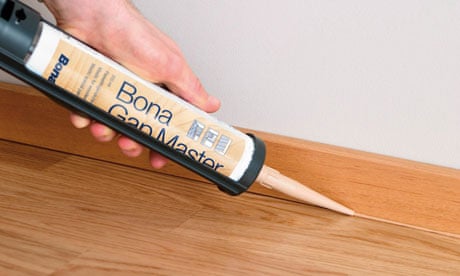
When planning your wood-to-tile transition, hide your expansion gap beneath a sleek threshold, T-moulding, or metal trim. For contemporary interiors, a flush design with a concealed gap tucked under the tile edge creates a continuous, architectural line. Use a flexible silicone-based sealant between the materials (never rigid grout) to absorb minor seasonal shifts without cracking.
Design Tip: Always acclimate your hardwood before installation, typically 48–72 hours in the same room, to stabilize its moisture content. For best results, aim for a wood moisture content of 6–9% and maintain indoor humidity between 35–55% year-round using a humidifier or dehumidifier as needed.

Mistake #2: Mismatched Heights and Uneven Subfloors
A perfect transition begins long before you lay your first plank or tile. Differences in floor height are another common issue. This can cause even the most careful installer to experience a wood-to-tile transition mistake. Whether caused by underlayment thickness, tile size, or subfloor variation, uneven heights lead to tripping hazards, cracked grout, and visible breaks in flow.
Before you start, measure both finished materials, including adhesives, thinset, or underlayment, to determine how much buildup is required for a flush or nearly flush join. If there’s a slight difference (under 6 mm), a low-profile reducer strip can smooth the slope gracefully. For larger variances, use a self-leveling compound or plywood underlayment to correct dips and bring the subfloor into plane.
The Tile Council of North America (TCNA) notes that uneven subfloors can also lead to lippage, where the edge of one tile sits higher than another, creating both a trip hazard and an uneven visual break when meeting hardwood. Laser levels and long straightedges help identify these subtle height differences before installation begins.
If you’re working in older homes, check for floor deflection or sagging joists; movement underfoot can crack both tile and grout over time. Reinforce the subfloor where necessary and confirm the total buildup before installing either surface.
Design Tip: Match trim or reducer colours to your flooring for a custom look, or contrast with brushed brass or matte black metal to create a refined, architectural edge.

Mistake #3: Choosing the Wrong Transition Profile
Transitions aren’t one-size-fits-all. Selecting the wrong profile, or skipping one entirely, is a design and durability misstep that shows quickly. The right transition not only bridges height differences but also allows the hardwood to expand naturally without pressing against tile or grout.
Common profiles include:
• T-moldings: Ideal for surfaces of equal height; they allow subtle lateral movement beneath the trim.
• Reducers: Step the height down when the tile sits higher than the wood (or vice versa).
• Flush transitions: Offer the cleanest, most contemporary look, best suited to precision installations where both materials are level.
According to Brett Miller, VP of Technical Standards at the NWFA, “a good transition profile prevents conflict between materials by giving wood the space it needs to live naturally.” This means each profile must provide freedom for seasonal expansion while still protecting exposed edges from chipping and wear.
For high-traffic spaces, consider metal or hybrid composite profiles that resist abrasion while maintaining a slim, minimal edge. When installing in bathrooms, mudrooms, or kitchens, use waterproof or anodized materials that can withstand damp environments.
Design Tip: In open-concept spaces, continuous flush transitions maintain visual flow. In traditional or heritage homes, a narrow oak reducer or colour-matched trim adds definition and warmth while preserving architectural character.
Mistake #4: Skipping Edge Sealing and Filling
A transition is only as strong as its finish. Skipping edge sealing and filler leaves hardwood vulnerable to moisture, grit, and expansion stress, especially near kitchens, bathrooms, and entryways.
Water and debris can seep into the fine line where tile meets wood, darkening the edge and compromising adhesives or finish. Before sealing, use a stainable wood filler to close micro-gaps or nail holes along the edge. The Canadian Wood Council recommends flexible, solvent-free fillers that can expand and contract with the wood while maintaining colour integrity.
After the filler sets, apply a clear or tinted flexible sealant (such as a urethane or high-quality silicone) along the joint to prevent moisture penetration. Avoid rigid grout or caulk—these can crack when the wood moves seasonally. Finally, finish with a low-VOC polyurethane or oil-based topcoat that extends slightly over the transition line to reinforce the seal.
Design Tip: Choose a filler shade slightly lighter than your flooring; it blends more naturally and disguises wear over time. For high-humidity zones, reseal annually to maintain a moisture-tight edge.

Mistake #5: Overlooking Design Continuity
One of the most subtle yet impactful flooring mistakes happens when design flow is ignored. A poorly placed or visually abrupt transition can break a room’s rhythm, making even high-end materials feel disconnected.
The best floor transitions are designed from the layout stage, not as an afterthought. Consider light direction, furniture placement, and architectural symmetry before committing to where materials meet. Transitions should align with doorways, window lines, cabinetry bases, or natural sightlines through the space.
In 2026, designers are favouring tone-on-tone palettes and soft contrasts over high-contrast seams. According to Architectural Digest’s 2026 Design Trends, natural continuity is one of the defining principles of modern flooring; lighter oaks paired with creamy porcelain or mid-tone woods beside soft greige tiles create cohesion rather than contrast.
For renovations, maintain continuity in both tone and texture. Repetition of finish, such as matte surfaces or honed textures, helps unify the materials. When metal trims are needed, select colours that disappear into the flooring rather than stand out.
Design Tip: Use a subtle contrast instead of a sharp division. Pair pale oak with limestone or rich walnut with warm concrete to achieve a balanced, connected aesthetic that feels timeless.

Expert Solutions: How Easiklip Simplifies Every Transition
Easiklip was engineered for these challenges. Each solid oak plank locks into a patented clip system that lets your floor expand naturally without separating from adjoining materials and reducing many wood to tile transition mistakes. It’s the simplest way to achieve precision transitions that stand the test of time.
Here’s how Easiklip flooring addresses every major transition mistake:
-
Expansion gaps: The floating design manages movement automatically.
-
Height alignment: Uniform plank thickness simplifies flush transitions.
-
Profile selection: Works with T-mouldings, reducers, and flush strips.
-
Edge sealing: Boards can be lifted or replaced easily for refinishing.
-
Design flow: Natural tones pair effortlessly with today’s leading tile and stone finishes.
Brett Miller of the NWFA puts it best: “True craftsmanship isn’t about hiding imperfections; it’s about anticipating them. The right system lets materials live together beautifully.”
Whether you’re remodeling a single room or reimagining an entire home, choosing a flexible, well-engineered floor system like Easiklip gives your design a cleaner finish and one that lasts.
Design Tip: Before your next renovation, order a sample pack to see how Easiklip oak tones complement your tile or stone palette under natural light.
Seamless Design Starts with Smart Planning
A wood-to-tile transition mistake requires foresight, accurate measurement, and a system that respects how materials move. With Easiklip hardwood flooring, those details come together effortlessly, helping homeowners and designers achieve seamless flow between rooms.
Whether you’re avoiding expansion gaps, levelling uneven subfloors, or refining your finishing details, Easiklip’s solid European oak planks and clip system simplify every stage. No glue. No nails. Just timeless design that performs as beautifully as it looks.
Before your next renovation, explore these resources:
-
Floor transition ideas for design inspiration.
-
How to install an Easiklip floating hardwood floor for a step-by-step guide.
-
Order a sample pack to see the craftsmanship and tone of real European oak in your space.
Interior designer Sarah Richardson says it best, “The most successful interiors feel effortless because every detail was considered.”
With Easiklip, even the smallest detail, the line where materials meet, becomes part of a larger, seamless story.


